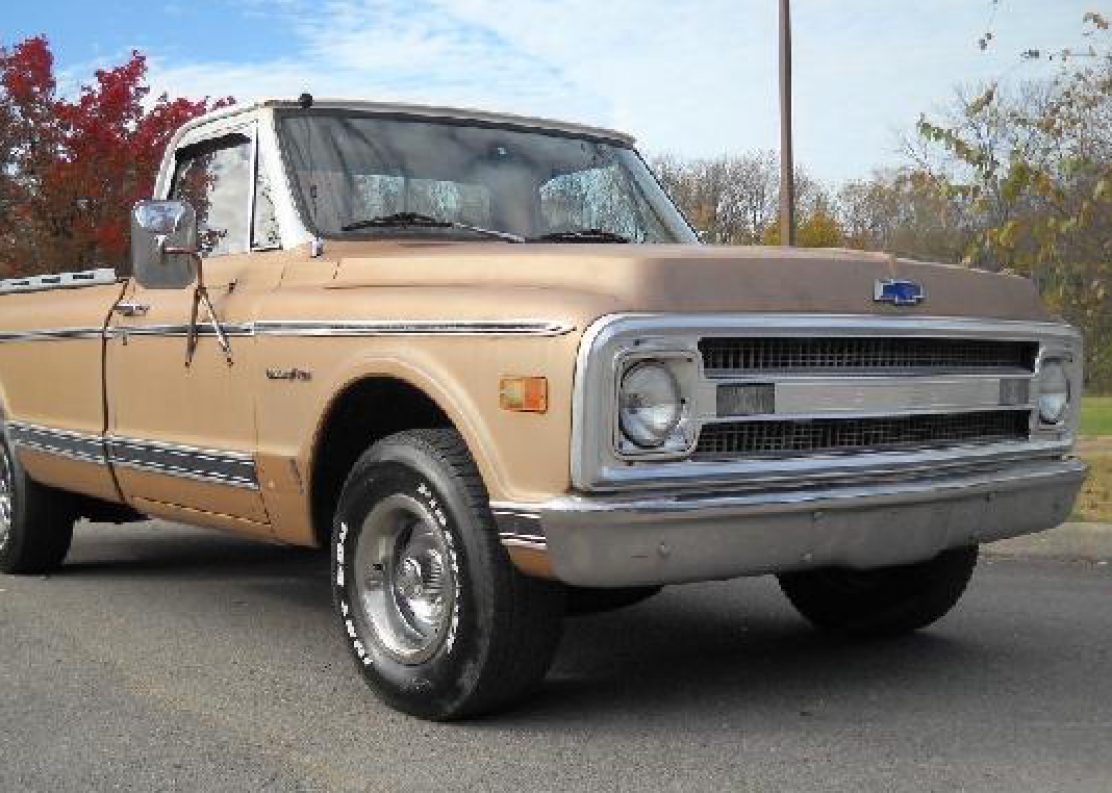

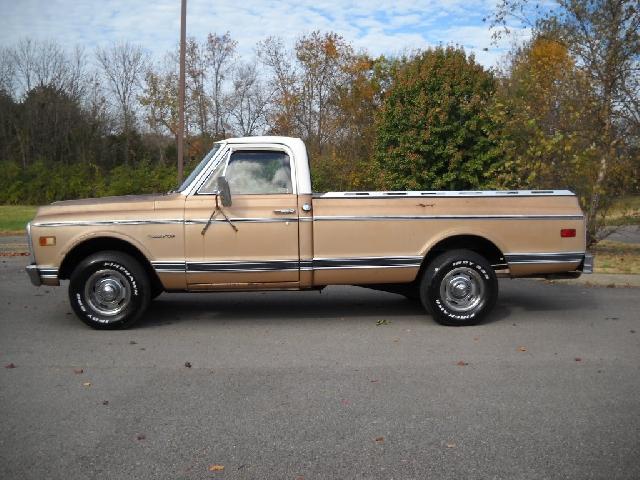
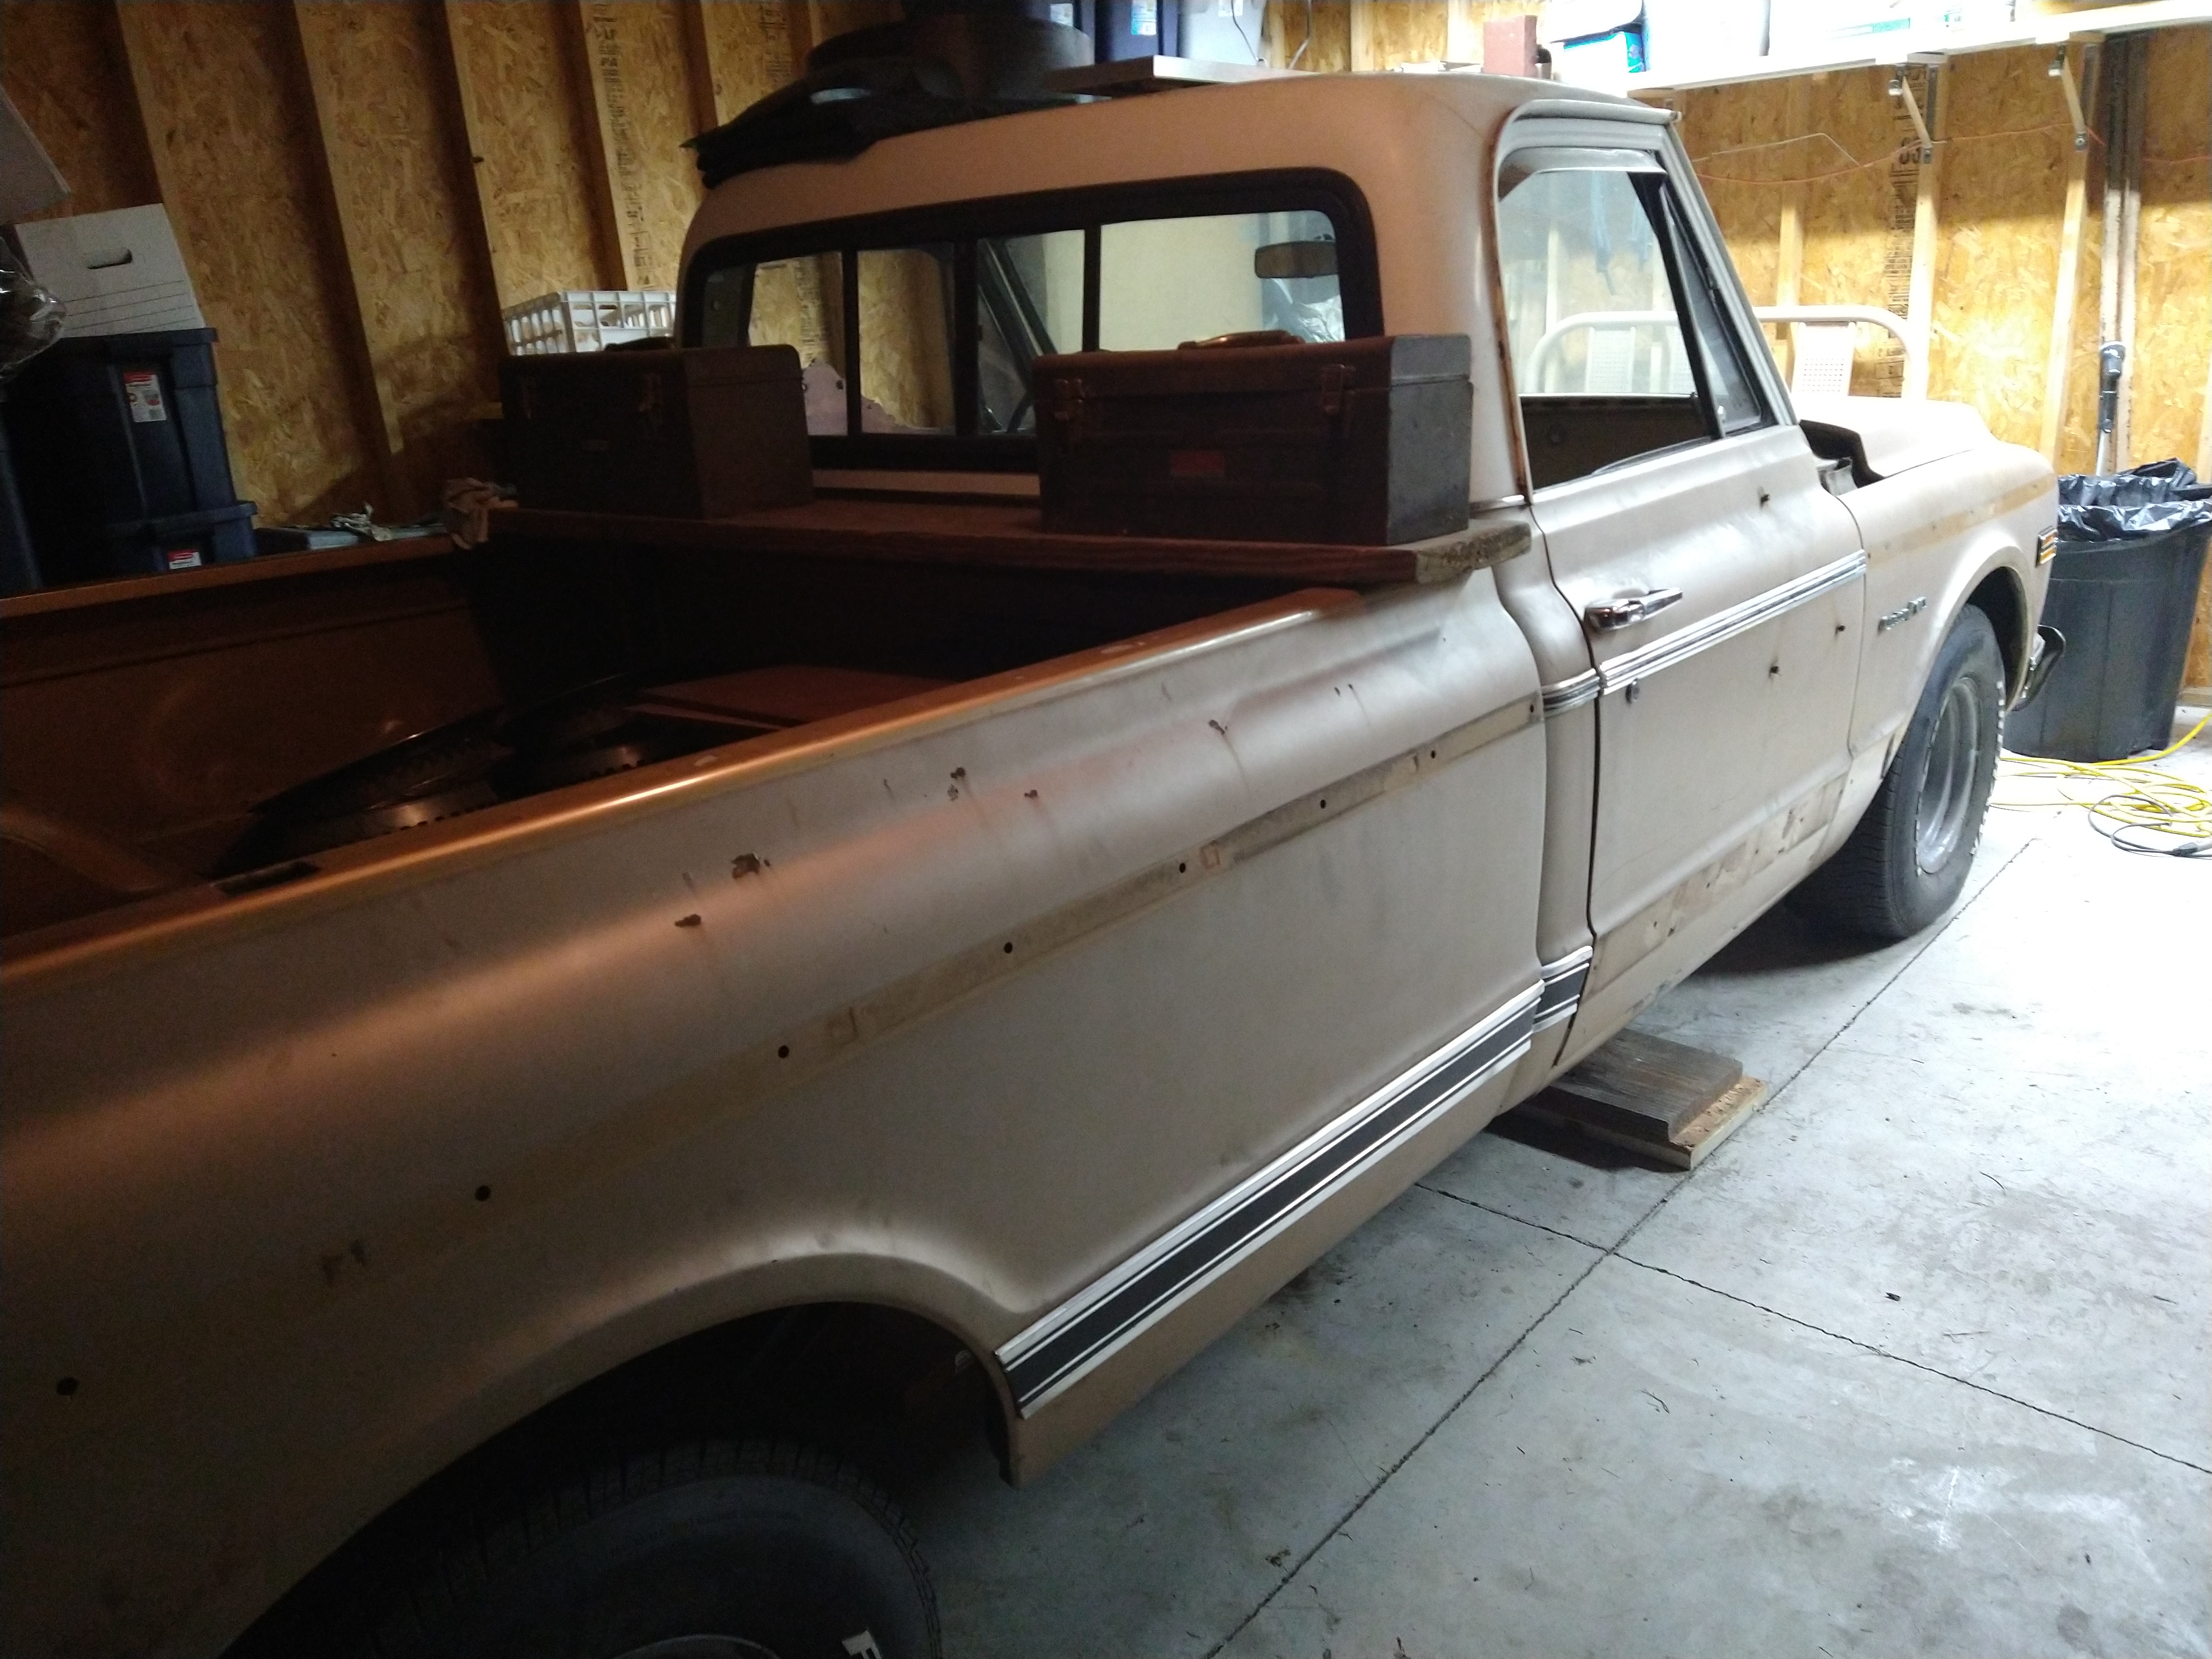
Well its 2016. I am just starting this. I just purchased a 1969 Chevrolet Custom c-10 truck. My Father purchased a New truck like this back in 1969. I learned to drive on that truck and decided I wanted to restore one. I also wanted to document the adventure as I do, so I started this blog. It will be very slow at first, but even as this process of organizing the project I will be posting so if someone else does this they migh gain some insight…..I just hope I don’t make things worse. My thought process sometimes gets me in trouble. My plan is to do a resto-mod, which means I will be restoring the truck but not to totally original. Newer motor, newer suspension pieces maybe lower the truck alittle. It will not be too radical….but different. This truck I bought is pretty basic and sparce. I will be posting some pictures soon, but for now I hope to post next week with some info on the truck’s original configuration.
Progress -Summer 2025
Not much has been done this year but I will update everyone with what I have done. Its been a combination of prep work for some reconfiguration and a different front suspension setup. I will be deciding on a different setup since what I had purchased did not work out. It is pretty disappointing that a company I thought had good products and good customer service did not come though. I have removed all the previous front in setup and am going to try and sell and recoup some of the expense. I will outline this ordeal in another post. This post is about the front bumper work I have started.
The bumper looks good from the front. First a little suspected history. This bumper is not original, I can tell as you will see in the pictures below it has some rust on the backside, but its not what an original ’69 bumper would have. So I cleaned up some of the loose rust and treated, meaning converted the rust with a treatment that converts it to an inert material, which will not continue to get worse.
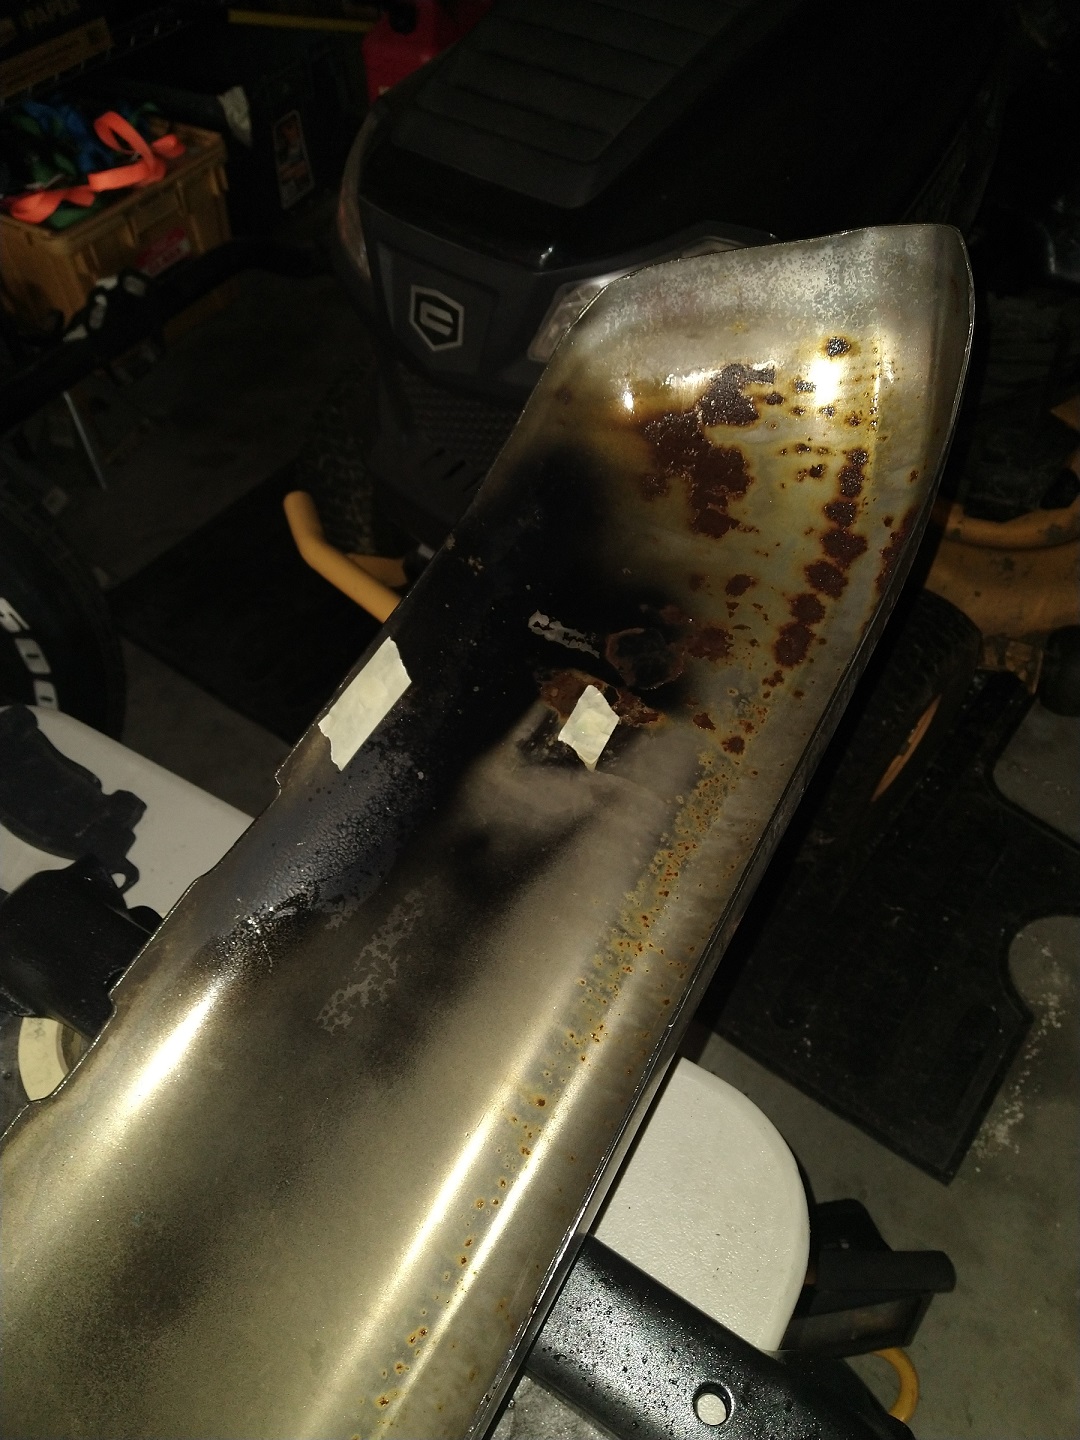
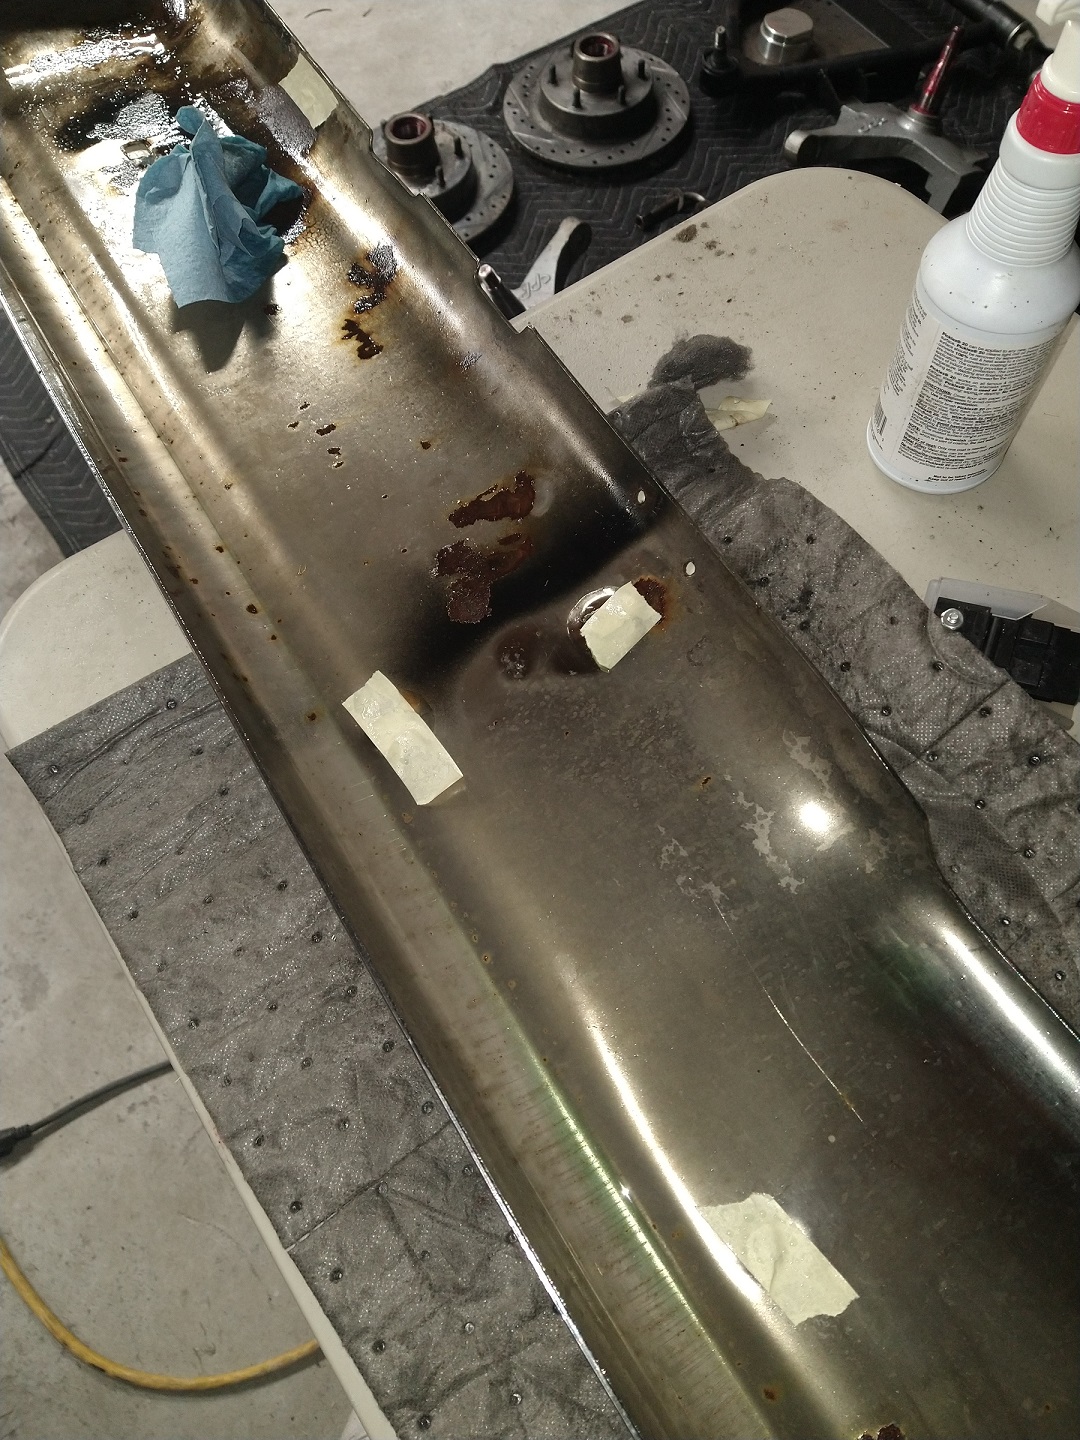
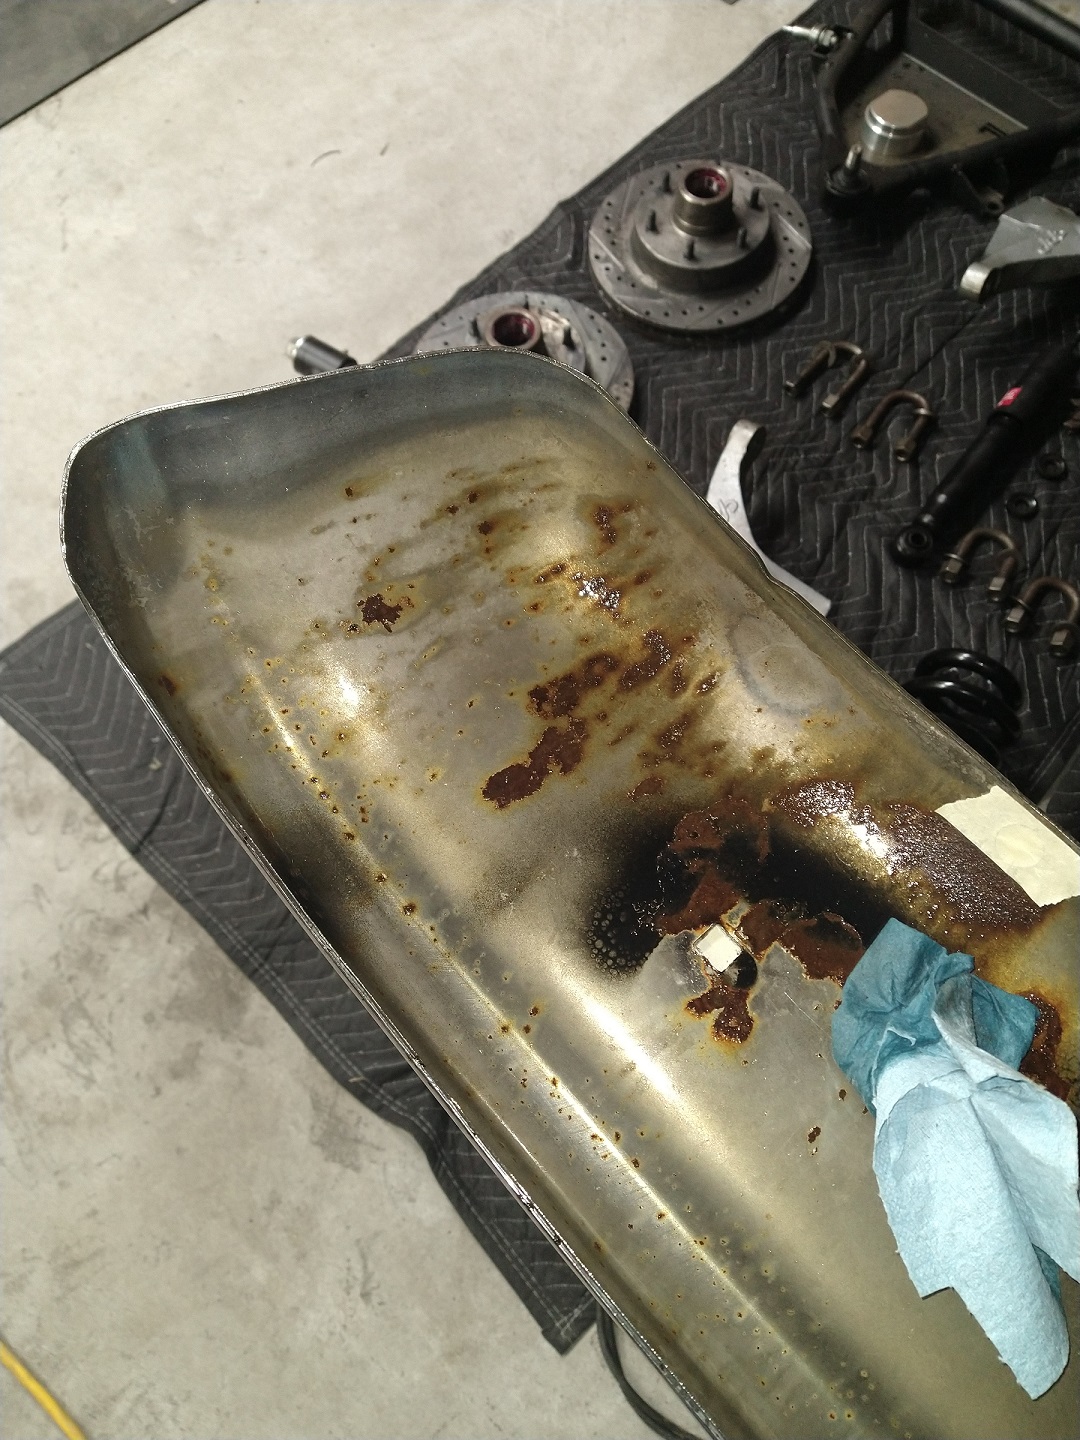
These pictures where shot at night so they are a little dark. but this shows the rust before treatment. I have taken of the loose rust with a scrub pad. I have some pictures off it after the rust treatment, but I can’t find them right now. I will post the finished product later. Just trying to get the rust taken care of.
Speaking of rust I am also trying to work on plans to get the cab either fixed up….rust repairs or find a replacement cab with a lot less rust. This is going to take some time and also a good shape ’69 cab is kind a becoming a unicorn hunt. I have lined up a body shop that will do the cab repairs but that is a lot of money and I will have to see what I can do there.
I will update here soon.
Winter 2024
Well, its gotten cold here in Middle TN. I have been moving forward with thing on the old truck. I will be posting some updates very soon. Its just too cold to get out there and finish up getting the truck ready to store for the Winter. I was almost ready to do all this – what I still need to do:
- Add anti-freeze coolant to the radiator
- Find the correct wiring to get my new alternator charging properly (explanation coming)
- I have a new battery tray and one bolt will not line up – so correct that
It is supposed to be in the 50’s next week so I will get some pictures posted and maybe get some of this done.
Old Chevy Truck Cab Alignment Project
I have started a little project on getting the cab on the old truck back to as close to factory alignment as possible. Well….how did it get out of alignment. Old rubber cab bushings that isolate road vibrations and jarring from bumps are installed at the corners of the cab and this is also the mounting point for the cab to the frame.
Other than having a cab that rides rougher, cab alignment can be affected. take a look at this:
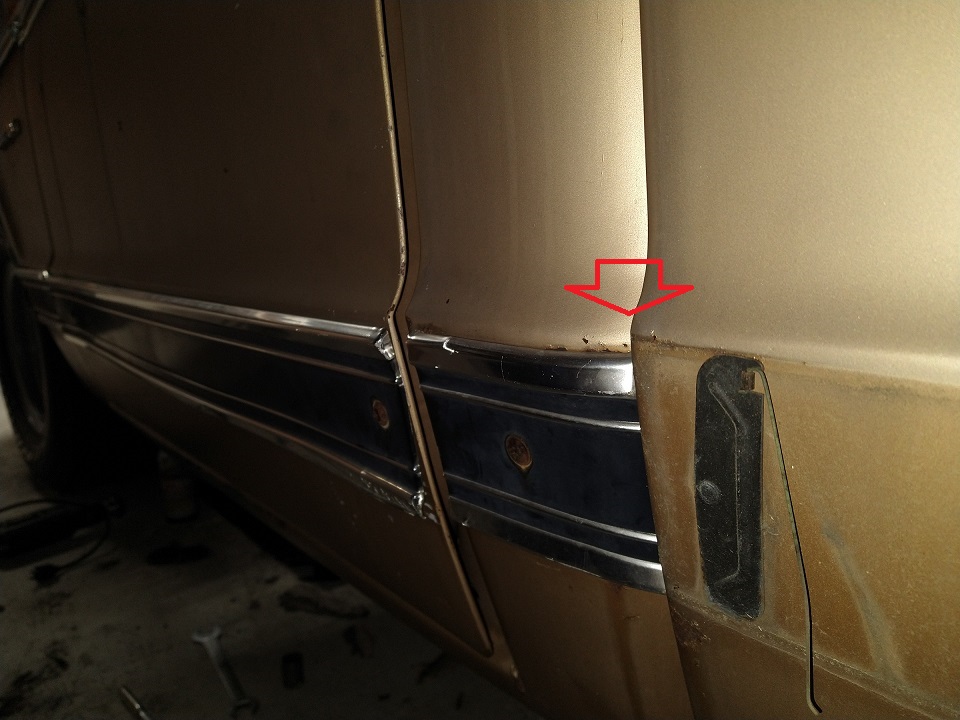
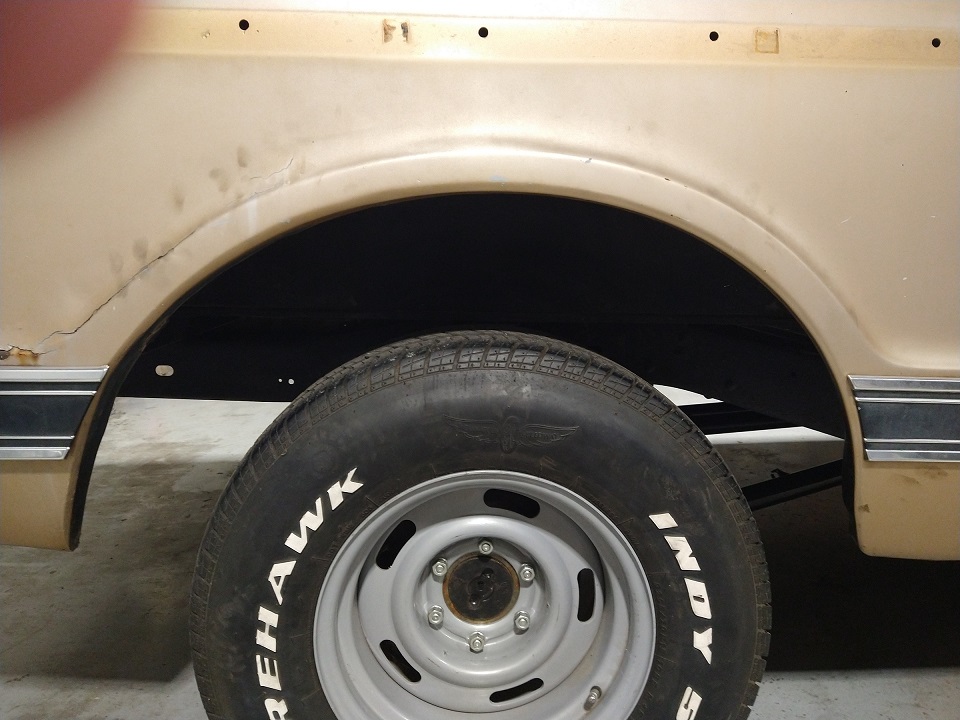
See where I marked this pic…..cab is a little lower than the bed. Well…the hope is that since my bushings are old and have “sunk” over time that new ones will line this back up. This is important for me to know if its these bushings or suspension. See below:

Were I have this picture marked…..this side is a little less than an inch lower that the other side. So, I am hoping that news cab bushings will fix this. It may not….as it may be suspension adjustments, but you have to get the cab at least closer to factory alignment.
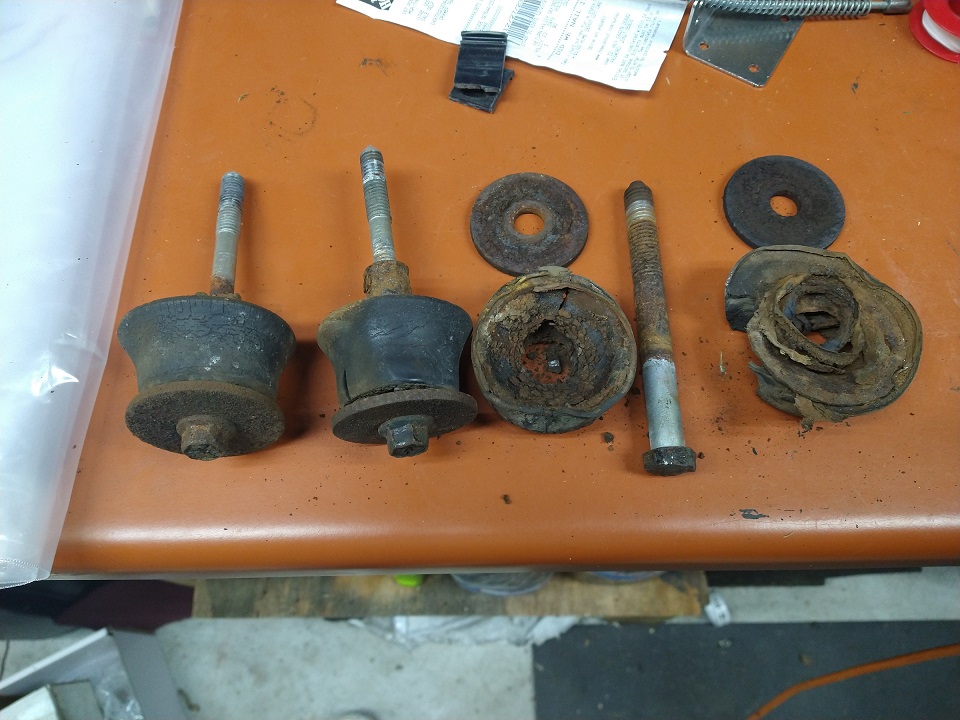
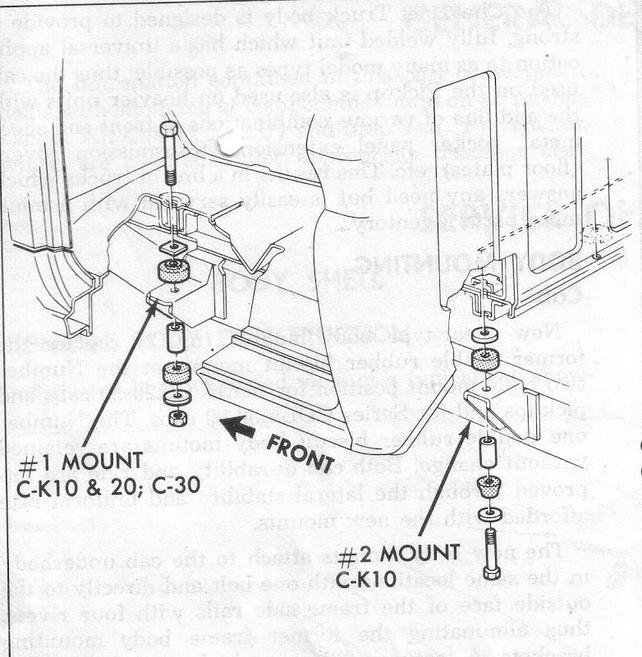
Here are my bottom part removed. As you can tell….not the best shape. But the two on the left are in better shape than the front. I am just glad they came out. I have a feeling that they have been replaced before at least the rear….(left two). These are the bottom bushings and not the part that is affecting the cab alignment. I will be taking those out after I get the new ones ordered. I have to use a floor jack to raise the cab just enough (couple inches) to get the old upper bushings out and new ones in. Here is a pic from a catalog that shows how it all goes together.
Below is what I hope mine will look like when I am done.
These are some pictures of what new replacement ones look like. I have removed mine at least the bottom part just to see if the old rusty bolts would come out.
Hopefully I will get to these in a couple weeks. I am ordering Monday.
Update
I have got this project done. I will be posting pictures on Monday hopefully. I have the alignment very close. Still have a couple of things to try and do….very minor. So pictures coming soon.
Updates Coming……
I have had a lot of work completed in the ’69 Truck. I will have an update coming soon. Its been at the school getting work done I can’t complete due to not having the tools. I will eventually will be able to get work like this done…when I get the new tools in the new garage.

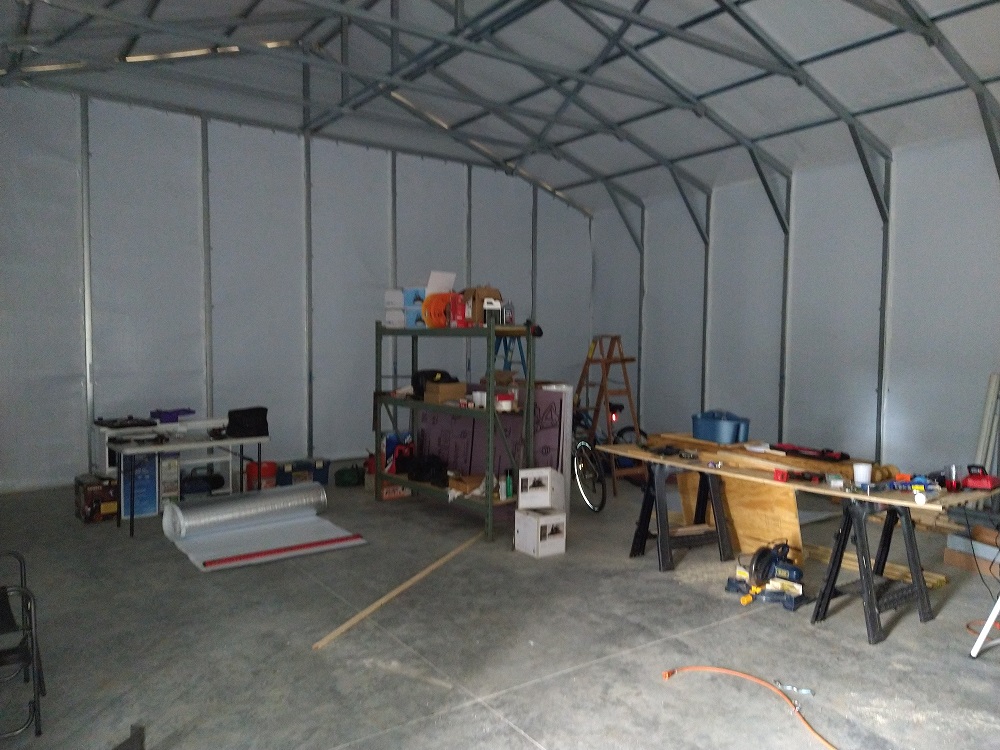
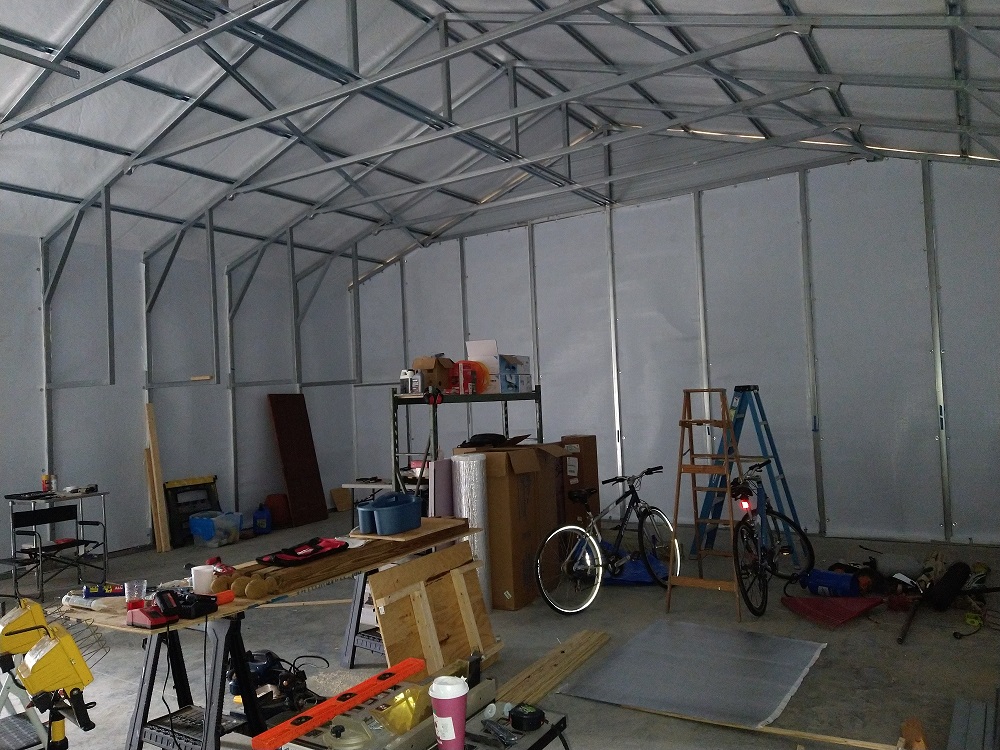
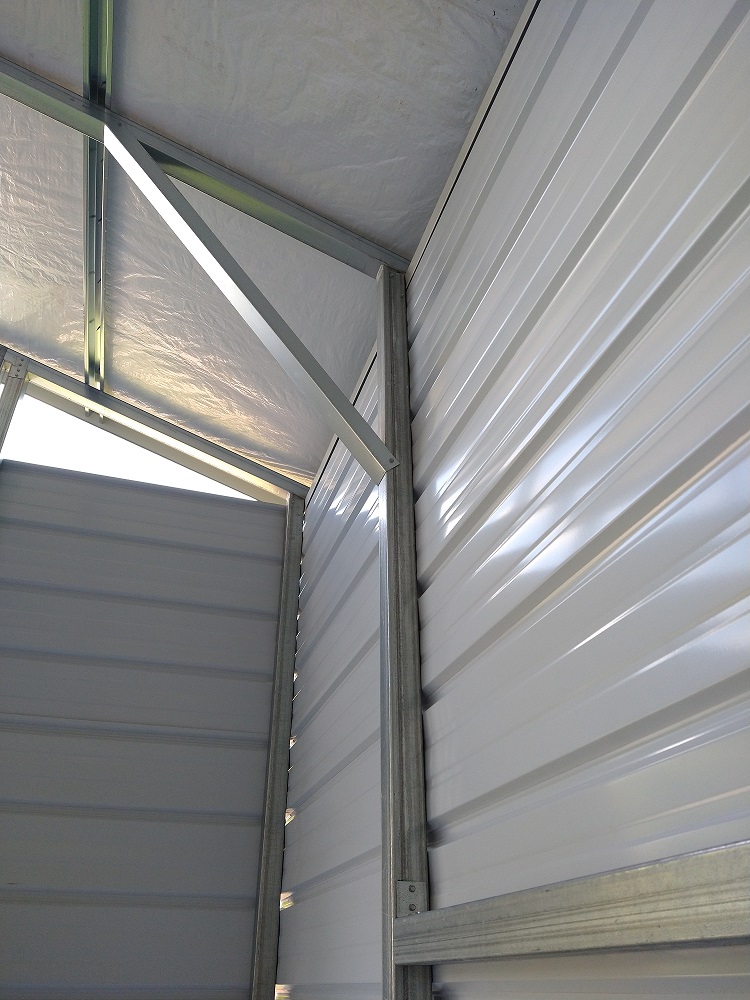
Here are some pictures of the new garage and I will put up some more here of it more recently. I have done some work in here also. These are pictures as I was putting up the radiant barrier material (white on the walls).
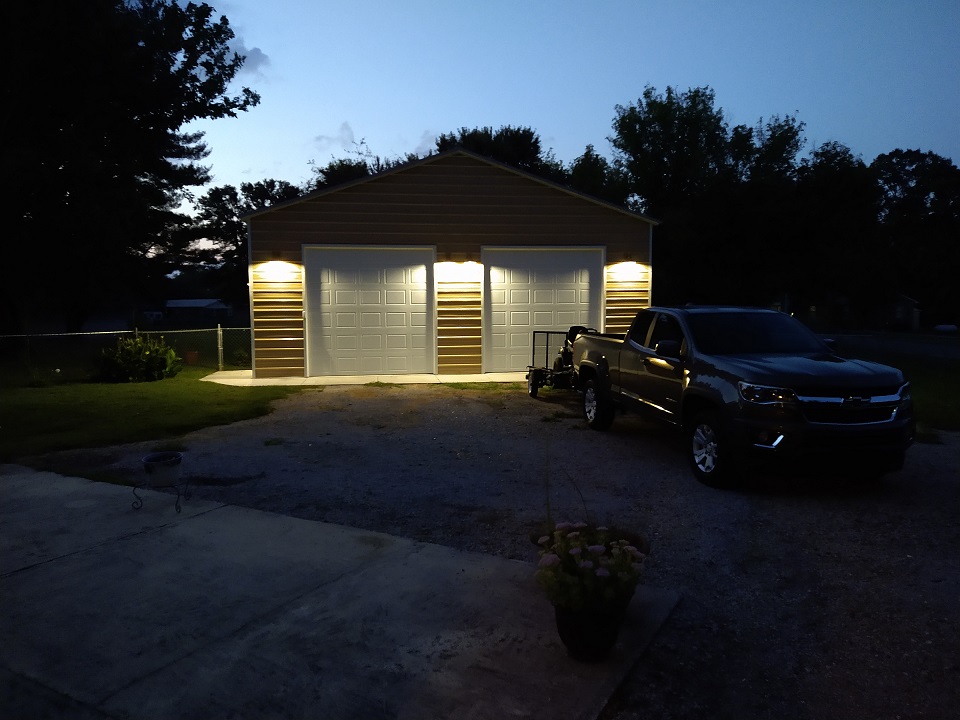
New garage at night…..got the lights working and what is neat is that in order to save a bunch of electrical wire running to house to get the lights on I have them setup to work with Alexa……just say “Alexa turn garage lights on” that this happens. Works great.
Update on the truck……
Well what was supposed to be just a engine swap, which is done and basically went well…..but what did not was just changing a rear u-bolt. so here we go. While they were trying to replace the rear u-bolt that holds the rear in……well in place……my rear trailing arms were bend.
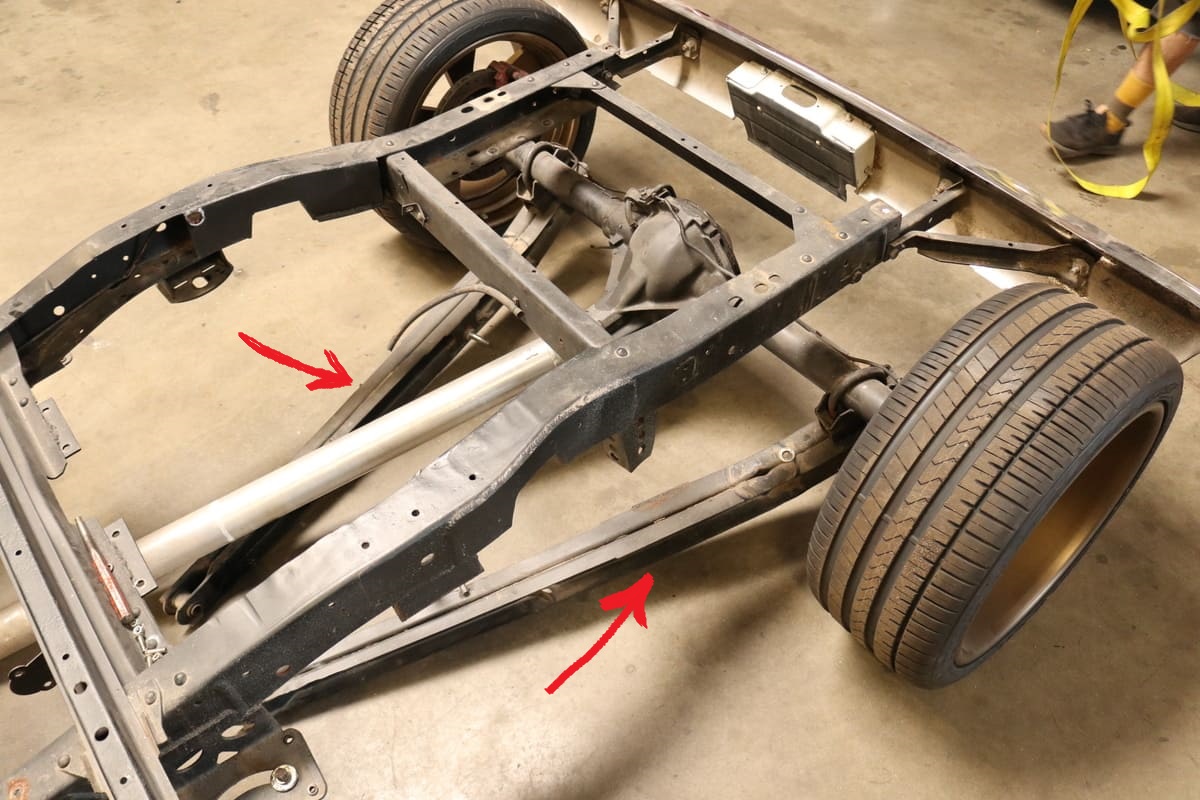
(This is not a picture of my truck)
This is not the trailing arms that were in my truck – I was unable to get a picture after they were out and disposed of. This picture is from the web of another guys truck but this is the exact same setup. The red arrows show what was slightly bent.
Here is the new tubular arms are the same ones I put on….again not a picture of my truck but exactly the ones I bought. This is this guys project and he installed outside his truck.

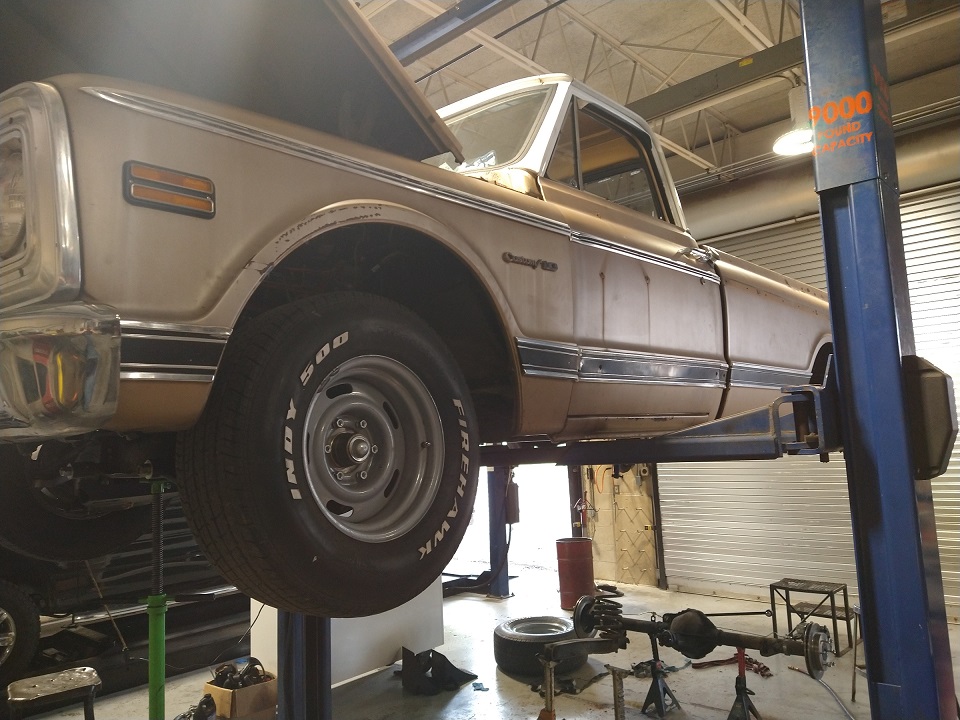
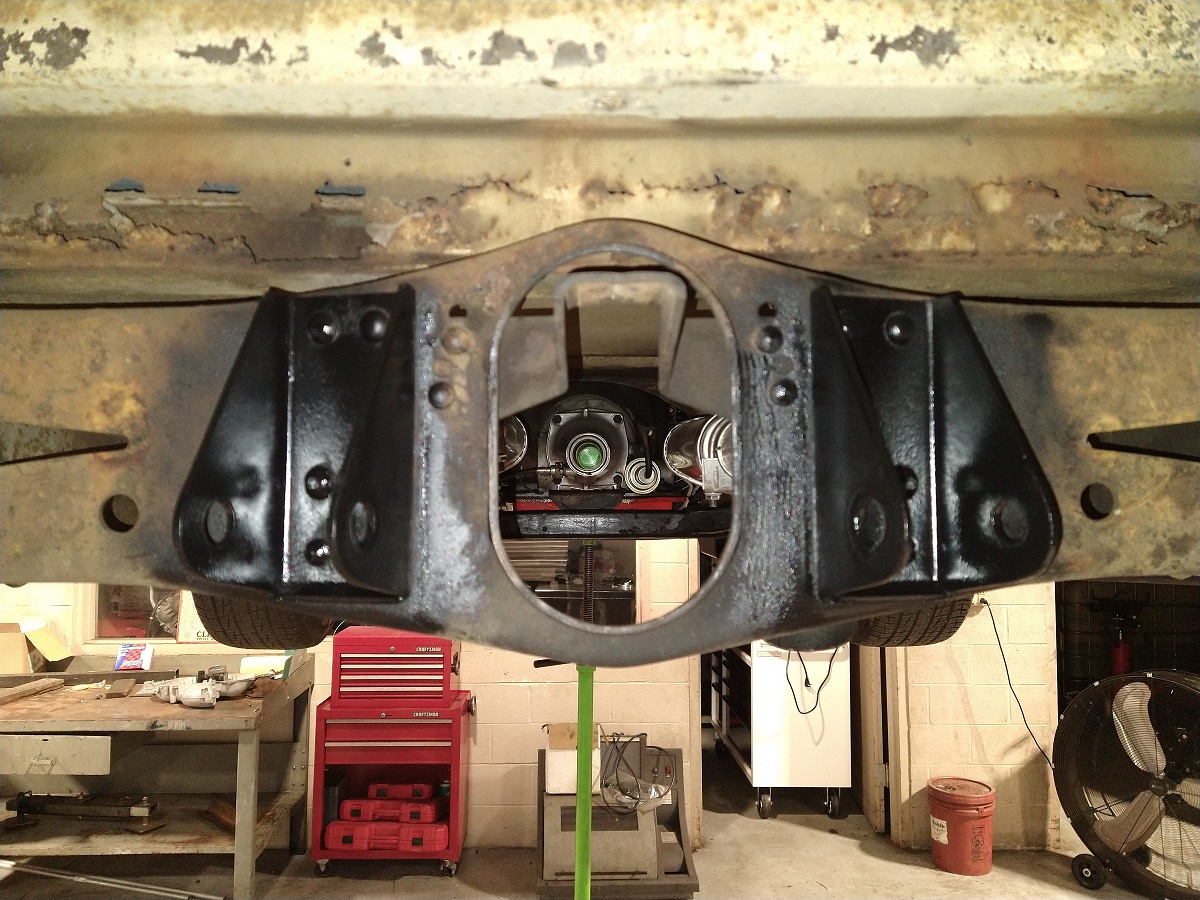
Here are some pictures of my truck (below) with all the rear end parts removed….and then some of the mounting points cleaned up and painted. I will have some new pics soon on this part of the project.
Here are some other updates to the truck I have done.


Ok lets go though these one at a time. The first picture is the new set of gauges I put in so I can actually read them, they are 2.5 inches in diameter bigger than the old ones and the lights actually work.
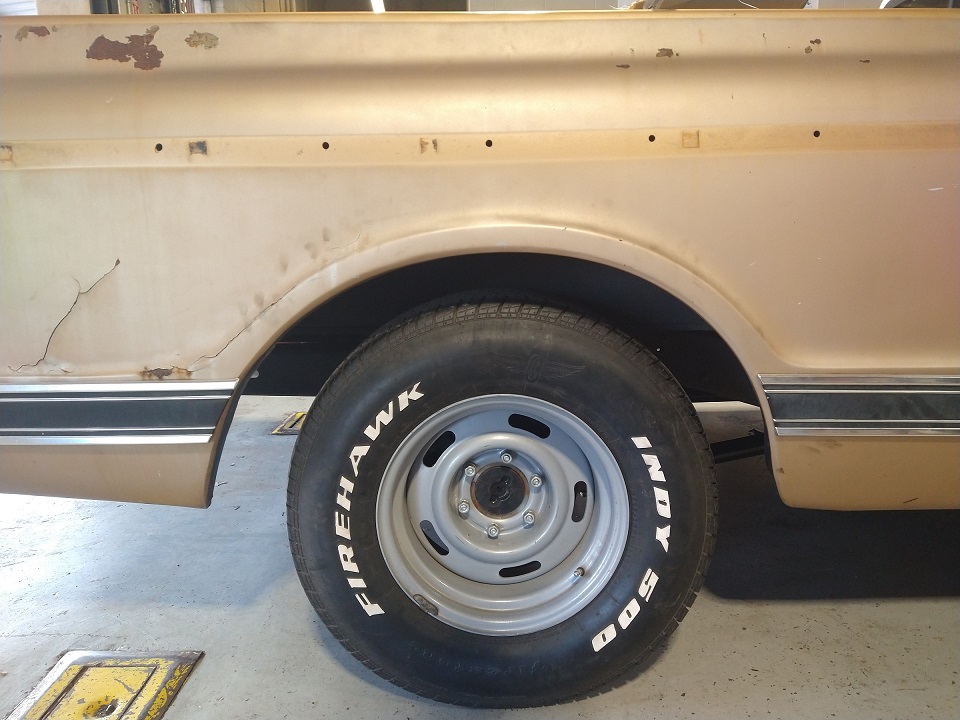
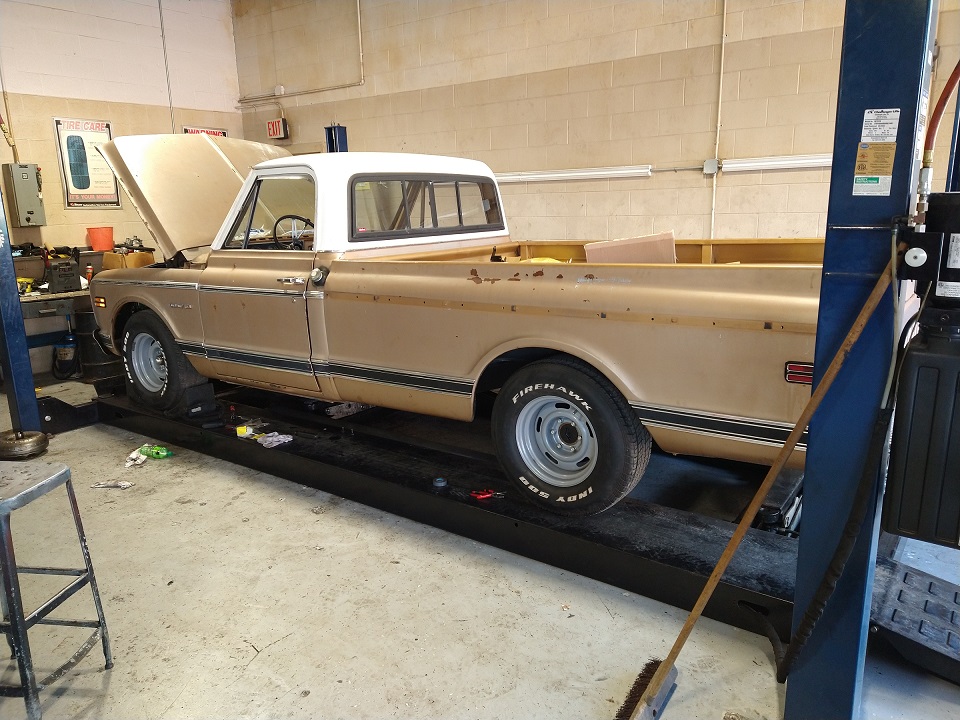
Ok….Pic 7 —- this was with what was supposed to be “stock” ride height rear springs….Uh oh…..looks like a 4×4, so way too high. They would have settled…but I do not think even then it would have looked right.
Pic 8 Went with a 3 inch “drop” rear spring and well it looks much much better. I hope it rides ok.
Pic 9 and 10 getting a new transmission torque converter since the one that was in it was too weak for the newer engine. That project is about done – I need a new transmission but that is a later project, but I will be going with a 4-speed or a 6 speed.
Update 3/25/2024
I have the truck home. As soon as I get a free afternoon….hopefully this week I will get some pictures on what I had done this past year while the truck was at the school. But here is a list:
- New gauges under the dash to show Temp – Amp – Oil Pressure Bigger so I can see them better.
- Engine swap – old 1979 Chevy 350 out (and sold) and newer 92 Chevy 350 in w/some new accessories (alternator – Power Steering – Belts – etc.
- New torque converter
- New 3″ drop rear coil springs
- New tubular “CPP Brand” (stronger and lighter) rear trailing arms to replace the factory bent ones with new bushings – You can see these in pic 5 above.
- New Rear in U-Bolts I put one one and the other was so rusted in I did not have the tools to get it out.
- Rear end painted
- Some touch up paint just were the new parts were put in in pictures above – not a permanent paint covering
- Lots of little do-dads to get all this in
As I said this was supposed to just be a engine swap….but a lot of other things came up. The rear end work was not expected, but with bend trailing arms replaced I know that the rear is tracking straight.
Two projects I have coming up are new side marker lights (Pontiac Firebird) I have them bought and they need refurbished – they will fit flush and I think look better and new LED dash lights. I hope to get these sandblasted in June ’24.
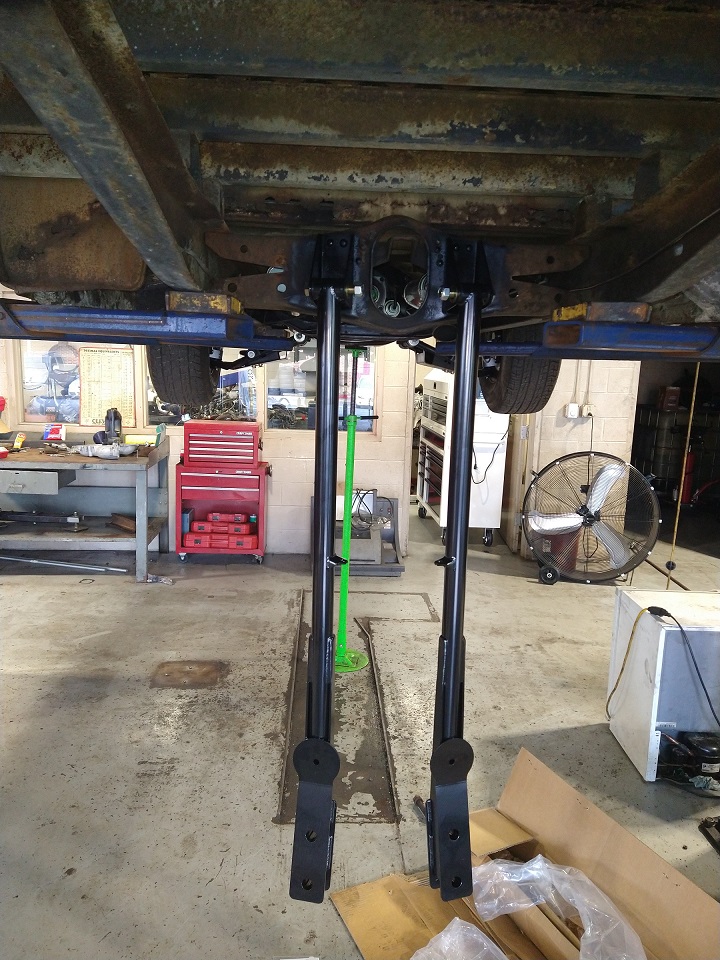
Well…..I am going to be working at getting some new parts that are needed since I did lower the truck. I did a 2.5 inch lower in the front and a 3 inch in the rear. So I am looking at some things needed to correct the new angles since it is now lower. These will be:
Rear shock relocation kit to get the rear shocks at close to a OEM shock angle. This is needed to made it ride better. I also need to get a longer trac bar to also compensate for the lower stance. This will enable the rear end to align better since its lowered 3 inches. All of this will make it ride more stock I hope.
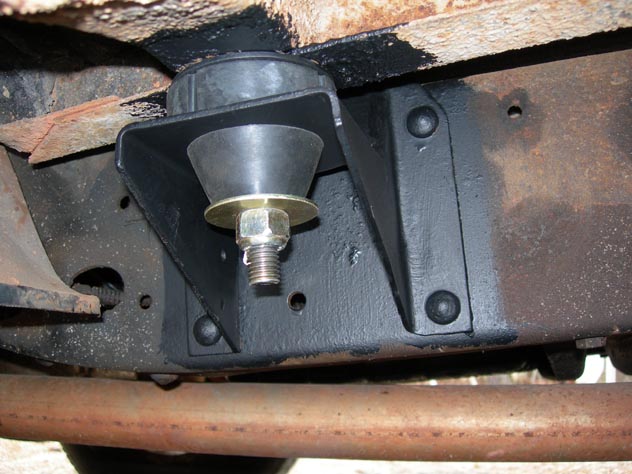
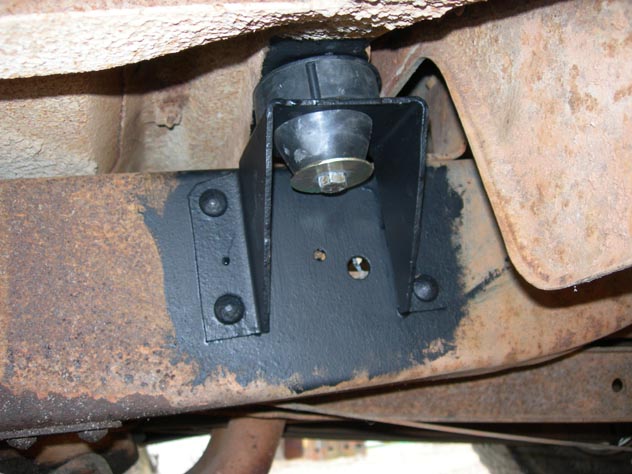
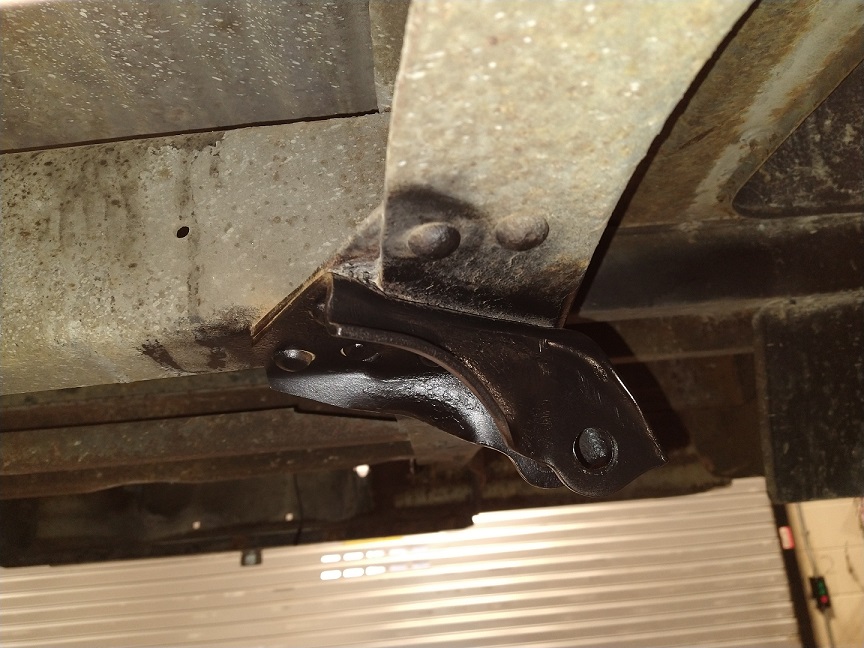
Next project is new cab mounts since mine are totally shot. They are rubber and the rubber in two of mine are totally cracked and worn out. I am hoping this will help get the truck level. The new suspension parts I have put on have helped in getting the truck more level from side to side. But I hope this will get it super close. Right now the drivers front is drooped compared to the rest of the corners.
When I get the truck back up on jackstands I will get some pictures of the plans for the next 4 months.
More to come……
Engine Section
There are some posts early on about what engine I would go with. I have decided to go old school and get another GM 350 motor. One became available and I bought it. It’s in the process of getting all setup like I would like. Mild engine with enough power but good to drive on long trips. I say mild but I am shooting for
410 – 415 horsepower.
405 – 415 torque
This is low by today’s standards but back in the 60’s and 70’s this was on the high side. People now-a-days can take a Chevy 350 to 1000 hp. I am building a “cruiser” truck to travel around in and take to car shows.
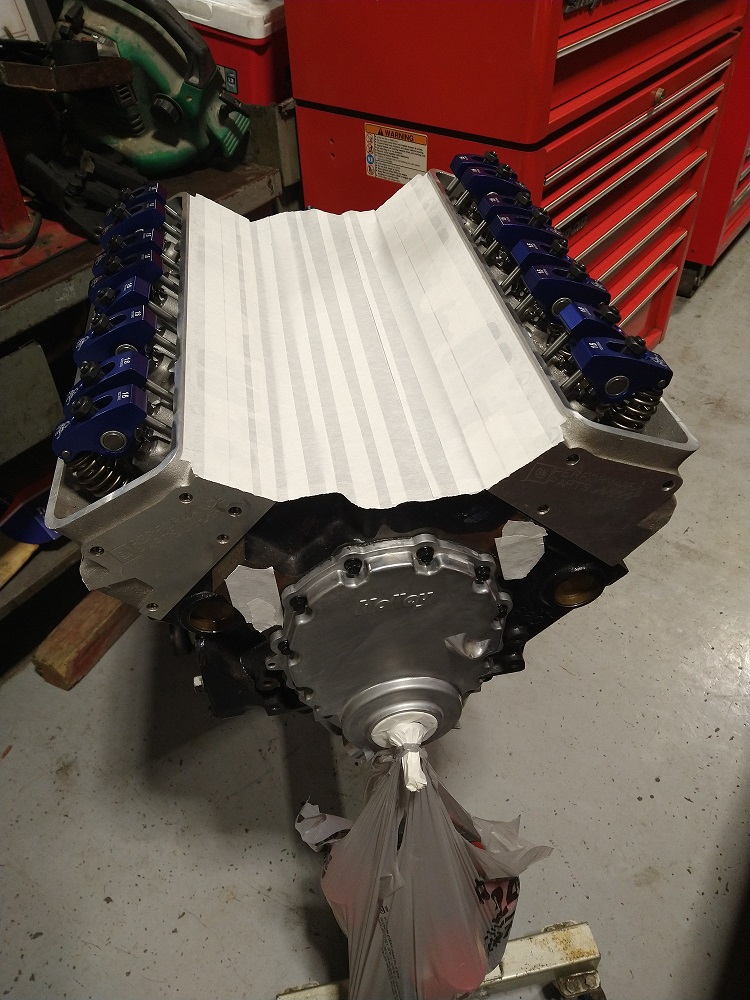
Here are some pics of it when bought and getting worked on.
Here is the engine before the work started on it.

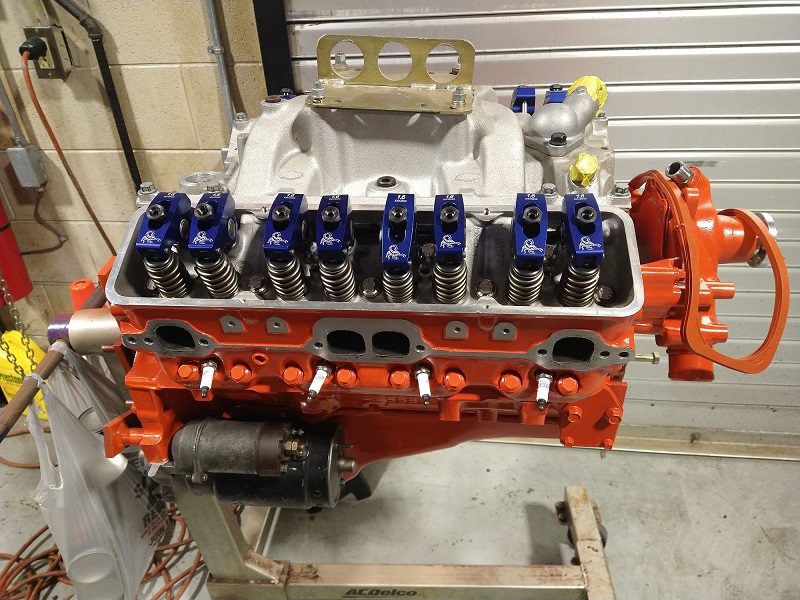
Three pics of the work being done Pictures taken 1/24/2023

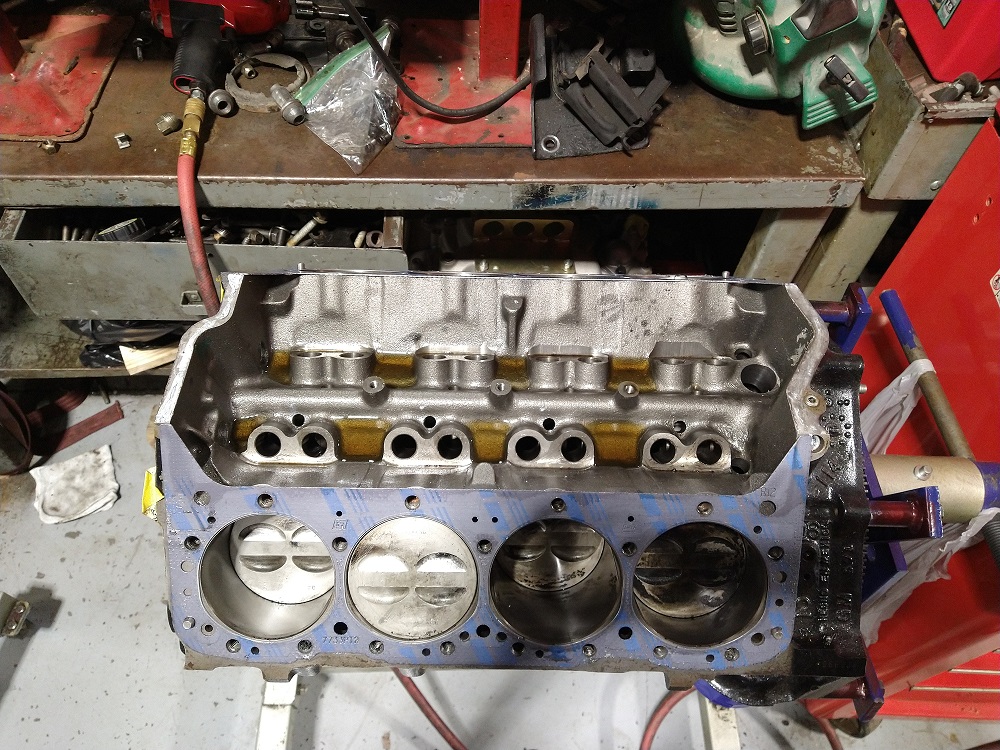
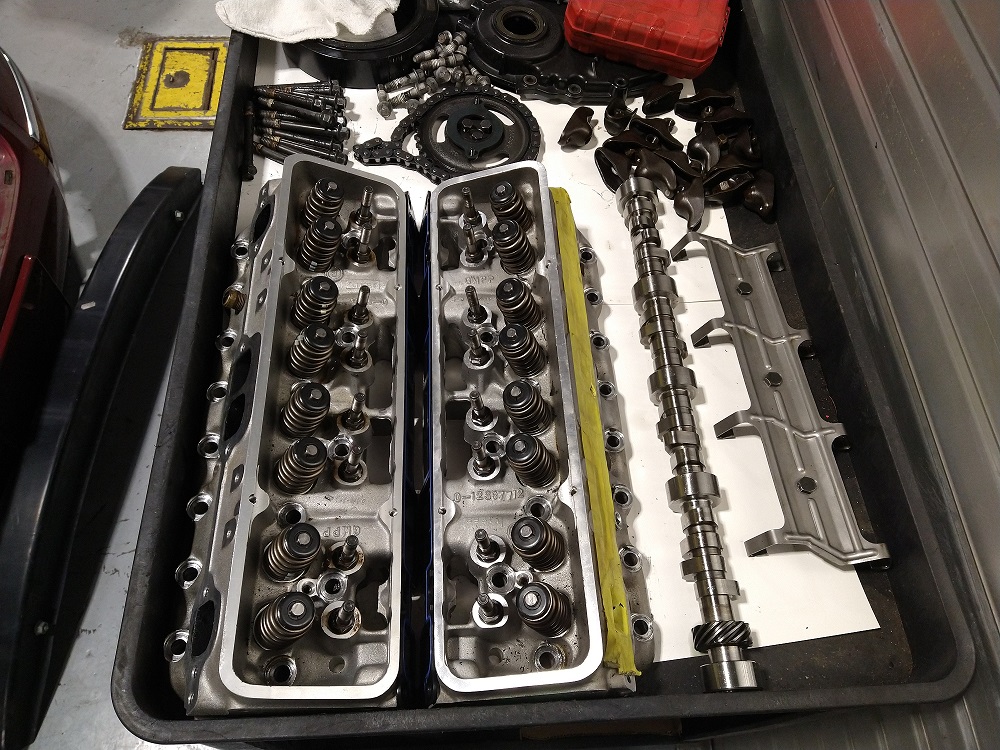
The last three shots are new valve spring being put in. The ones I bought arre top of the line for this year engine. All indications from researching is that its a 2006 crate motor that someone started to rebuild with some top of the line GM aluminum heads. These are the parts you are looking at in these three pics.
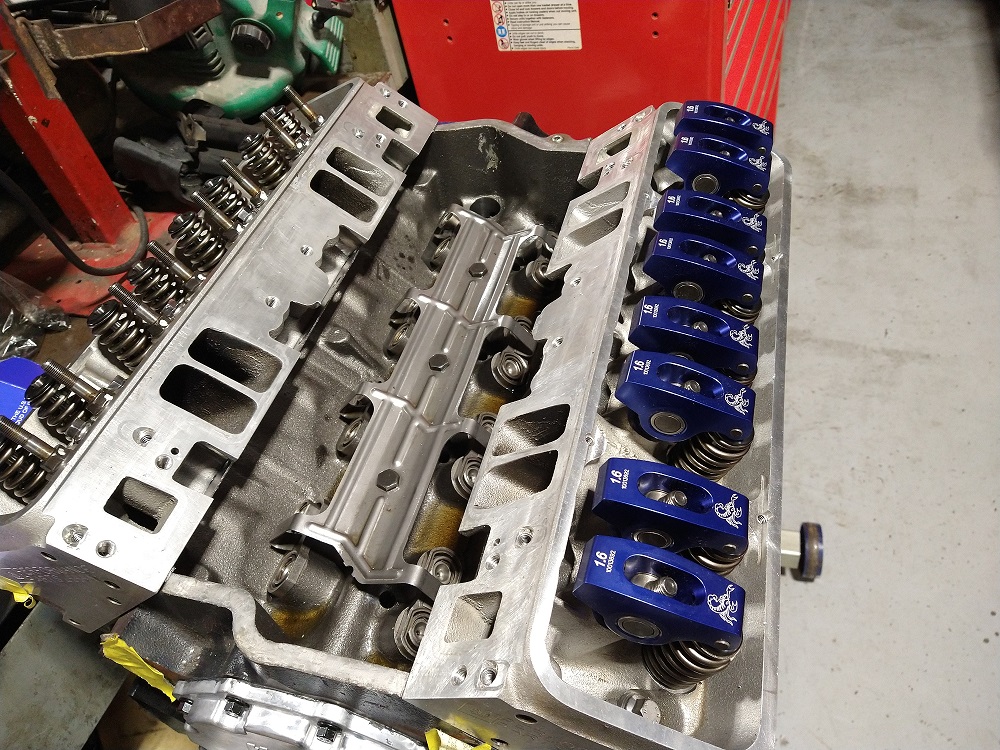
Parts let to go on. Roller Rockers – New camshaft – New valve covers – New gaskets – New timing chain – new timing cover and new paint (Chevy Orange) With the new parts someone already started putting on it and the matching of good parts i am trying my best to do this should be a good reliable mild horsepower “400ish”engine and will be a good “runner”.
I have more real good parts to go on…….about $1200 worth of them. It’s going to look a lot different than the first pic above. Fingers are crossed no issues. Still need:
Would love to get it on the dyno and see what it will put out, but I am in a time crunch so that may not happen.
Updates on the engine
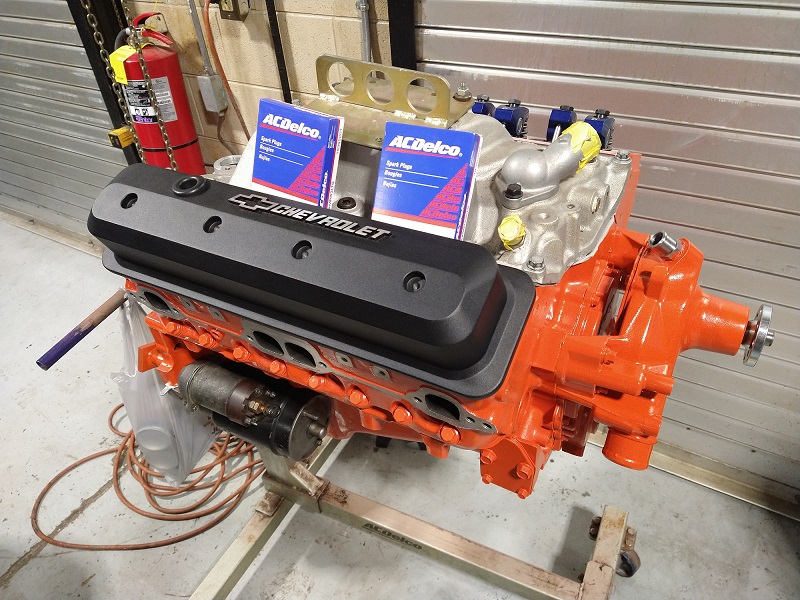
Most of the internal work has been done. Here are some pics


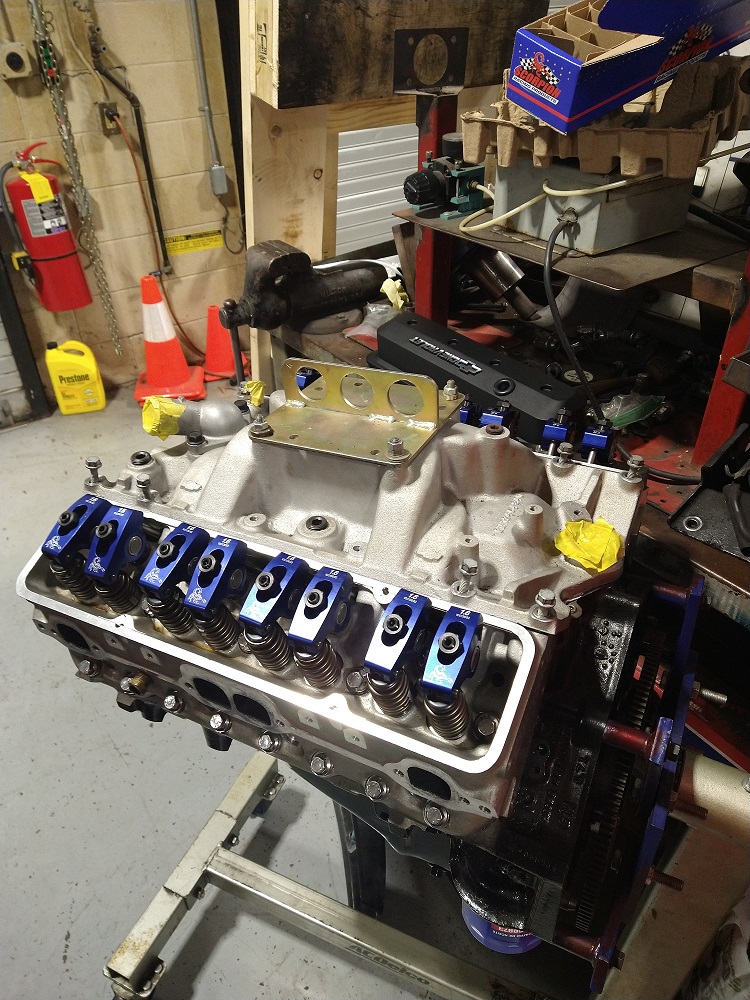

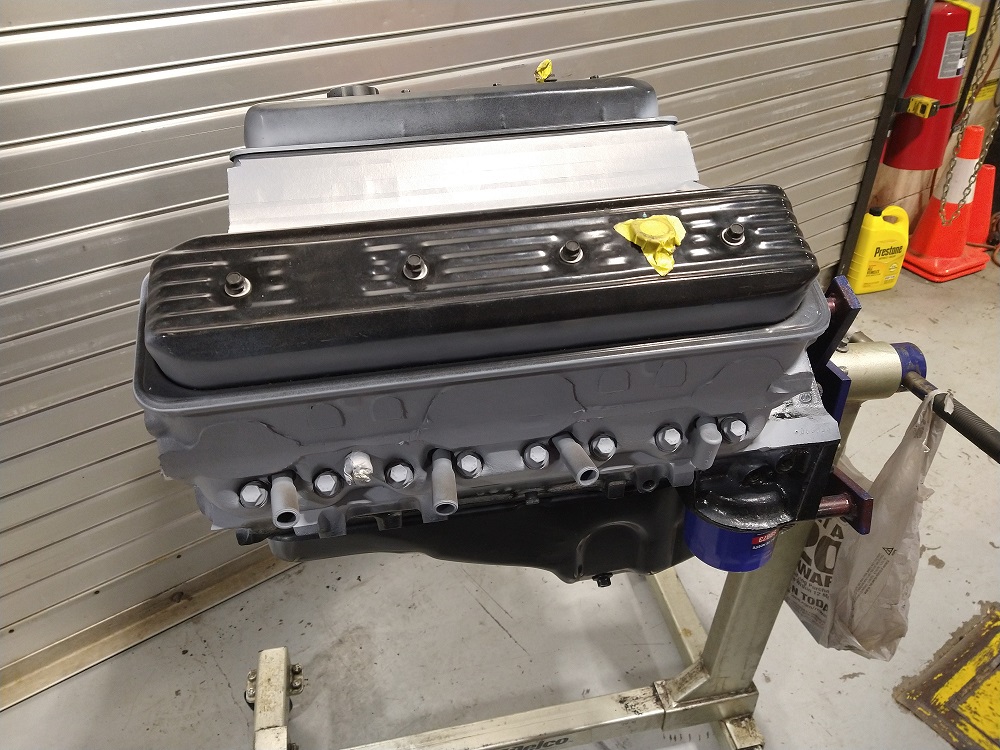
Engine getting painted. This is where it’s at today 2/15/2023. I put the a new valve cover on just to get an idea on what it will look like when the painting is done. Just note here…parts guy at the store sold me the wrong color paint. I have got the correct color…..so this will look the correct Chevy Performance Orange when it gets the second and third coat of paint. Look at the oil pan on the bottom….its looks more orange….as it should, it was painted with the correct paint color.
Hopefully in a couple of days it will be as complete as it can before getting swapped into the truck, which I am scrambling to get the truck done enough to limp it to the school so that can happen. Here is where I am at with the truck.

It was dark so pics are not great.
Update: 3/7/2023 – I have it back on the ground…been 2 years. I have to sort a couple of brake line drips. The 2.5 inch drop in the front made a huge difference in my opinion. I did manage with a friend to get the brake line drips stopped i think. I now have to work on getting to front steering components aligned enough to drive it to the school.
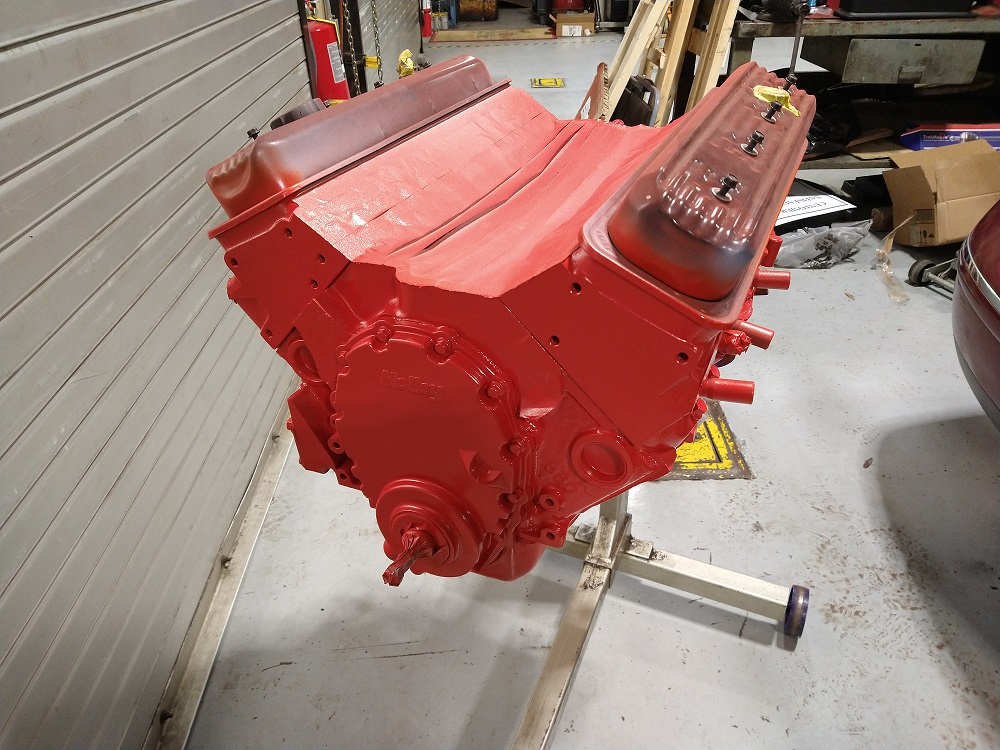
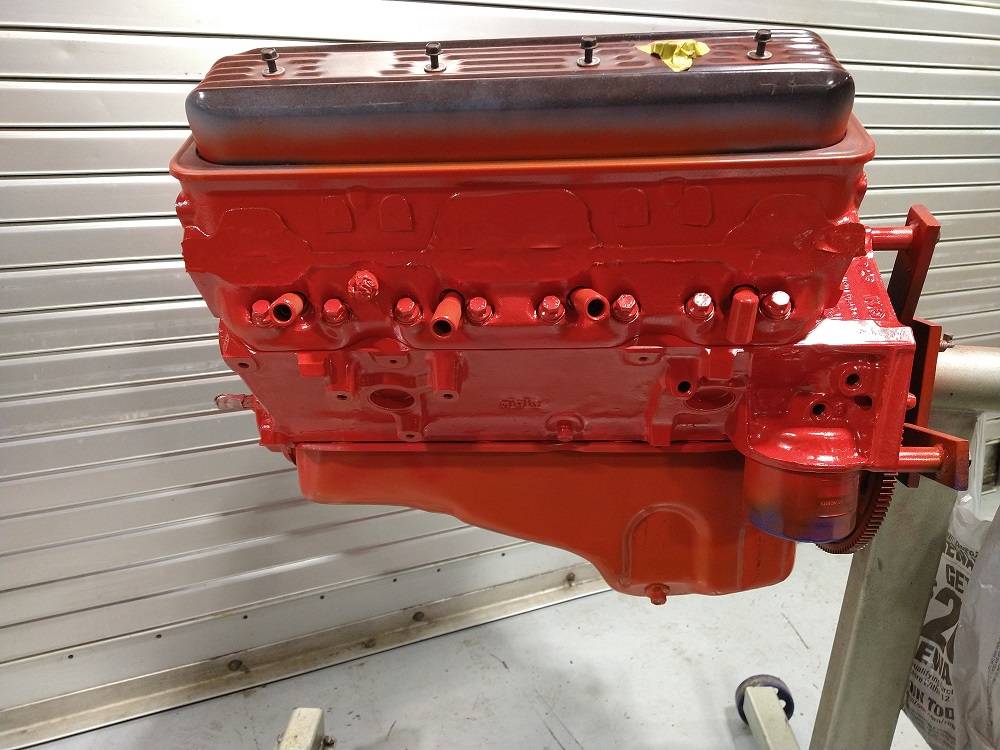
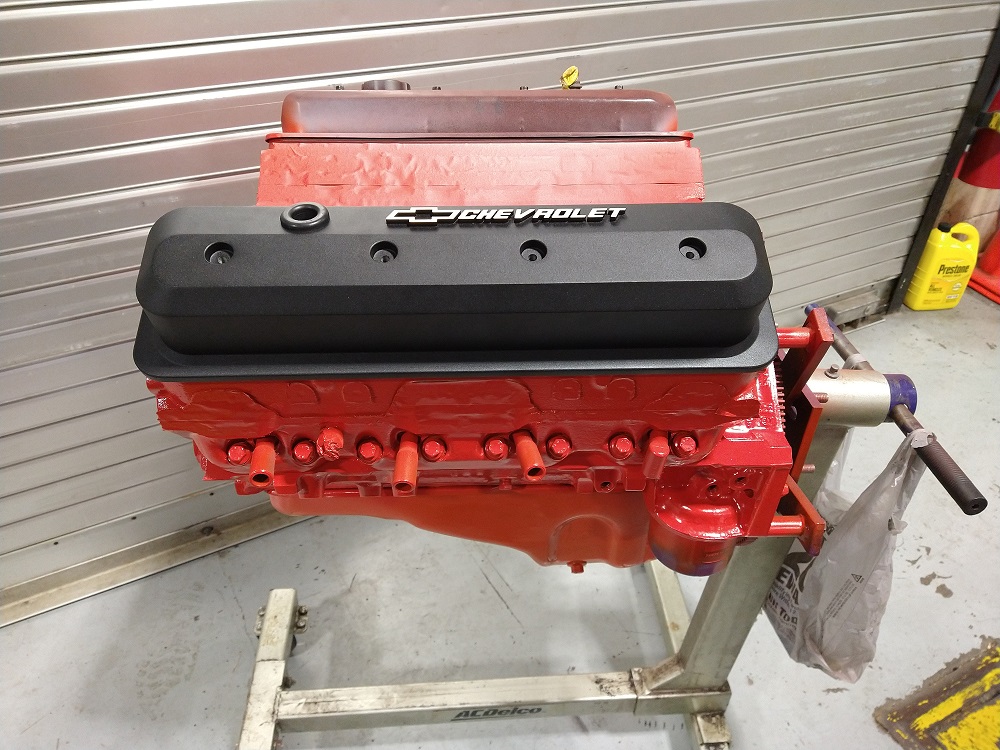
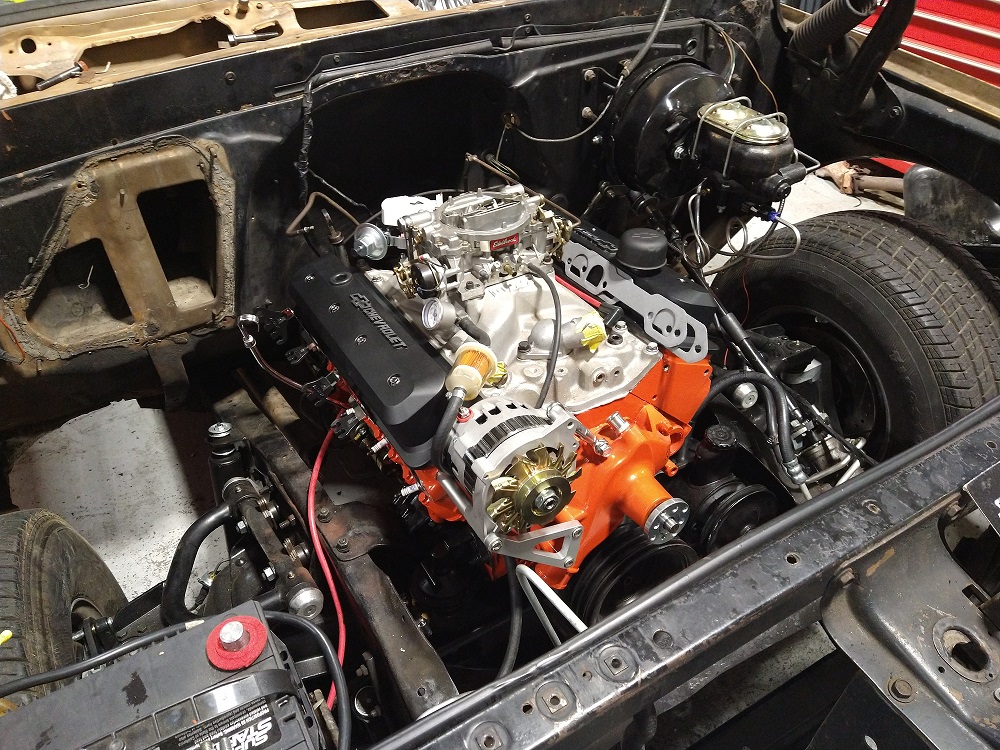
Update 3/7/2023 – The engine is almost done. As I said earlier it will look alot different. I went with an old school look with some modern accents. Here are some new pictures…just take alot above and see the progression and how much the engine looks different.
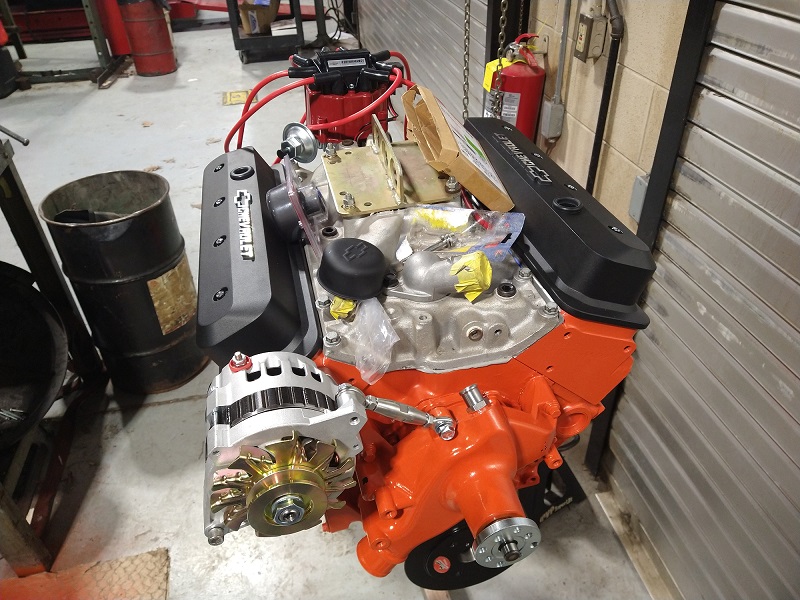
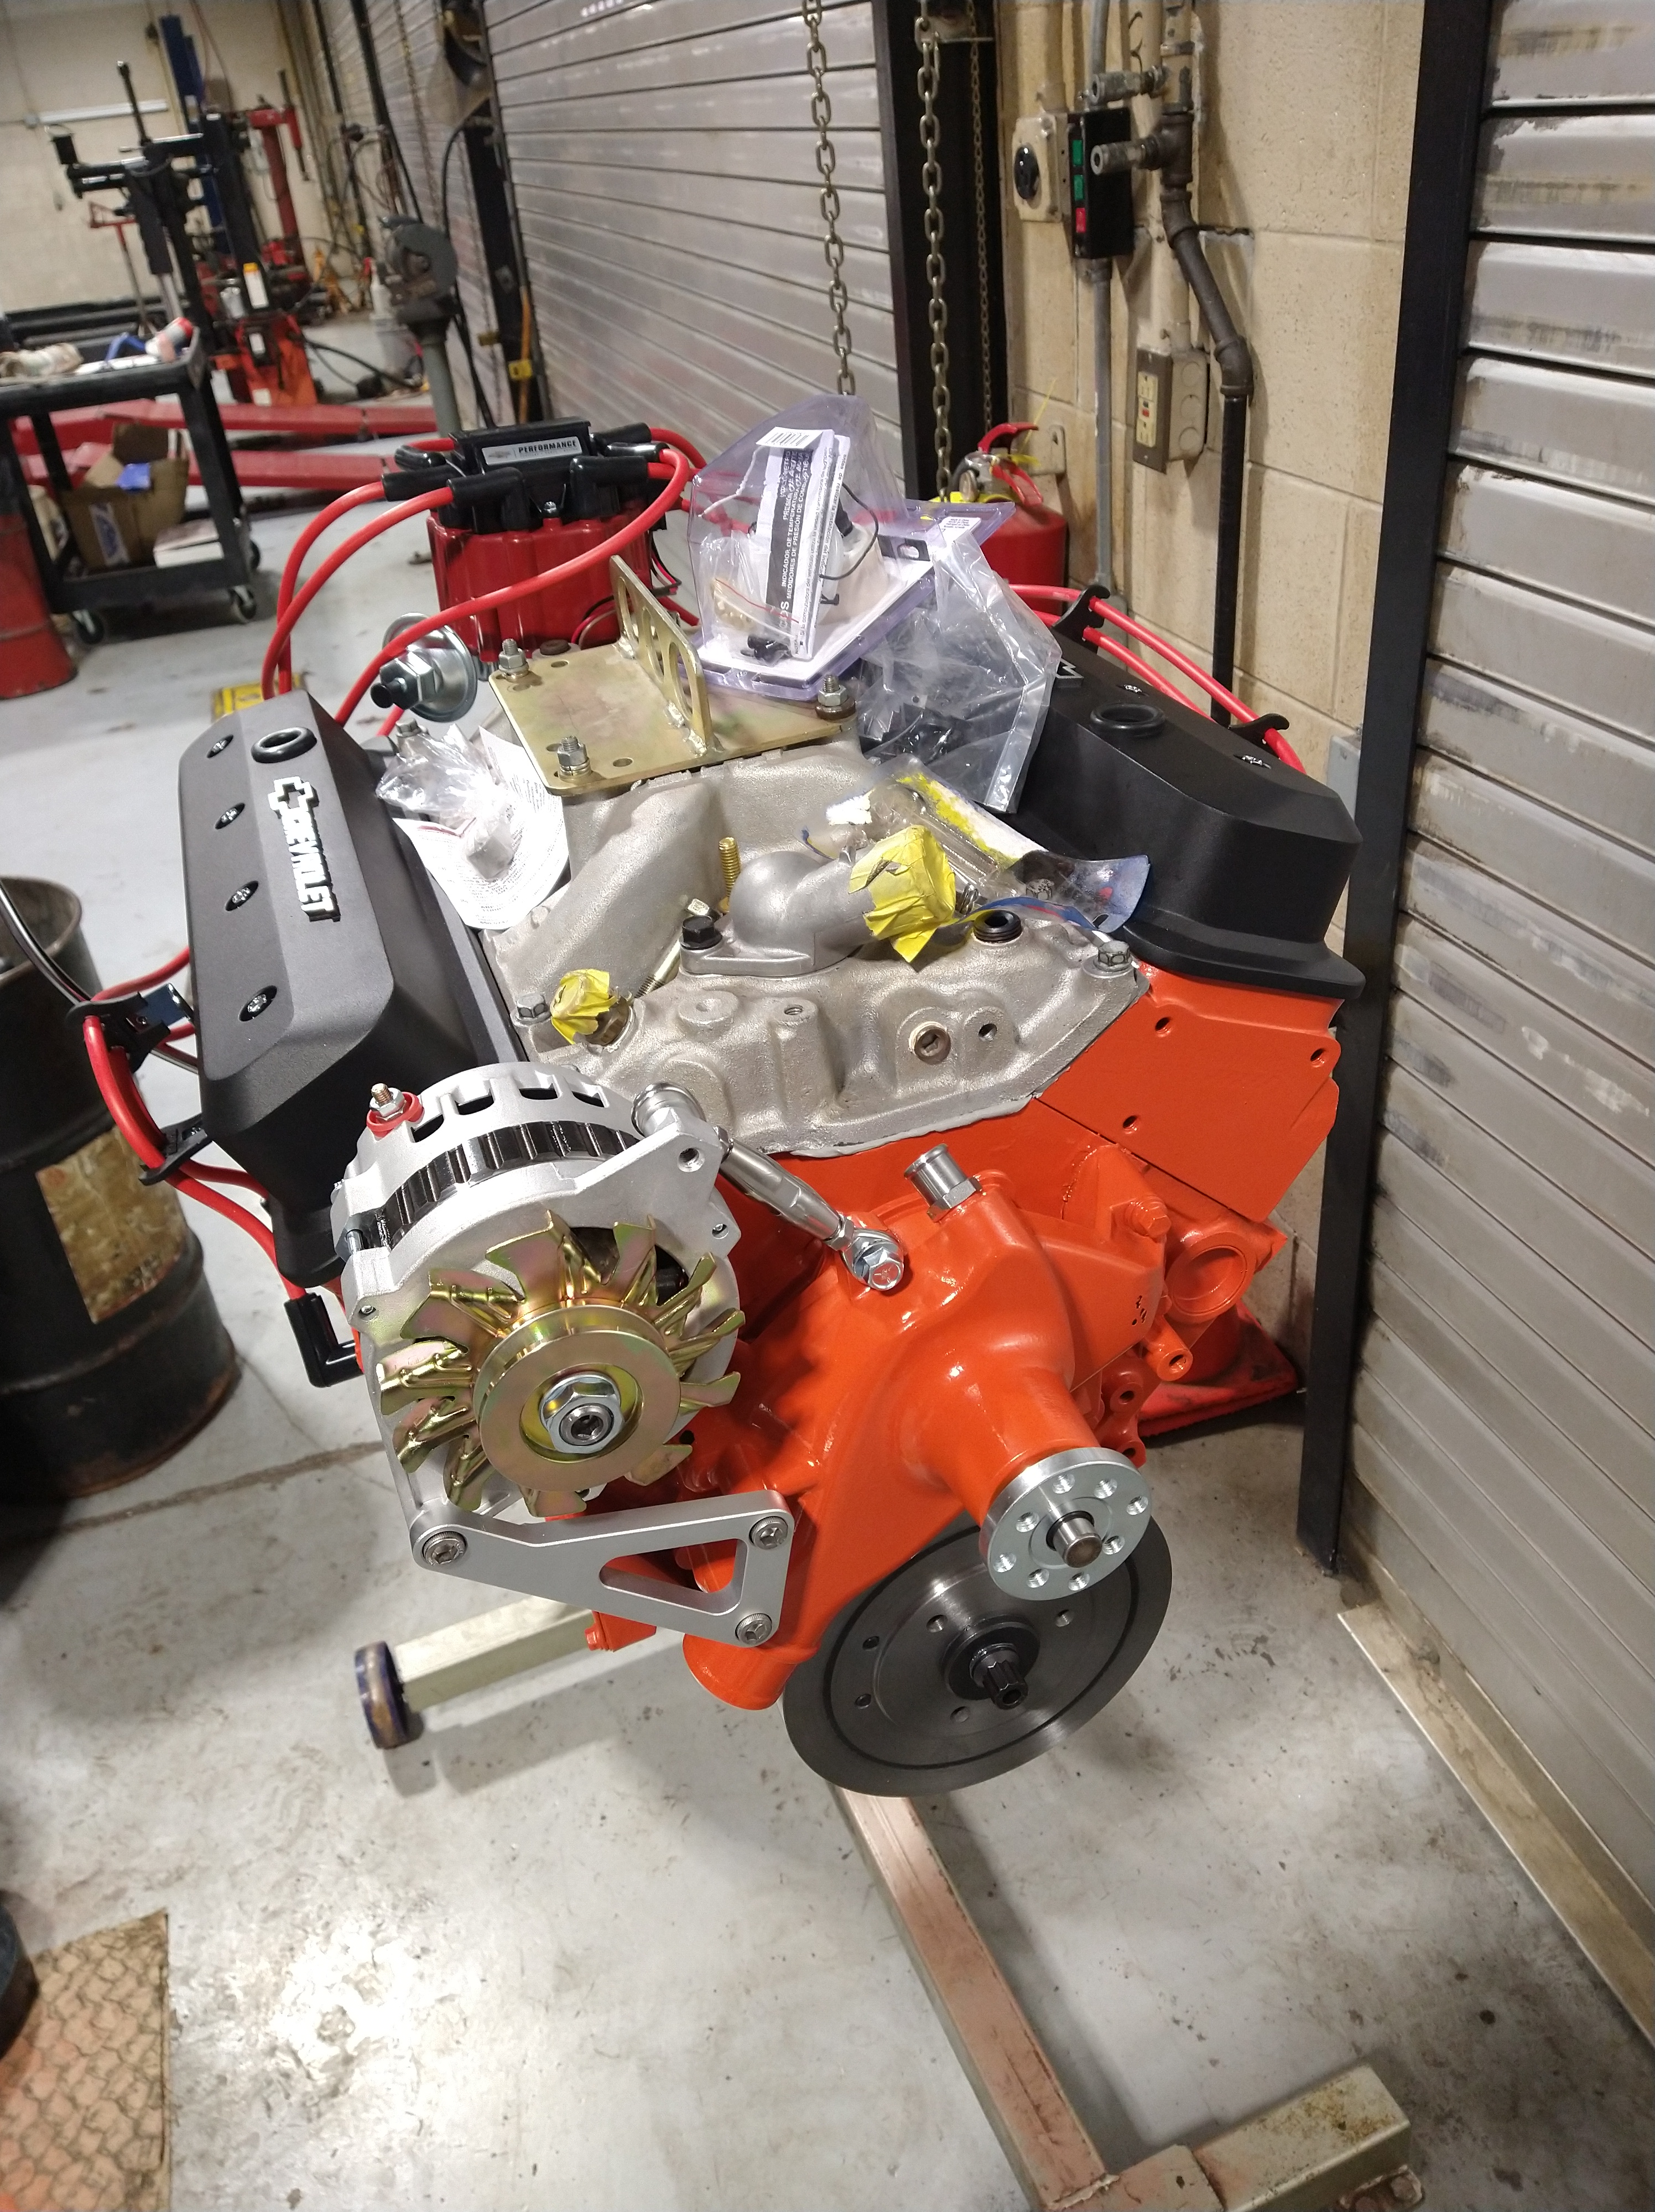
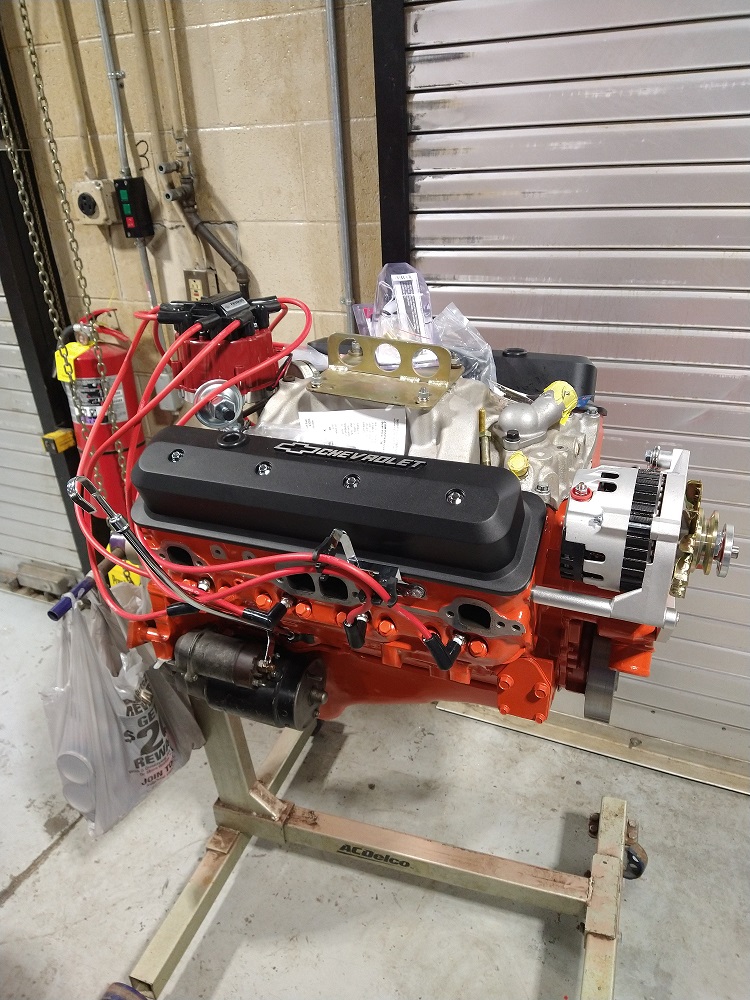
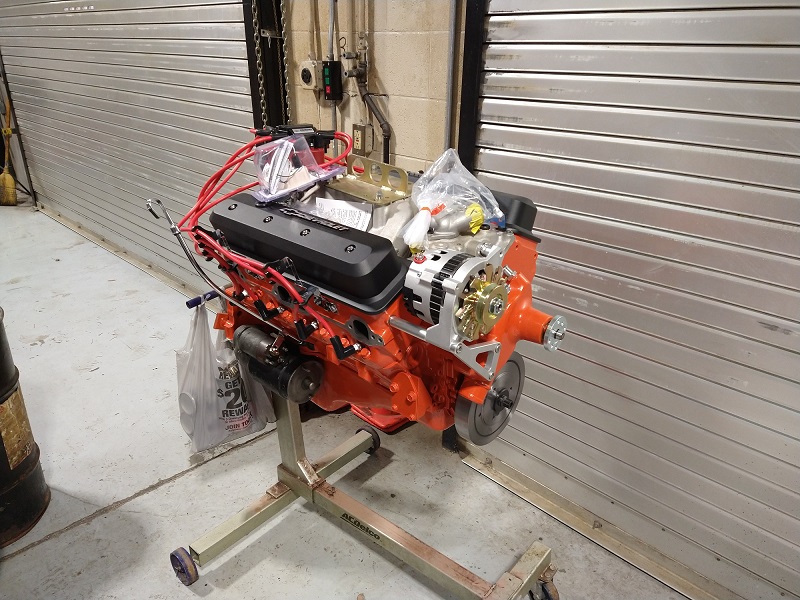
Here is some details:
Primed and painted with Chevy orange paint (engines from the 60’s and 70’s would have come in this color). I painted all the new aluminum parts this color. Others leave the aluminum not painted….but old school.
Black Krinkle official Proform GM Chevy tall Center Bolt valve covers with breather
New 160 amp Official GM Proform Alternator
New Aluminum turnbuckle style alternator bracket (turnbuckle style ensures infinite adjustment)
New Marine AC Delco spark plugs correct for this engine (what it would have came with)
New 8 inch correct for this engine balancer (what it would have come with)
New high flow Water Pump long style (what GM trucks had)
Moroso GM style Spark plug wires looms (Original GM’s where crazy expensive – I saw no point)
Proform High performance new HEI Distributor (Provides spark to plugs)
New 8mm GM Performance ignition wires – (red for contrast)
New aluminum time cover (hard to see its behind the balancer)
Footnote: that old crappy looking starter works, but will be replaced with a new mini starter.
New internal parts list coming and part numbers so if anyone what to duplicate this they can I will provide as much info as I can.
Update On Engine
New engine is about to go in the truck…….maybe in the next couple of days. Pictures below.
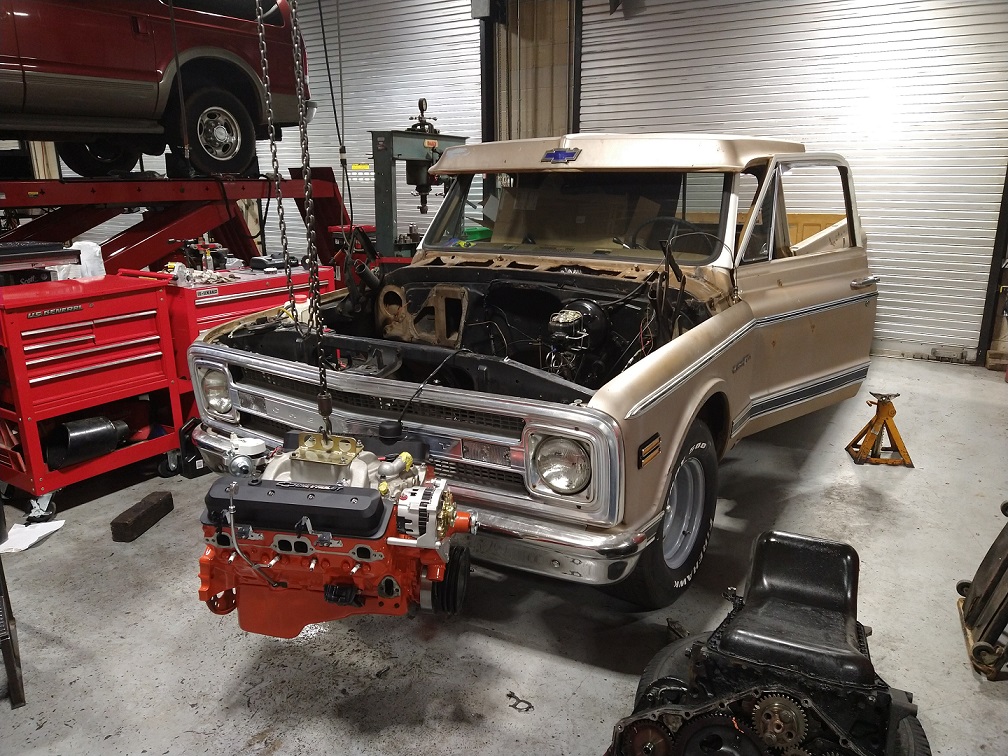
After this is in it will down to some tuning and hopefully getting it running great. I will be making a list of the parts I put in this engine to get it from the pictures that started this post to the one sitting in front of the truck in this picture. I have to grab all my receipts and make that list.
Also, it will be great if this engine fires up with minimal tuning and no issues. Hunting for what I wanted and needed has been a challenge and is continuing to be, I still need to get the correct power steering bracket.
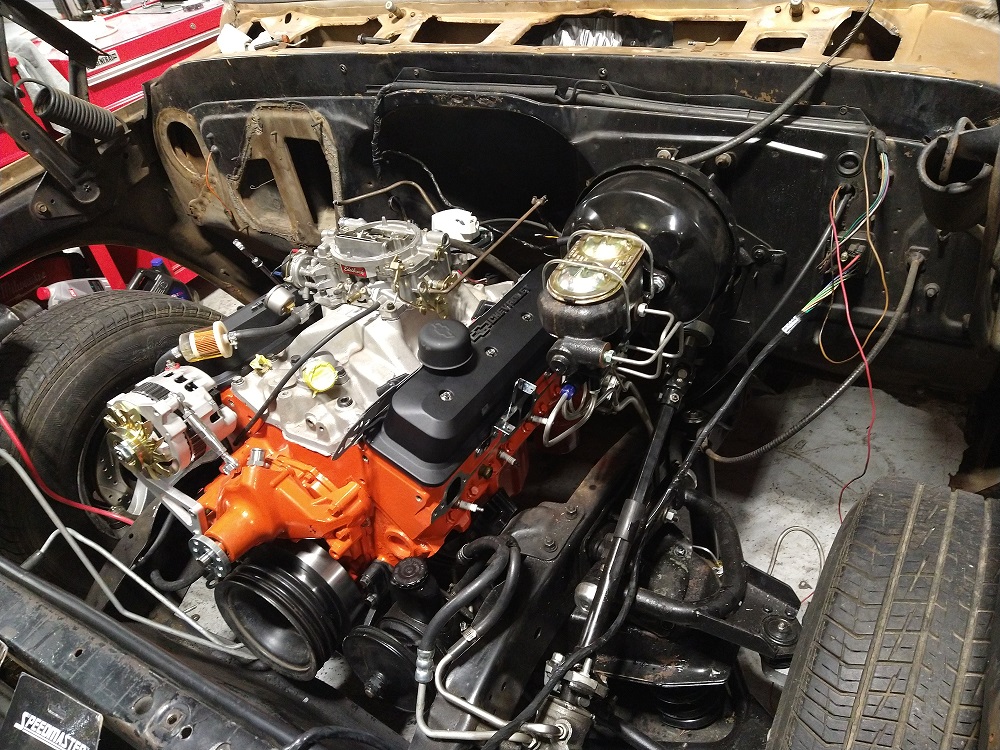
Engine is installed…….
Finish installing all the doodads from the old engine – install radiator and fill – install exhaust manifolds and mufflers – Tune Carb – check all engine vitals – oil pressure and such – install fuel pressure regulator
Hopefully all engine sounds will be normal and all good.
9/6/2023
Engine has been broke in and sounds ok. I am still getting some little odds and ends done. I had to get a temporary exhaust put on. This was just so when the engine is broke in it and to at least have some sort of exhaust on until later when a complete exhaust can be put on. Here are some pictures of me getting it back from the exhaust shop.
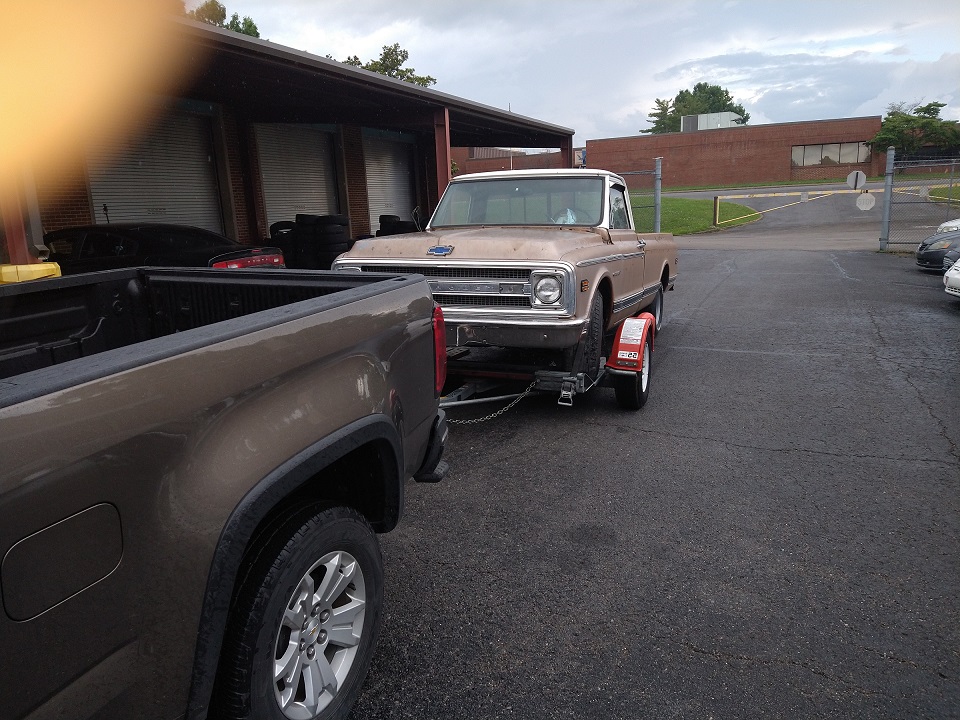
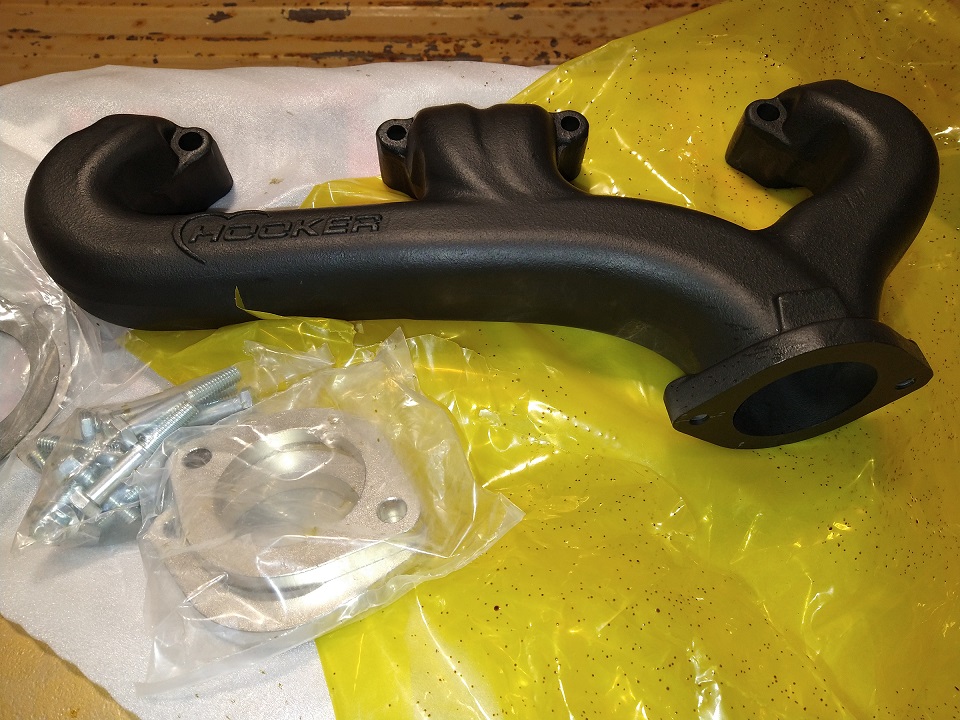
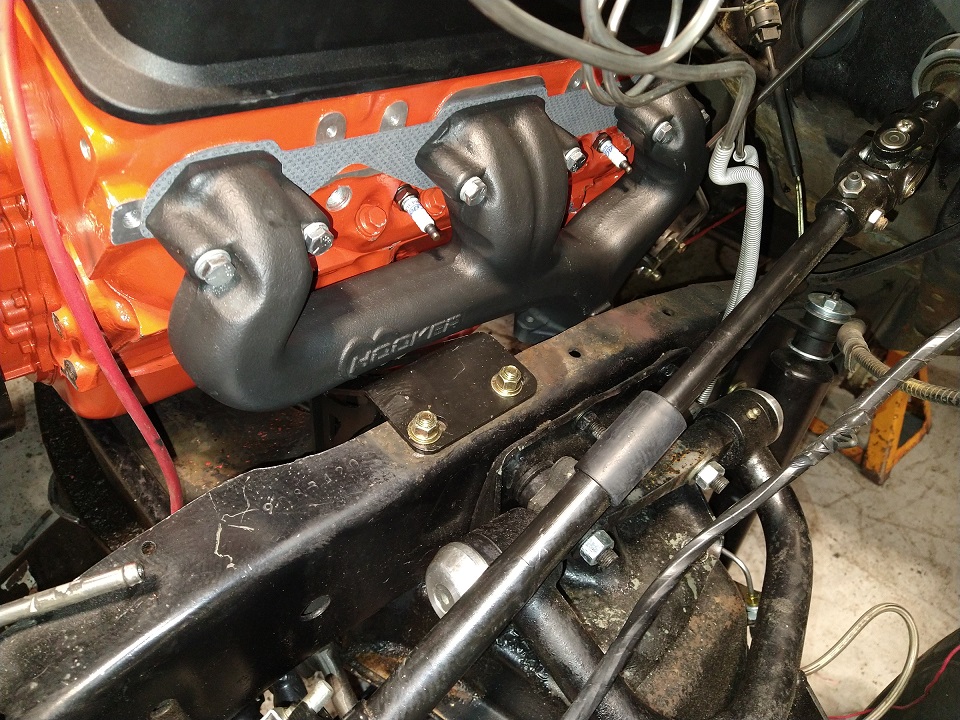
Here are some pictures of the exhaust manifolds I had to use. Tried headers but the ones I bought that were supposed to fit did not. While these are not as performance orientated as headers and are just a little better than stock manifolds, they fit better, seals better than headers and will work great for my needs. I am not racing this truck so I am happy with these. I had to get new motor mounts for clearance, but it had to be done. They were not cheap for what they are.

What I have been doing this past year
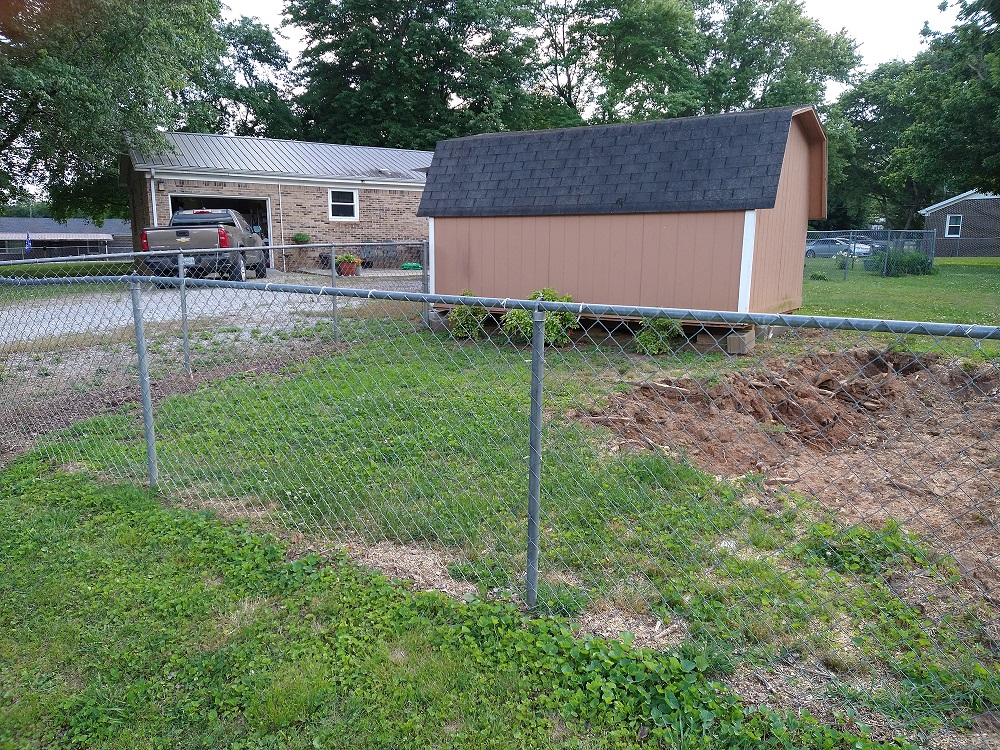
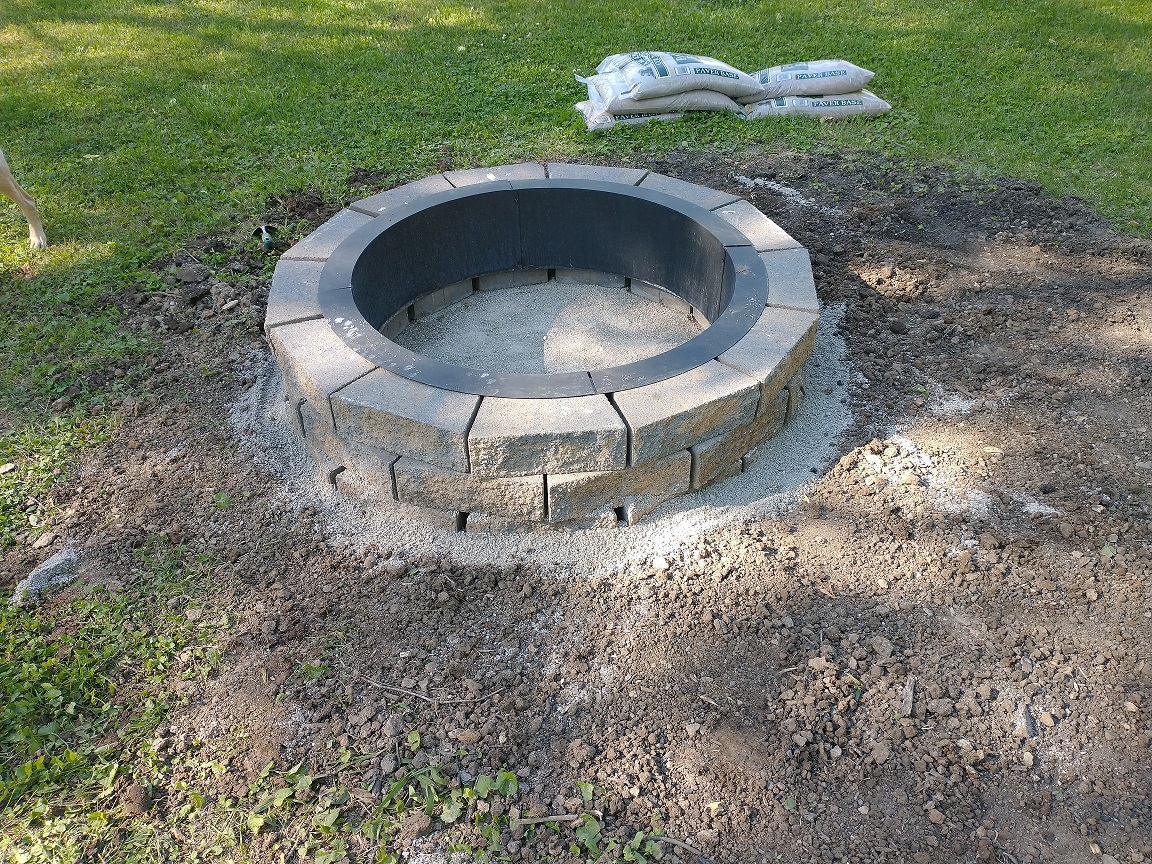
Ok, not much work done on the ’69 truck this year. Summary……………..leak /mini flood in my home and trying to get a garage built at Melina house that will be a new home for her car, my truck and the old truck. It has been a lot of work. The main time consumer or waster…………getting people to work.
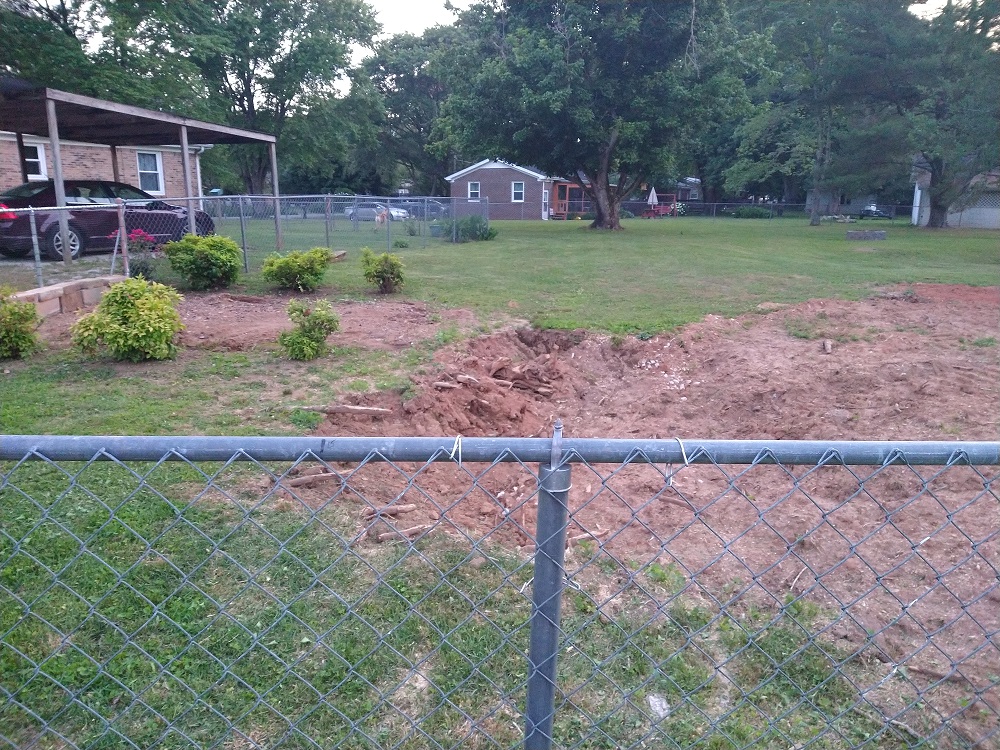
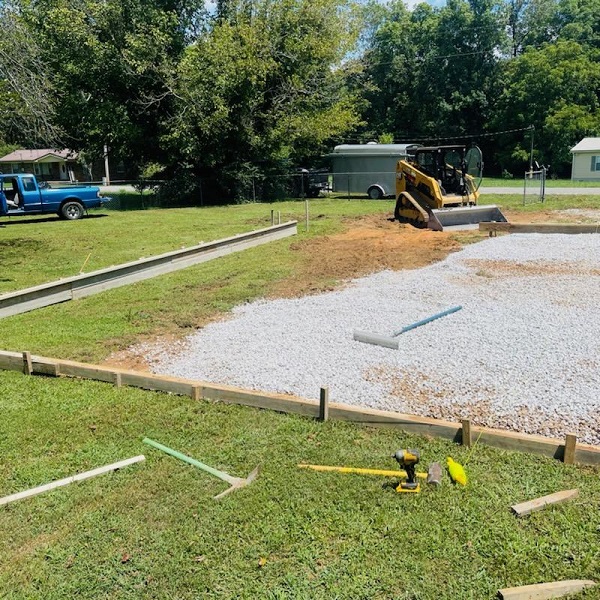
First to show you the prep work for the new garage. This is where two trees were that had to be removed. Don’t have a before picture readily available……………but this is the crew working after the trees were cut down. Pretty big trees…….take a look at the stumps, literally 4ft around. These were old maple trees I think, I am not sure but they were not oaks.

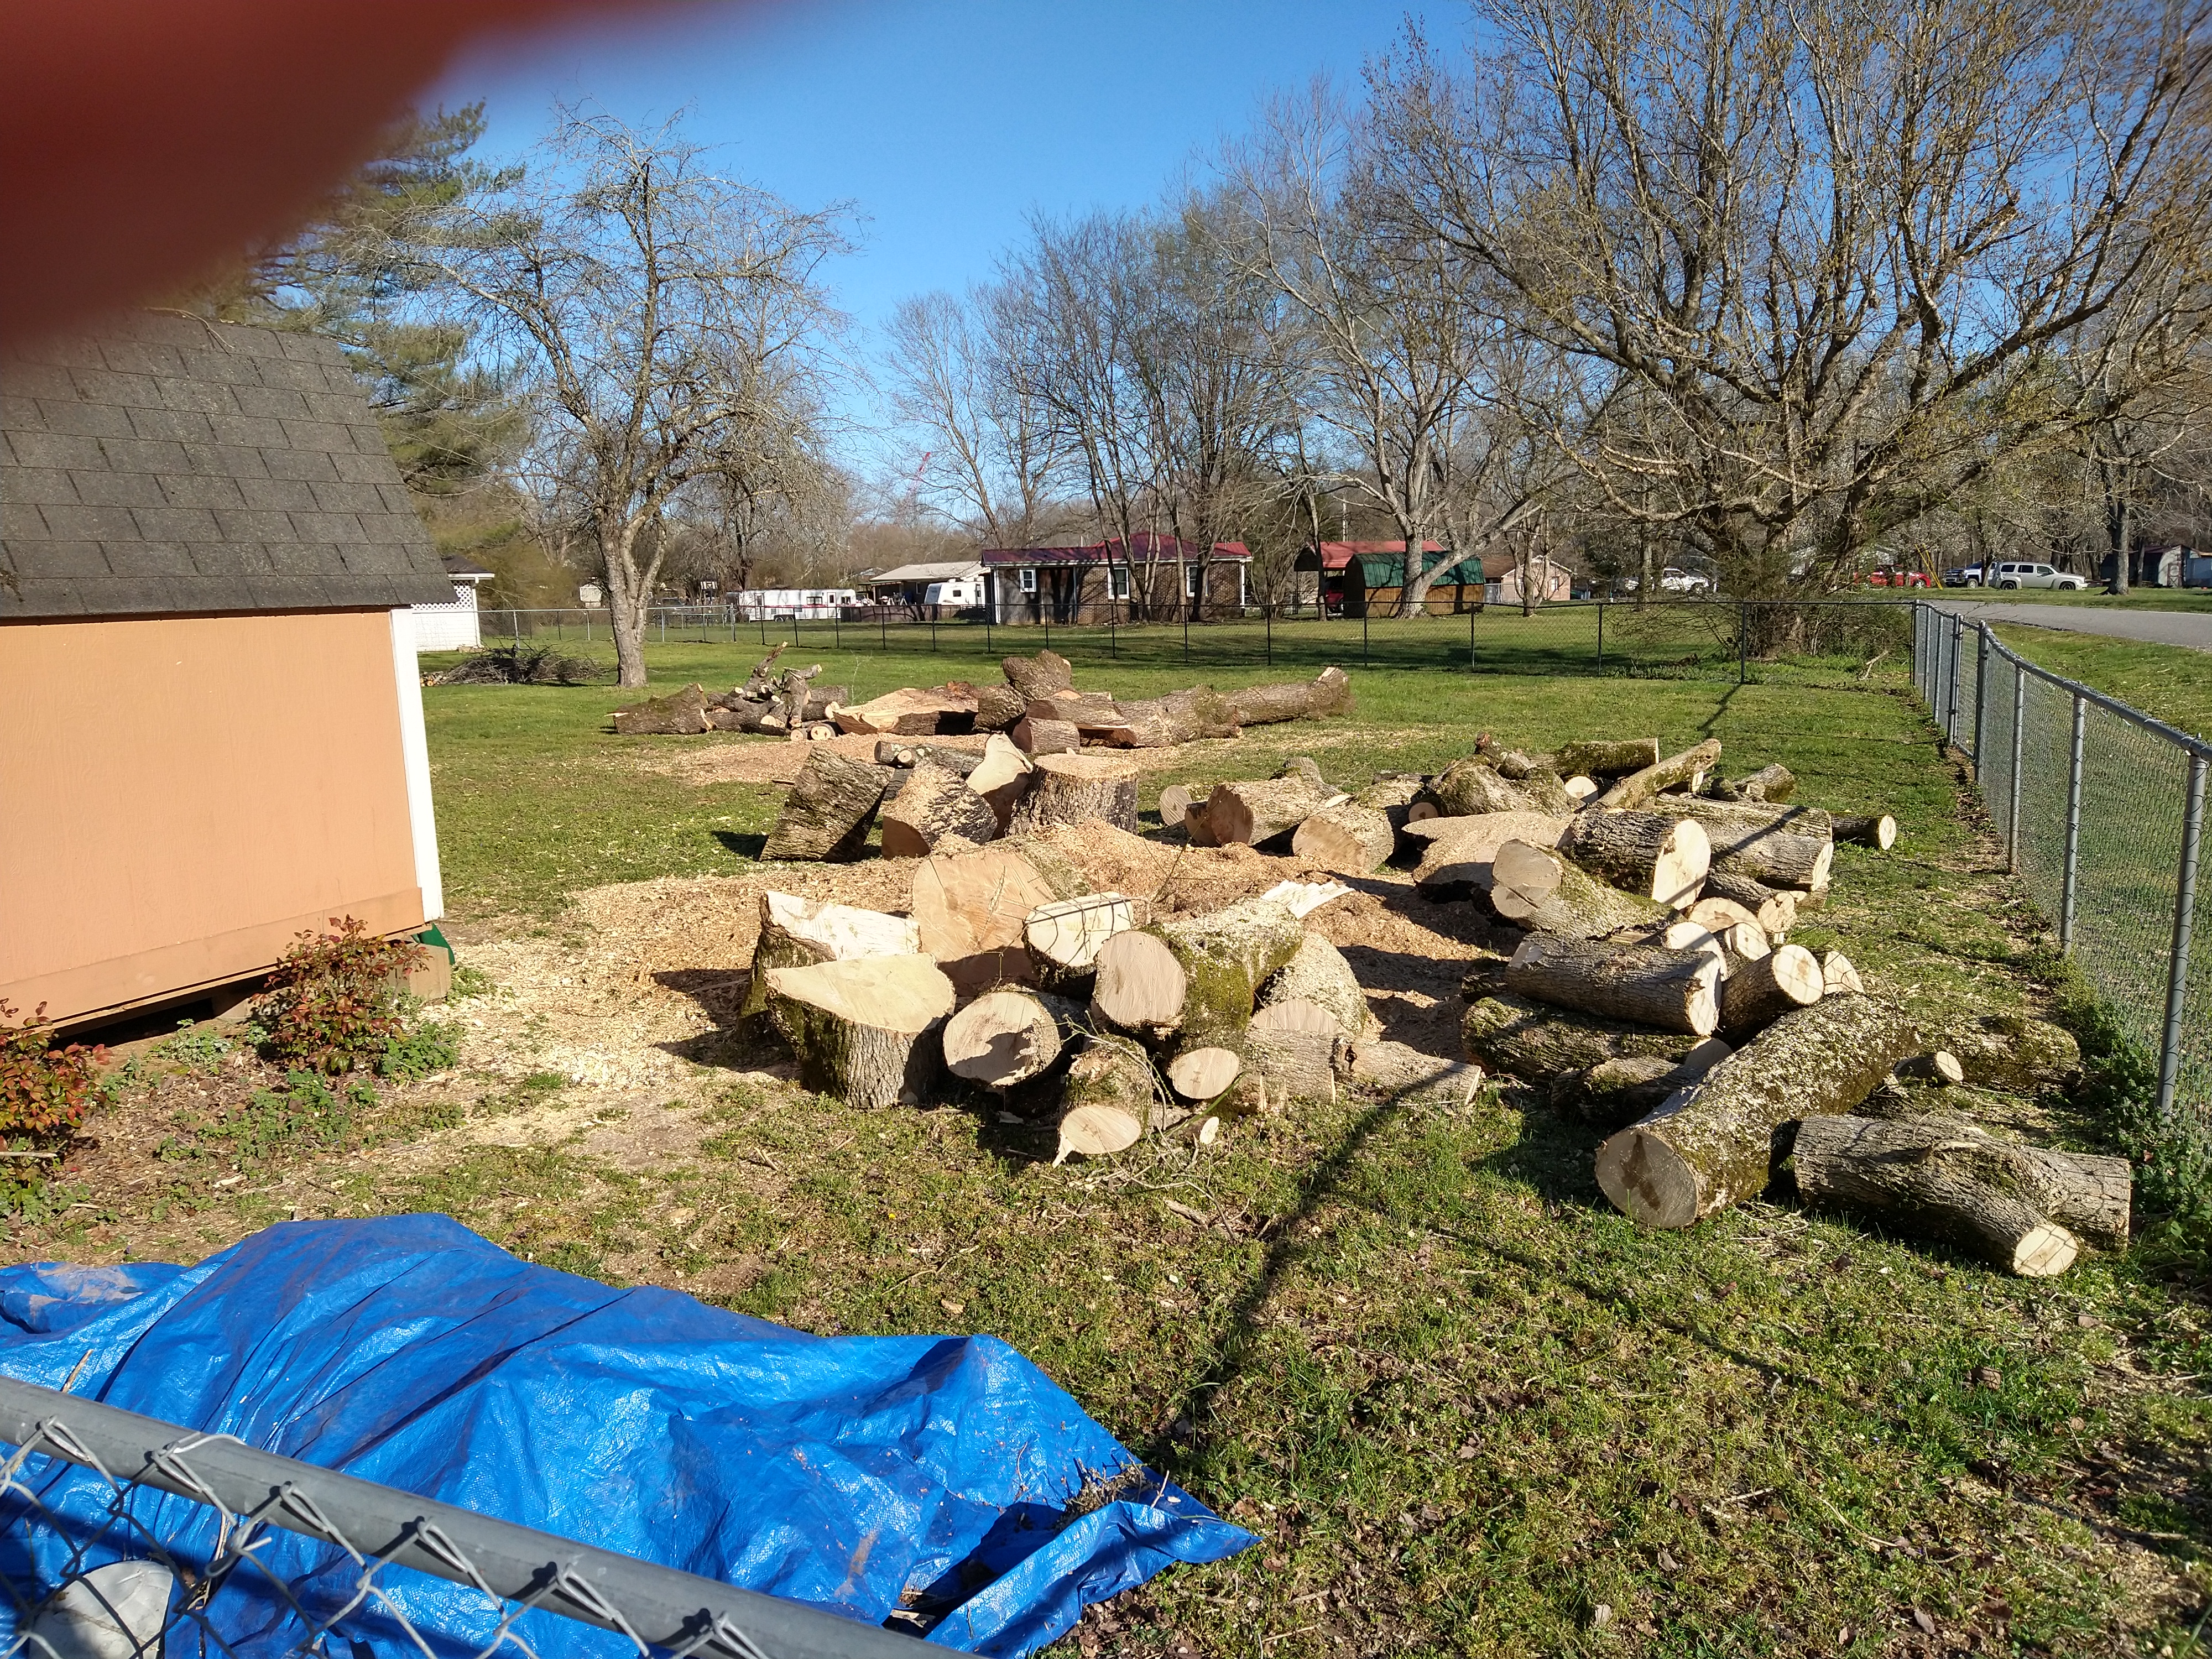
Here is another shot showing the extent of the wood. The tree service hauled off most the of the branches. A neighbor got a couple of friends and they cut up what you see here for some friends of theirs that have a wood burning stoves so they could have free wood to burn. They cut it up, hauled it off and split the big pieces up. This cost me $1800 for the two trees.
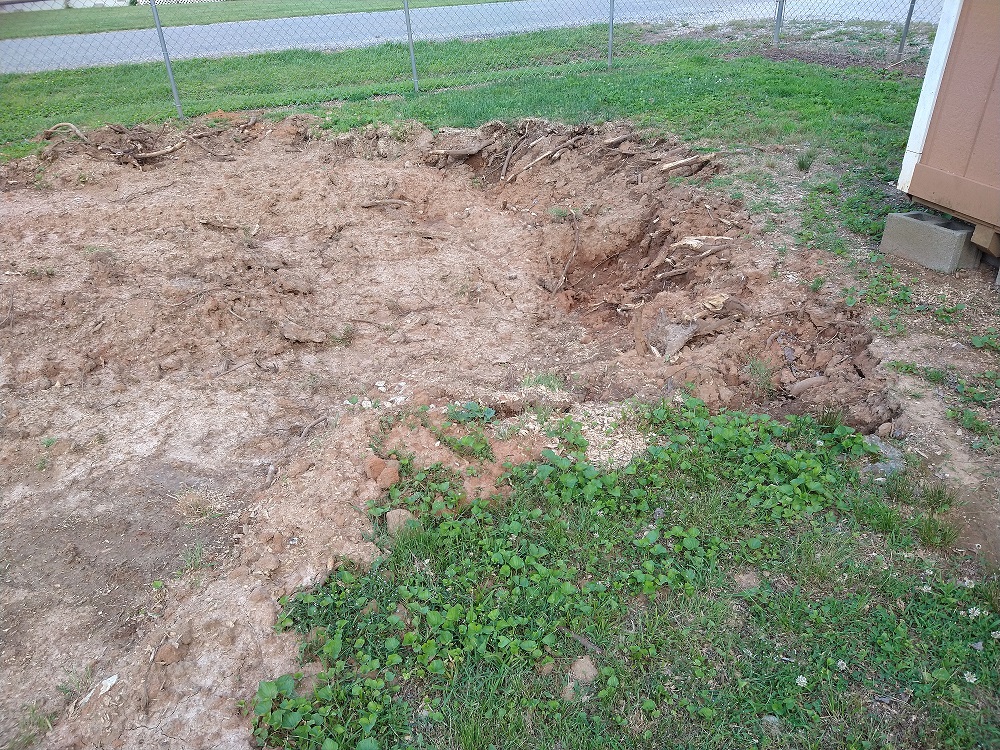
After this the stumps has to be removed. The tree service that removed the trees up until this point did not have the equipment to remove stumps only grind them. This was the first sign of trouble. It took me calling about 10 or 12 tree service people to find someone that actually removed stumps not just grind them. You should not put a concrete foundation over where a ground stump is. Its only ground down a couple of feet and covered in dirt. When this stump rots the ground will sink and your concrete will crack. So no go with that.
Once I found a guy that did stump removal this ensued….
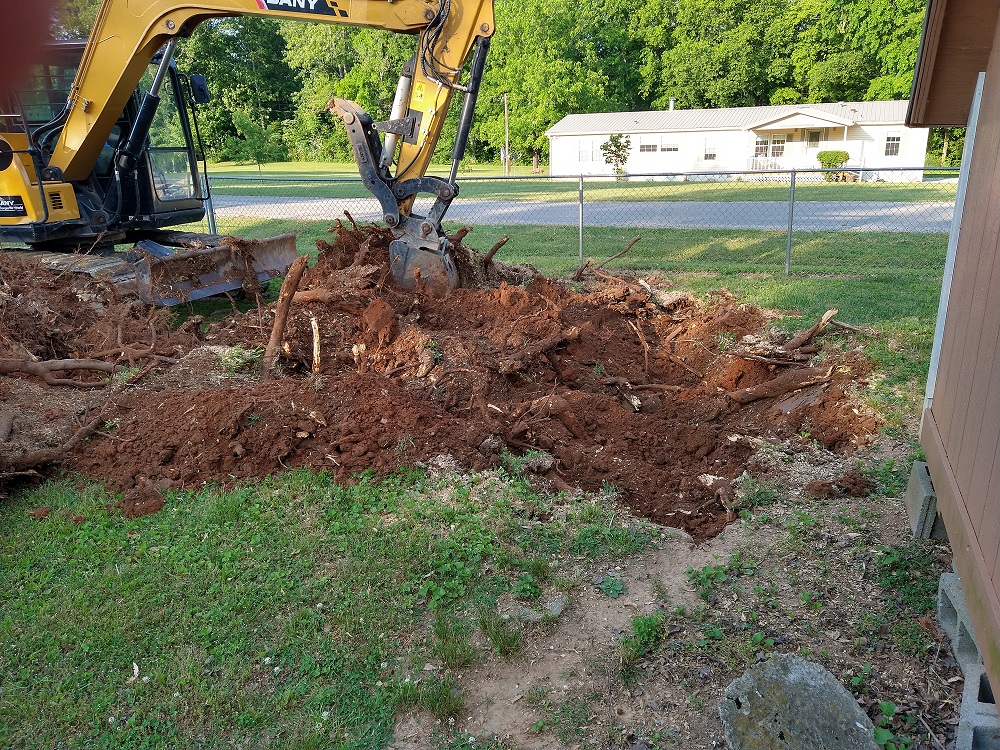
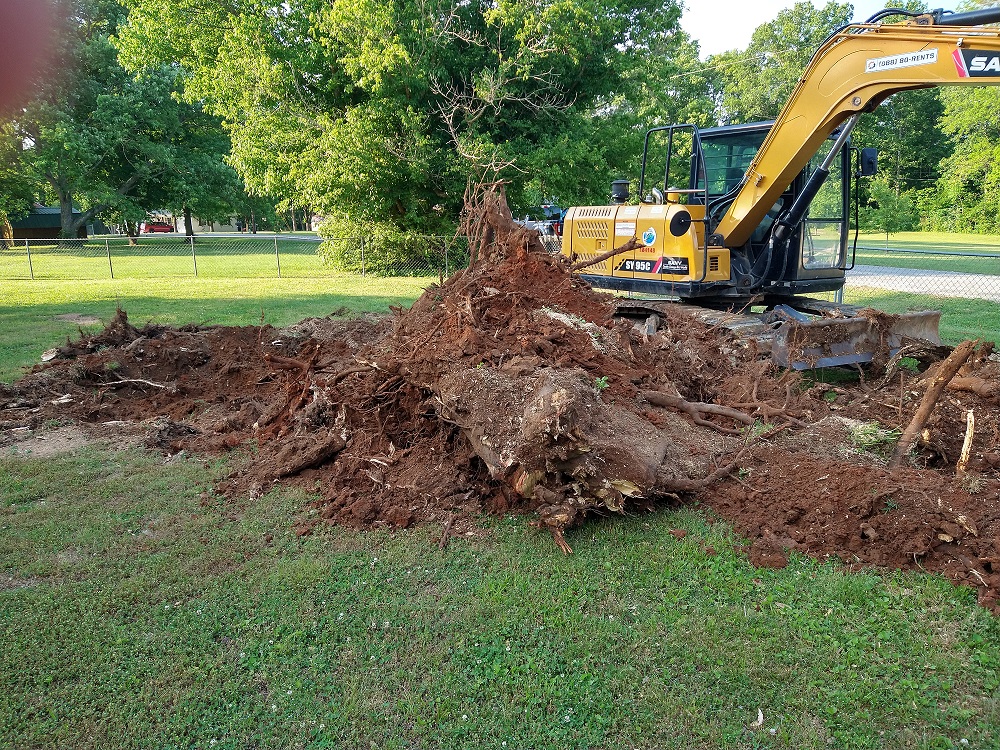
He was a real nice guy and a ex-military guy trying to get a business going so I helped him out. But this alone was another $1800
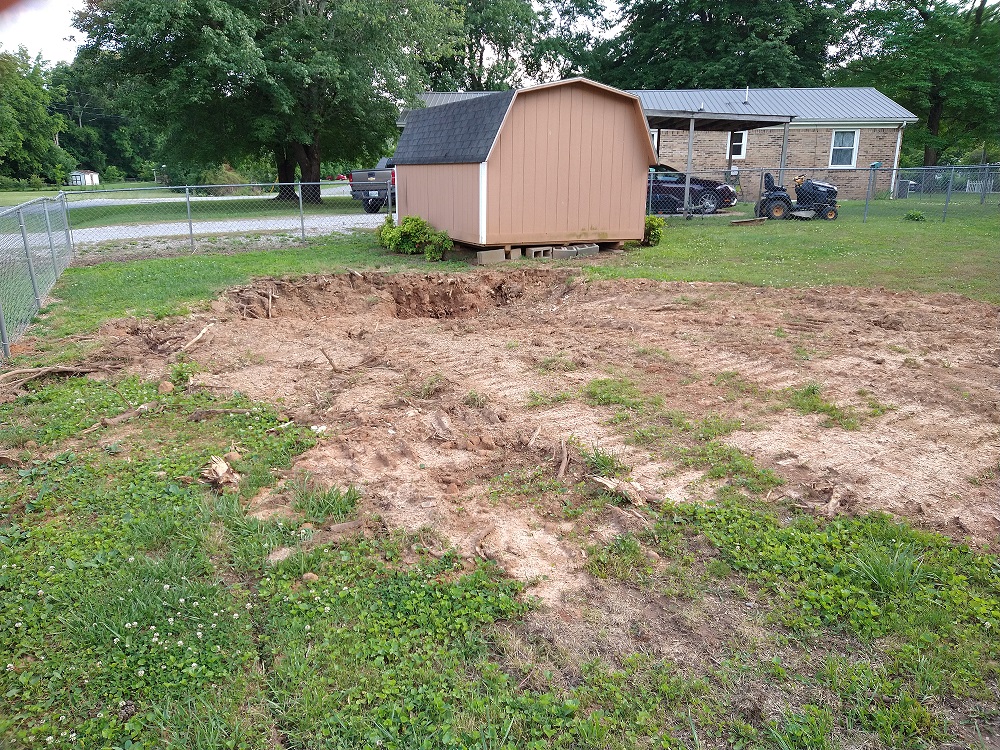
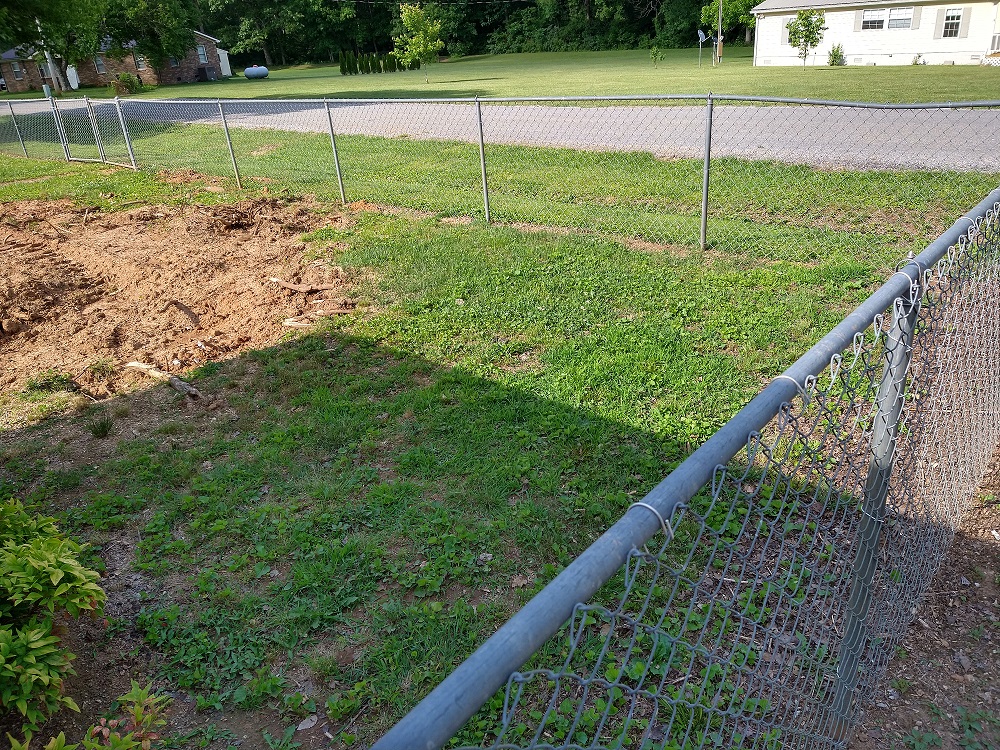
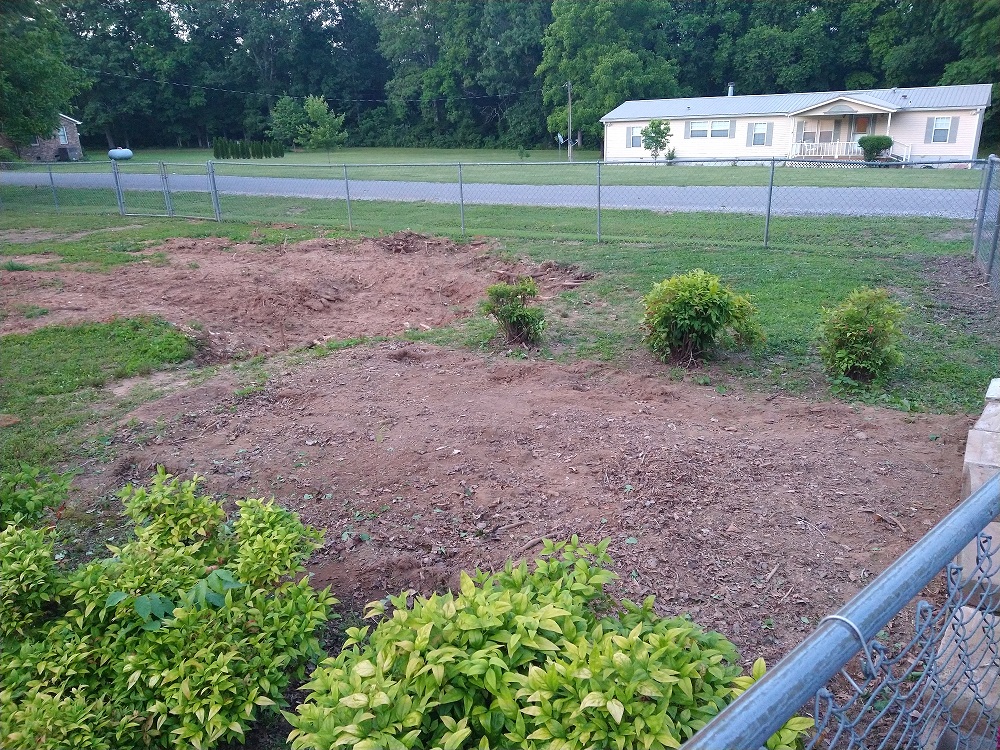
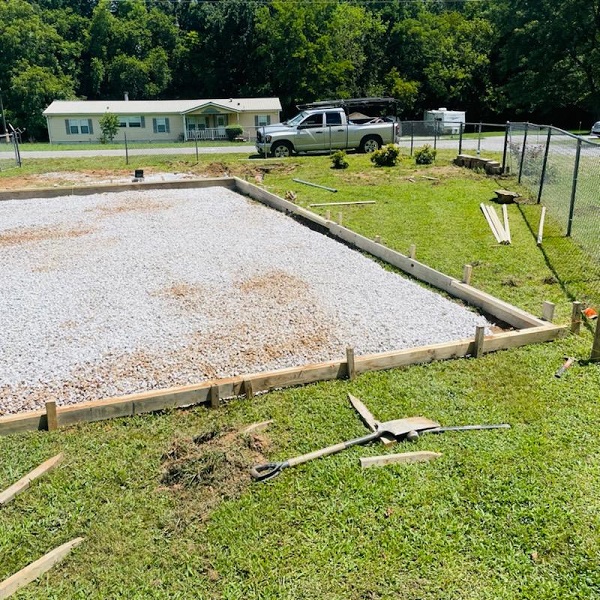
Here are some pictures of the back yard after all the wood and stumps removed. Still 1 hole left to fill in, there was enough dirt after the stumps removed to fill in one hole pretty good.

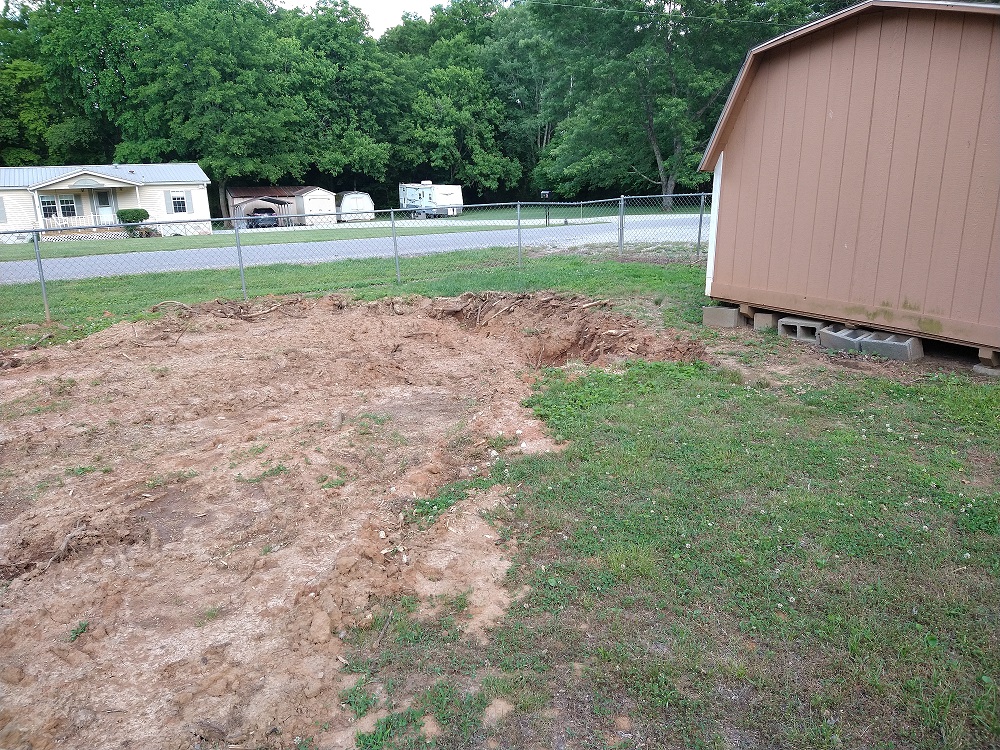
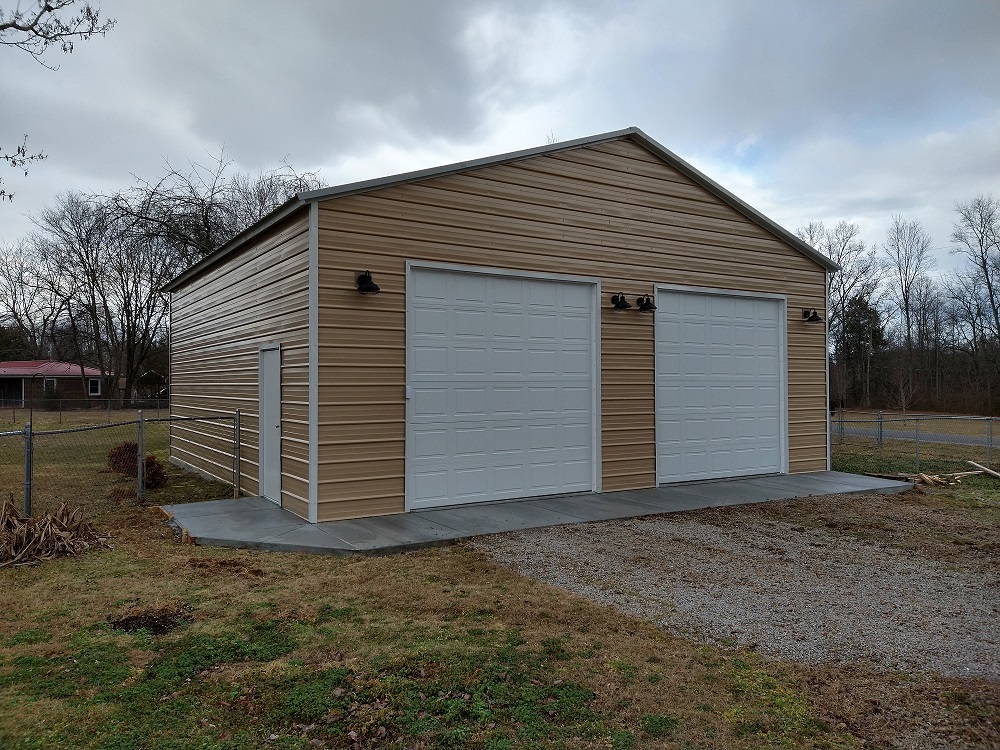
Still a pretty big hole to fill in later. I had to recover a little from the $$$ spent so far so I waited about a month and worked on getting a builder for my garage and a guy to do the concrete work. Went with a metal building due to be it being a whole lot cheaper that a stick built (like a house) garage. Here far go:
Stick built $65,000 vs about $49,000 for the metal building and concrete. Honestly $49,000 for a metal building is too much for a 32ft. by 32ft. garage. But, I shopped around with about 8 different builders in the area and this is what it costs. I went with a Mennonite builder. They were local, easy to work with and had a few features that others charges extra for.
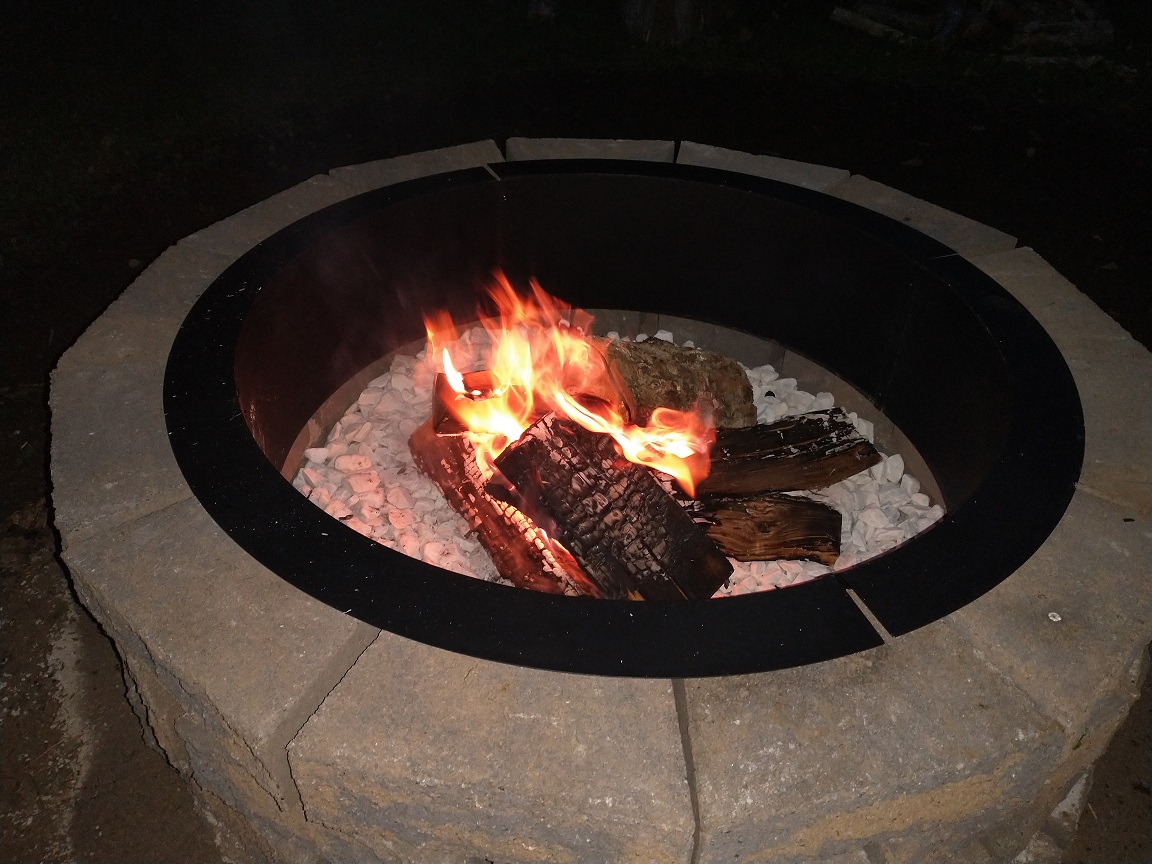
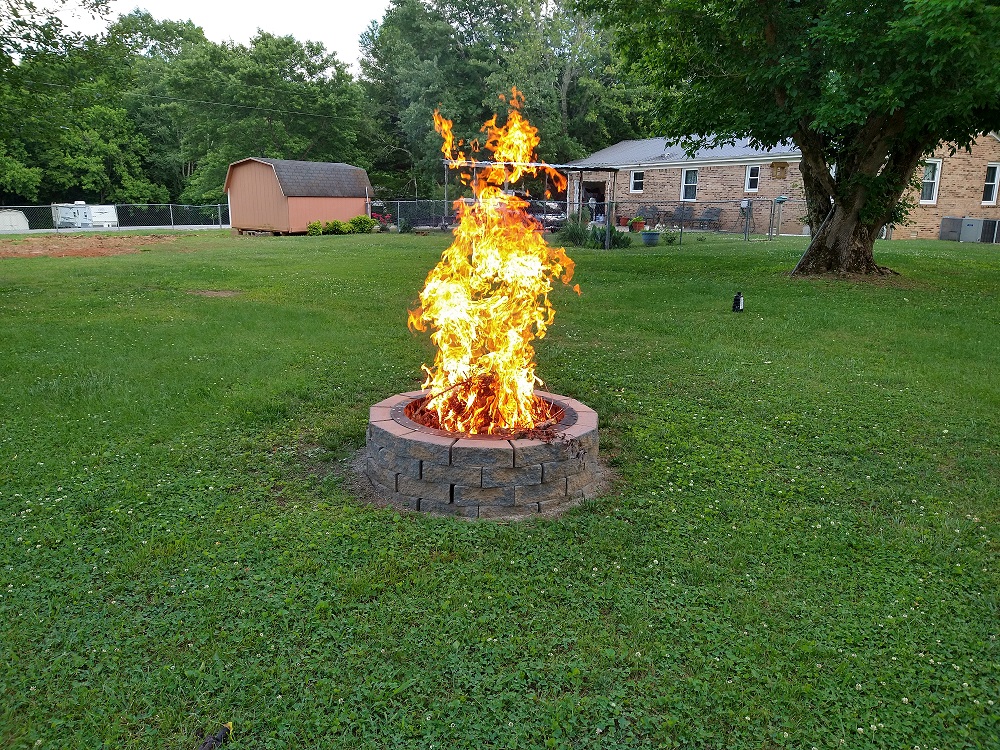
But first me burning up some of the scraps of leftovers from the tree removal
Me and Melina built this
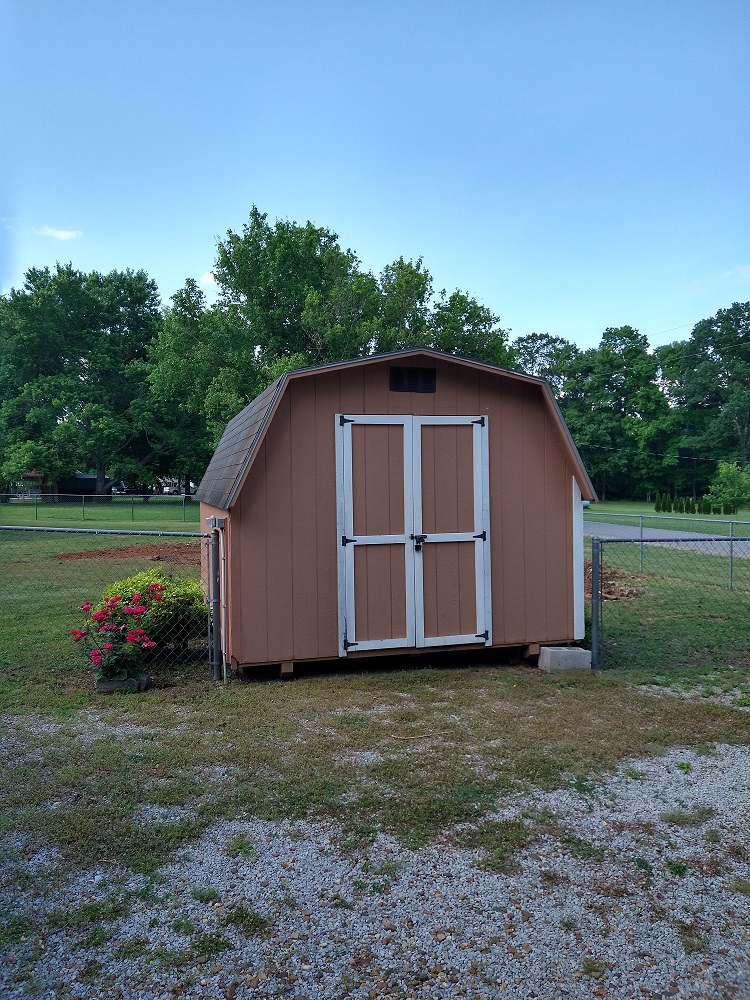
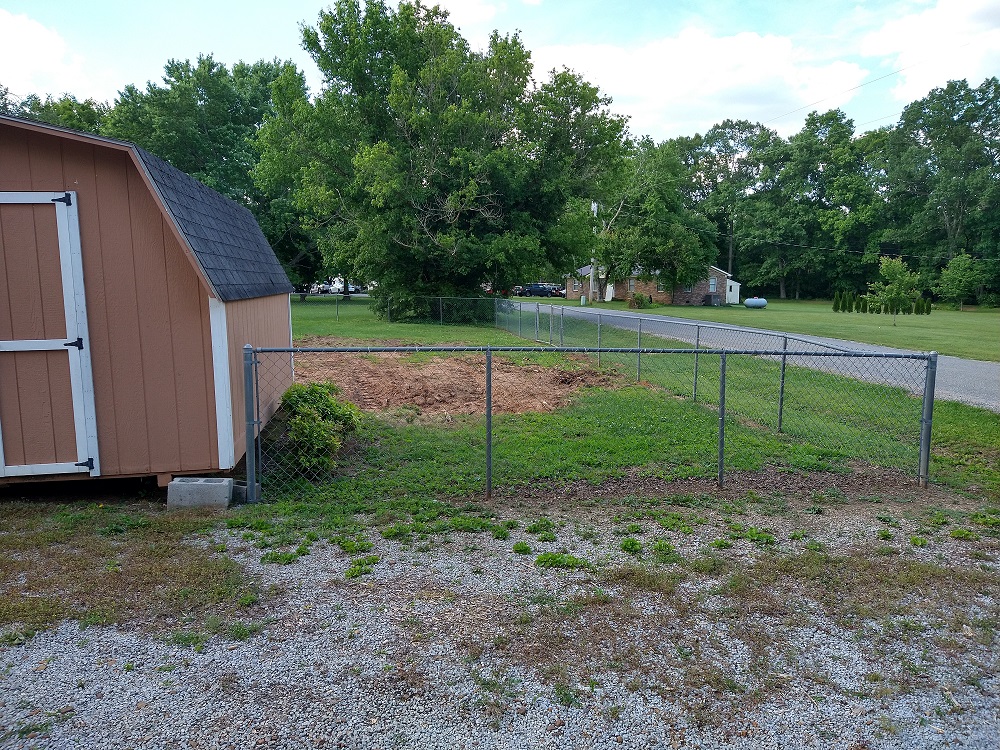
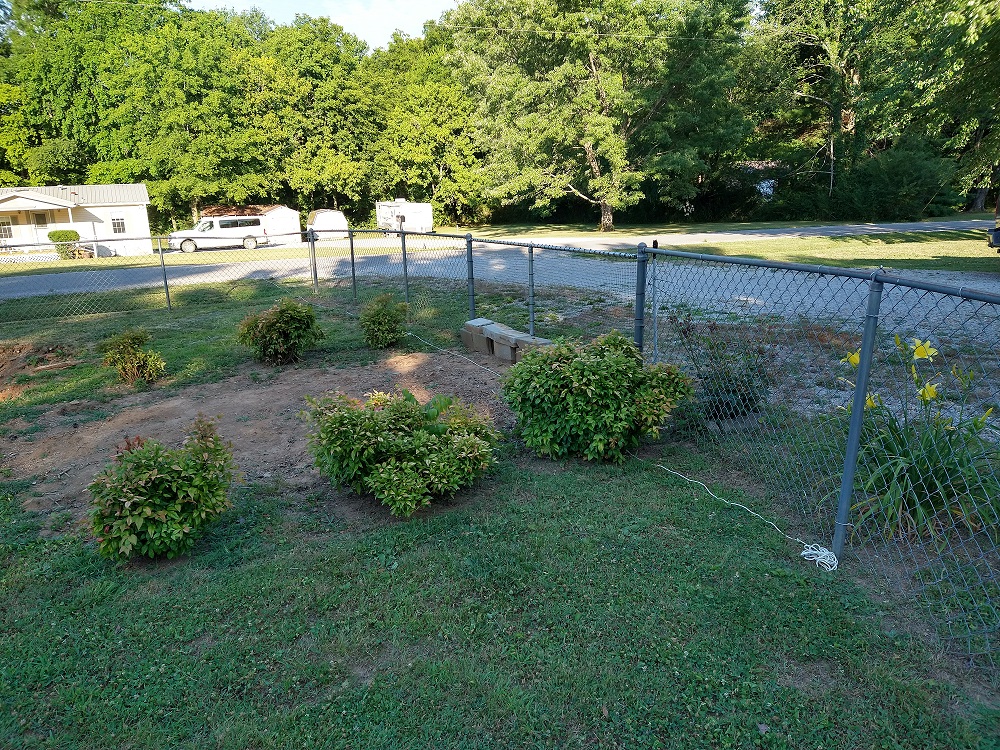
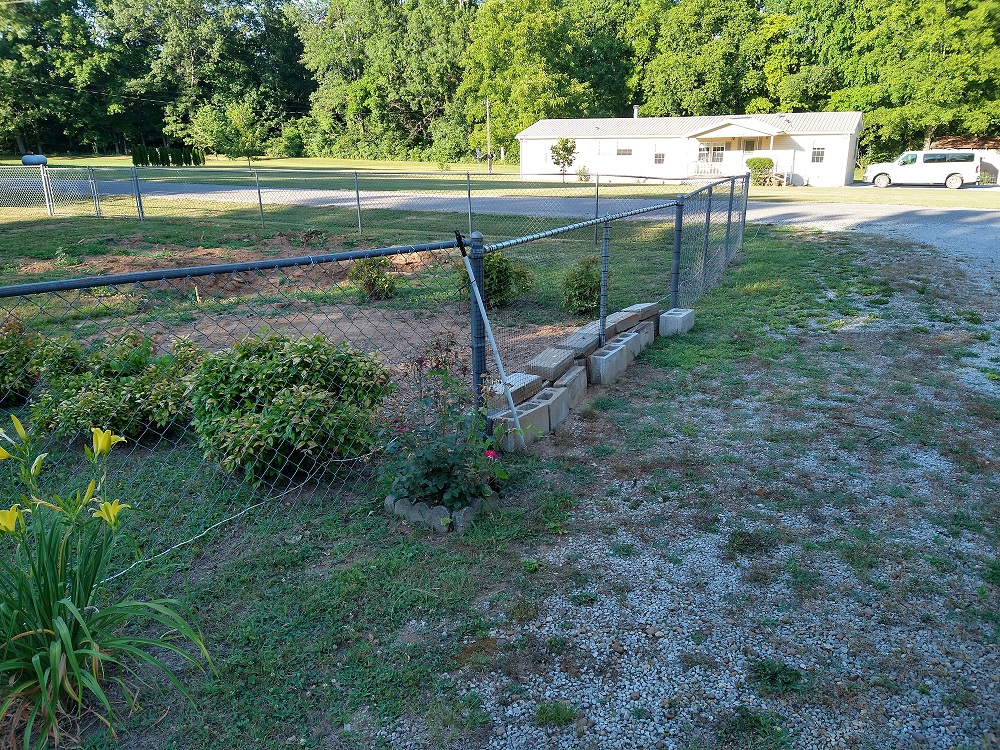
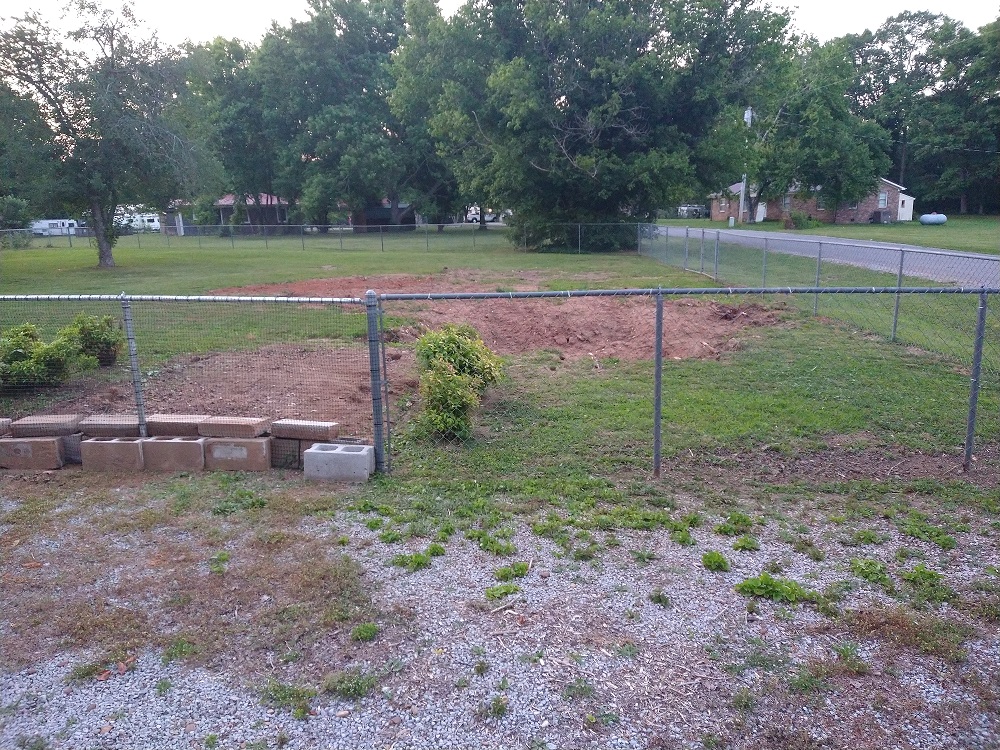
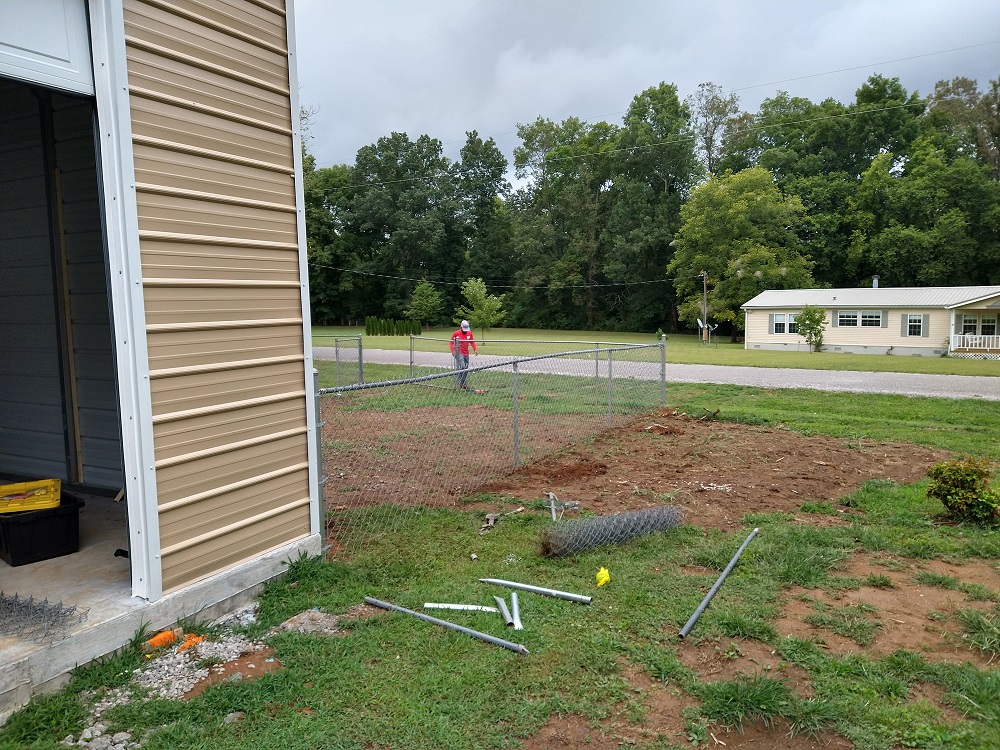
As you can see the old shed is still in one of the pictures above. That also had to go. So we had to move everything out of it and into the garage on the house. It’s still in there by the way…….and we had to get it sold. Melina posted it on Facebook marketplace and it sold the next day but it took the guy about three weeks to come get it. Glad to see it go but a delay. I think she has some pictures of it getting hauled off…will get them on here later. See the temporary fence is where the shed was, where all the blocks are. ……..we had to put it up so Magnum aka dorkhead could not get out. This is netting you put around a garden so deer can’t get in, but it worked for this purpose.
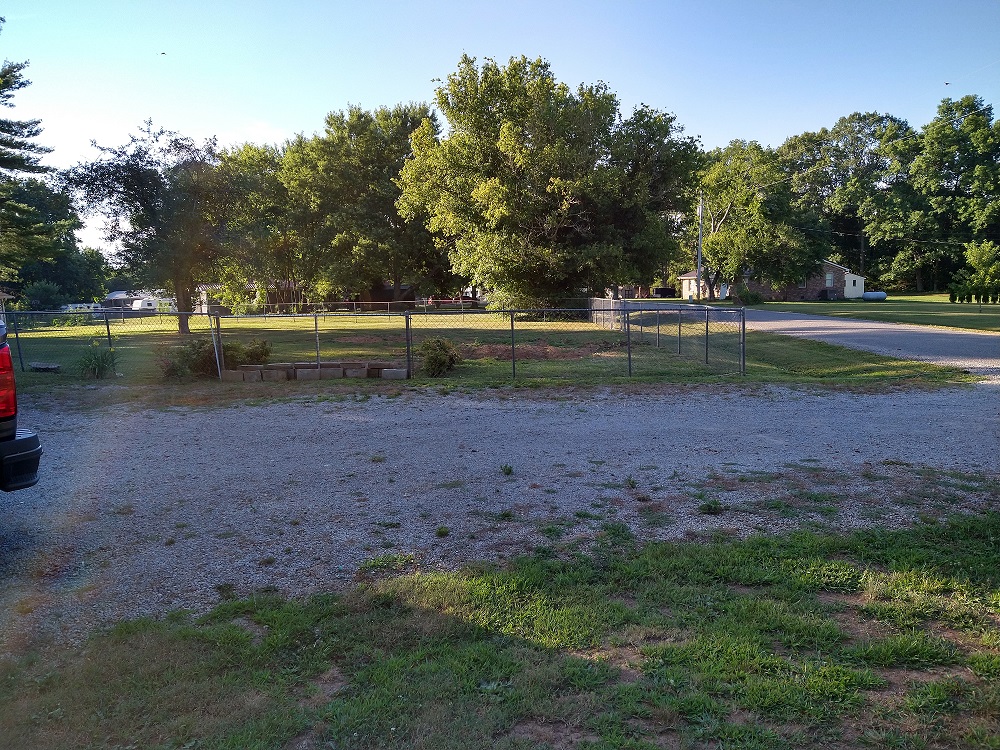
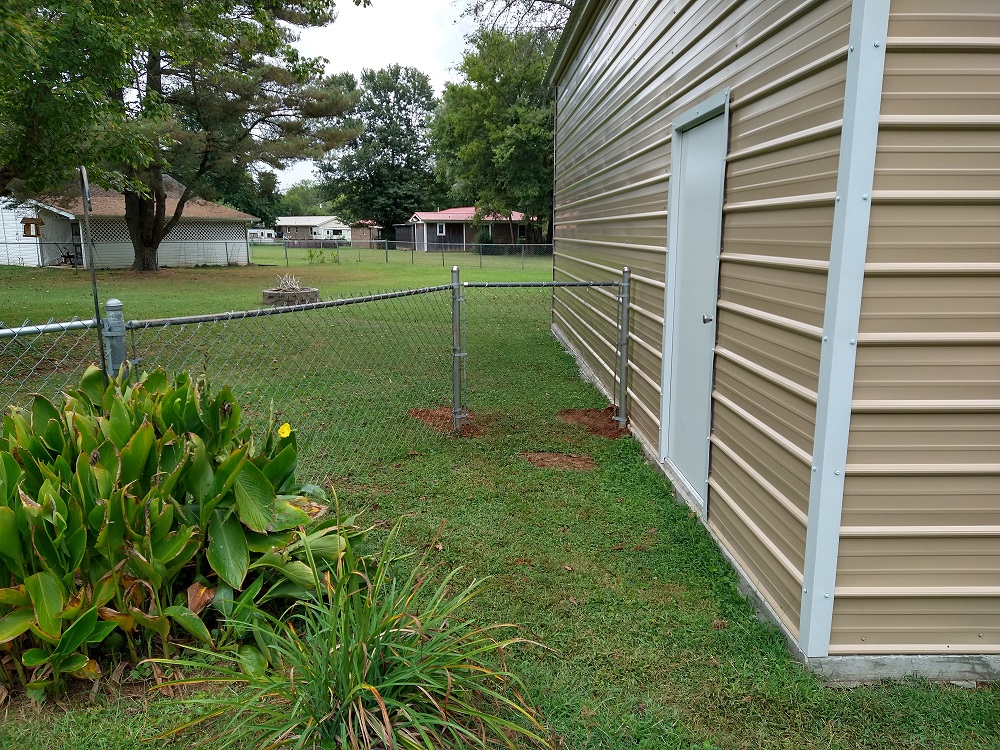
Here is the backyard with the shed removed:


Anyway got to get the concrete done. Here is this getting done:
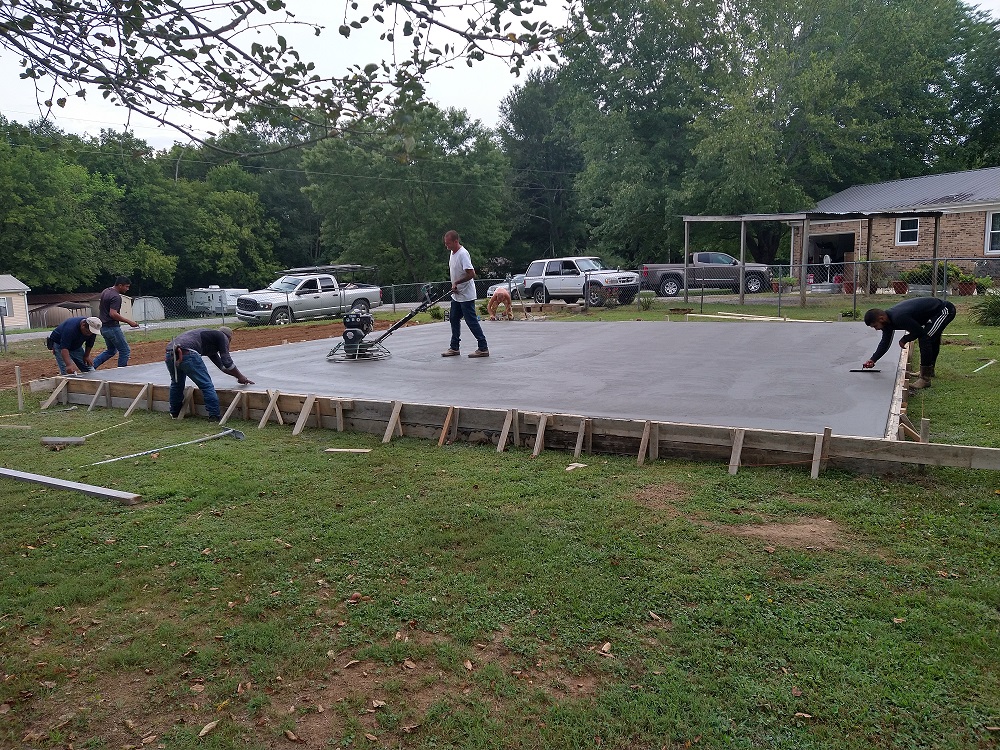
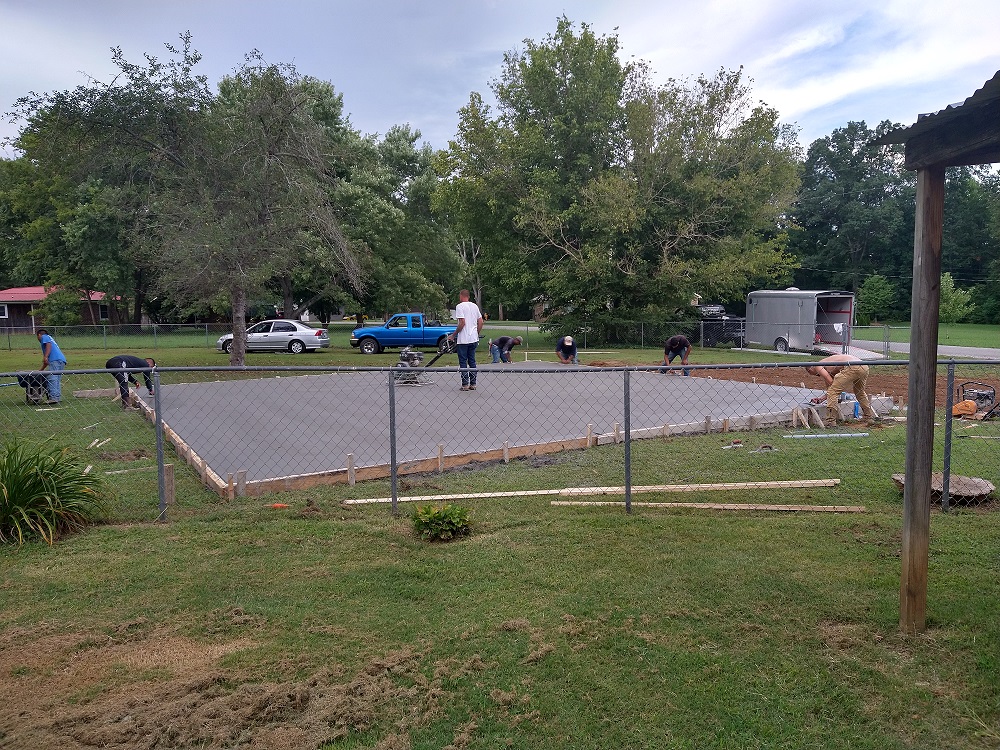
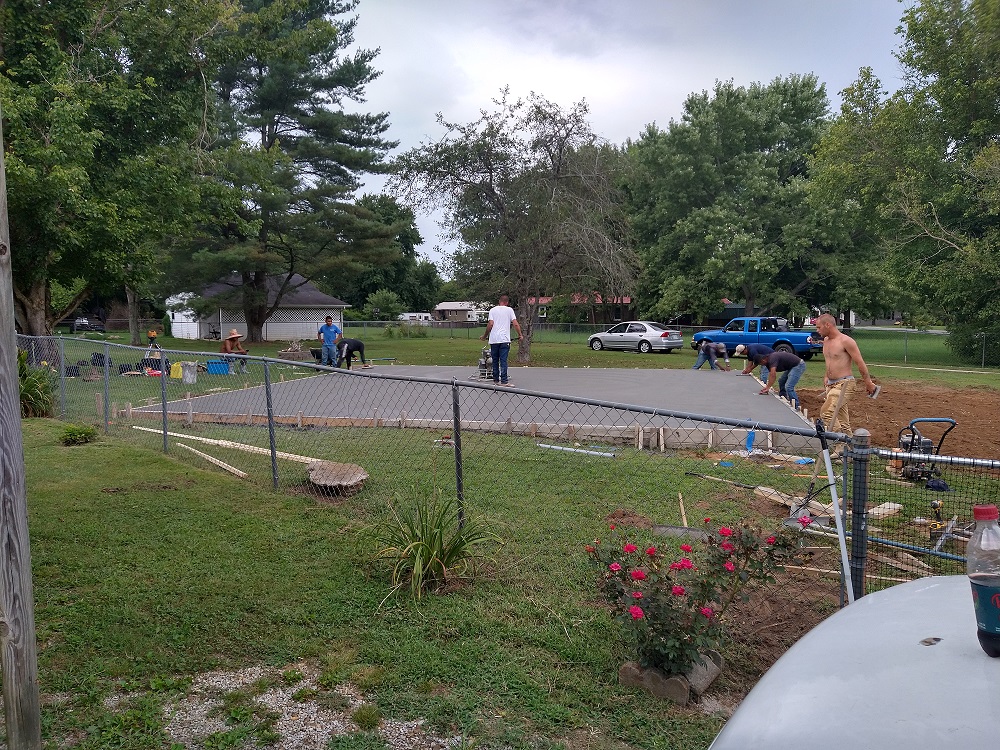

Ok it took about two weeks after the shed was gone to get them out but I felt hey did a good job and the concrete is very smooth. I can’t say much about the price here. My 24ft x 24ft garage I had built about 15 years ago at my house cost a lot less overall but the concrete work for that was $6500 and this was $11,000. Bigger pad and 15 years later and with the price of everything so high I was ok with that. They also filled in the hole left behind by the stumps and packed that dirt.
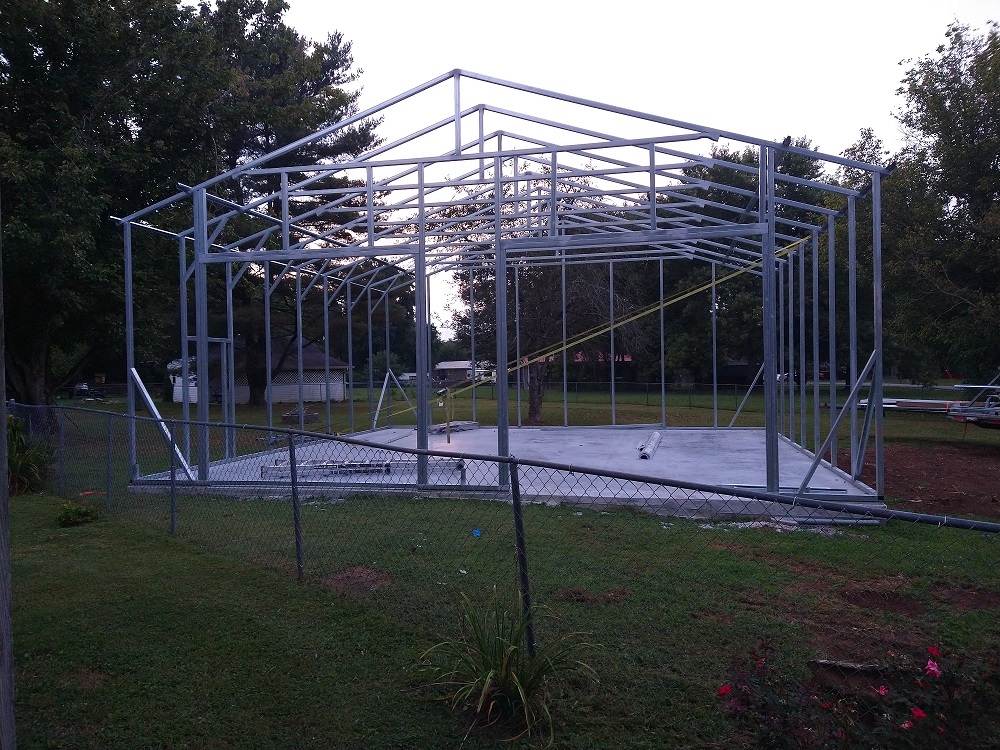
Getting the garage built Watsons metal came out and started to build the garage after about a week so the concrete could cure. Here is that going up:
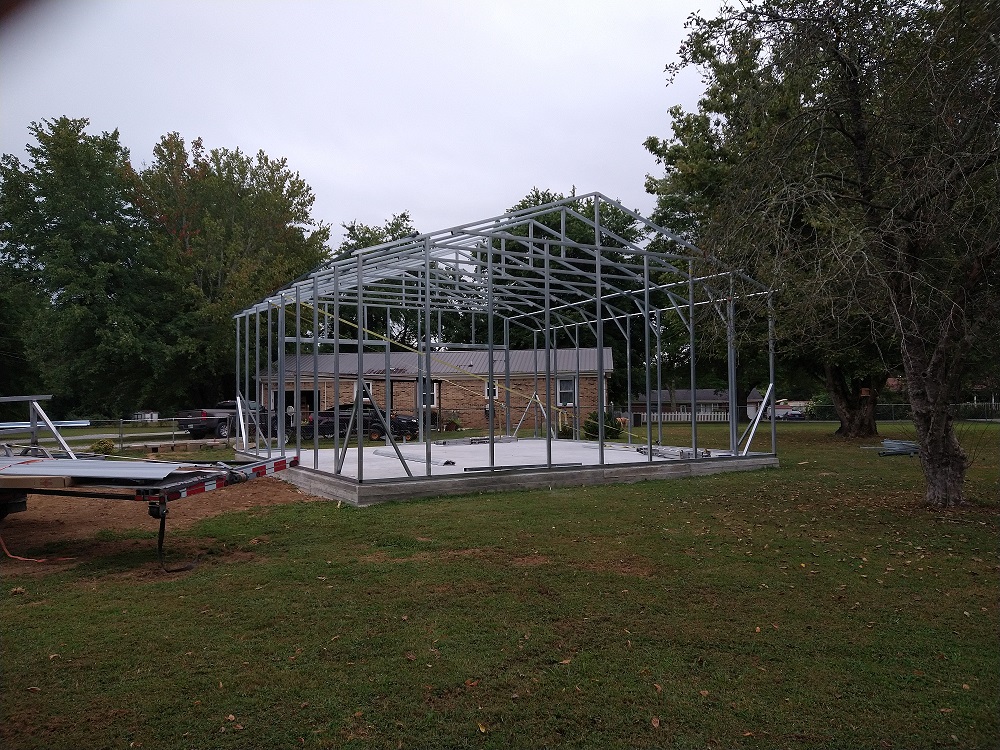


Now to get the fence fixed so Magnum aka Dorkhead still can’t get out and we can actually walk in the garage. As you can see the fence is still in front of the garage.
Here is more:
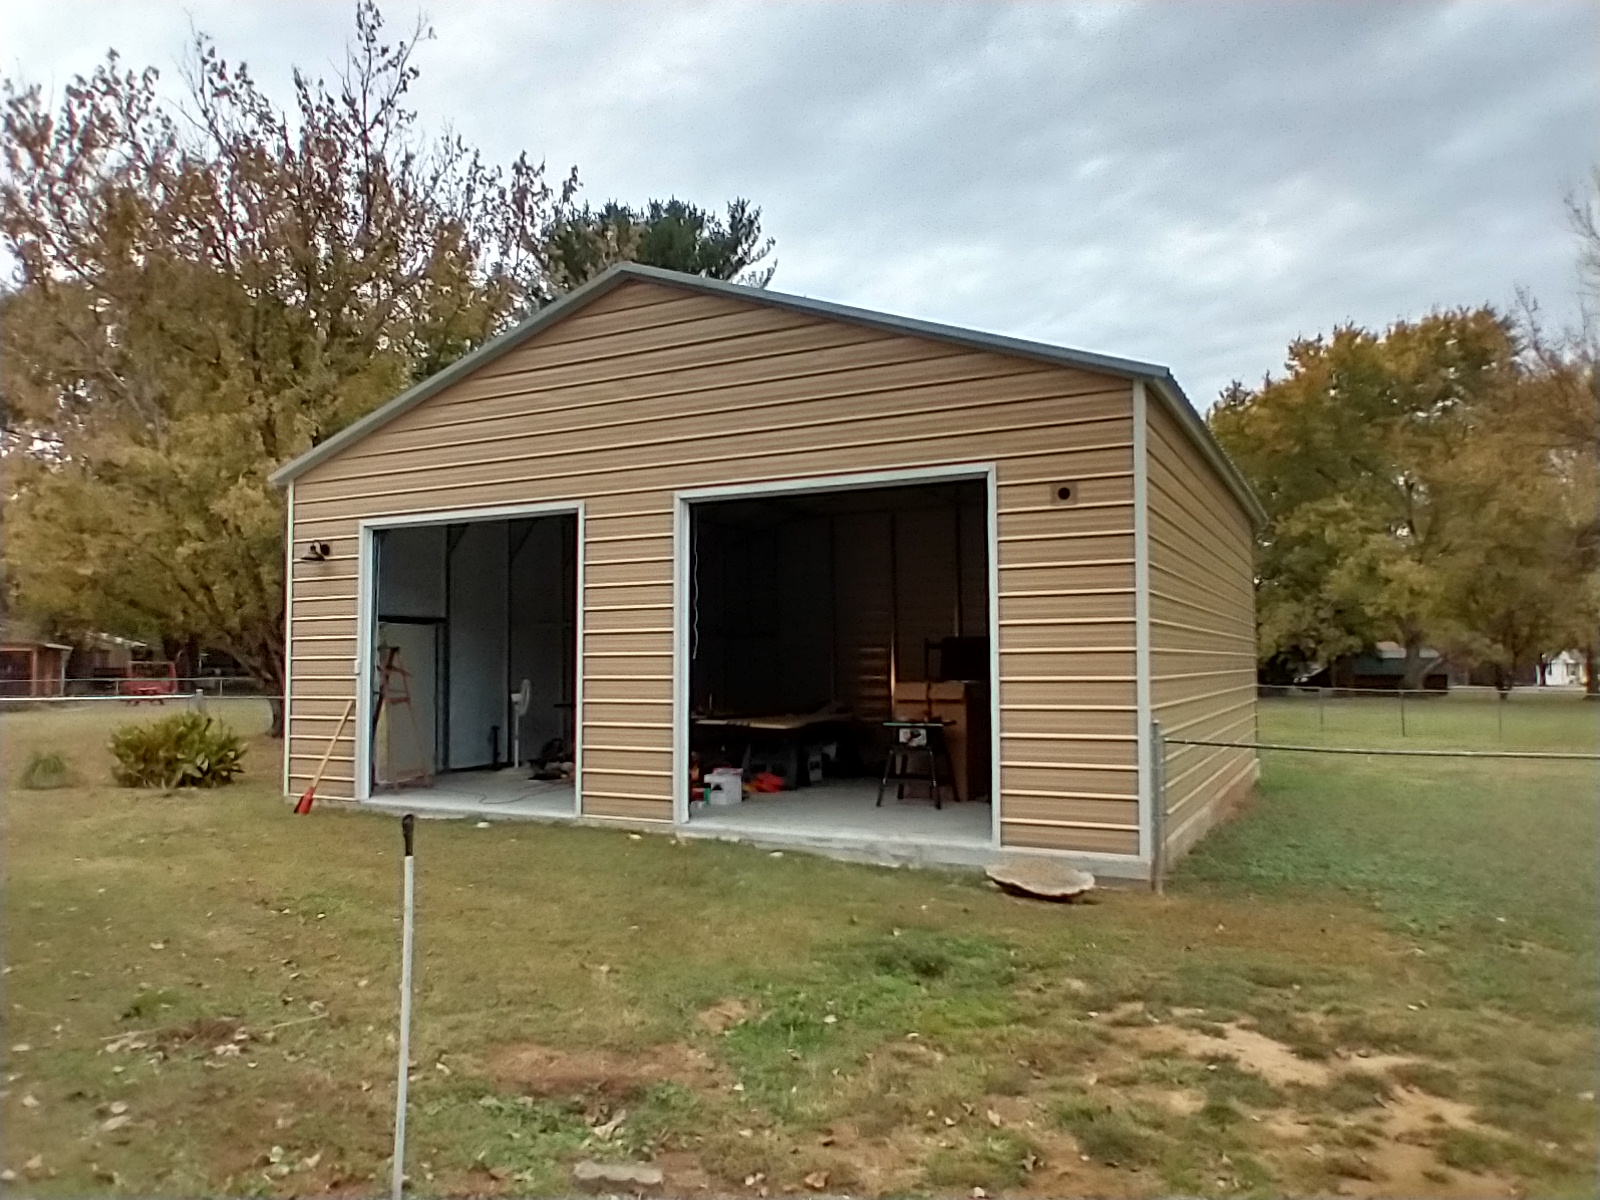
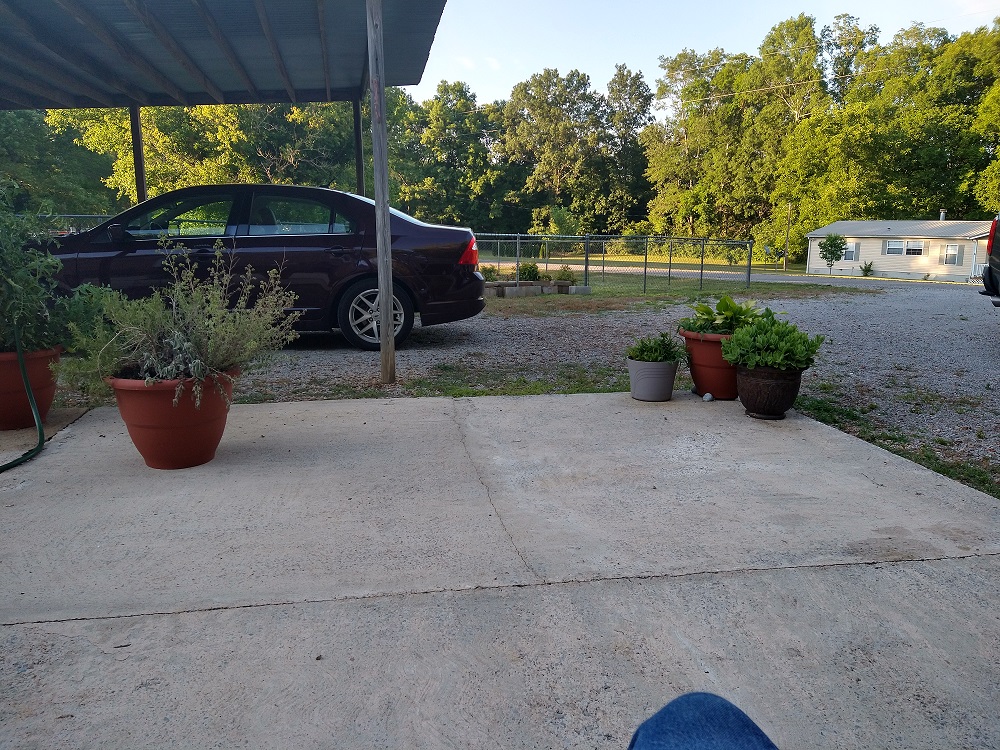
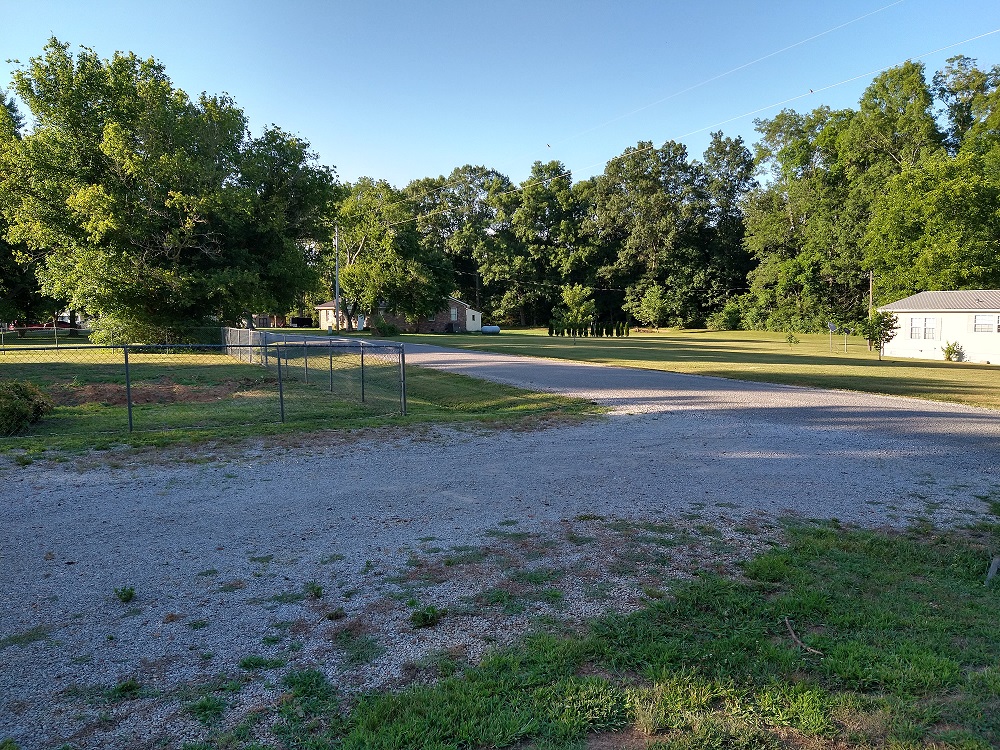
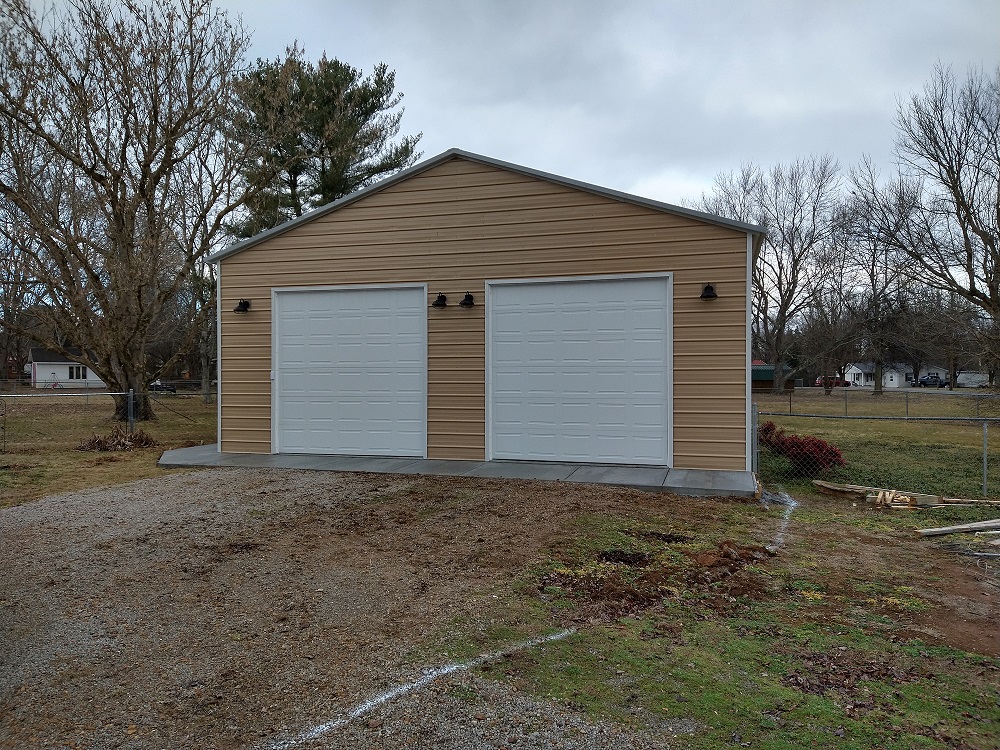
Here are some pictures of the progress as of now. We also had the old carport removed no pictures of that. Some gravel moved to meet up with the garage. Oh…….the apron is not done yet in the above pictures. That took 2 months for the guy to come finish this Melina and I were getting very upset at this. But he finally did and really did a good job as you can see in the below pictures. I also have gotten the 4 front lights on I also got the plants put on the sides. Here is pics on that where we are at.


Things still left to do:
- Power from the house
- Power plugs and wiring inside the garage
- More cleanup around the garage
- Planning on some bird feeders and houses on the left side
- Plants on the front in planters
More to come…………..
Here is the newer engine that will be going into the old truck. It does not look like much now, but I will in a separate post on the build up of this engine, as best I can.
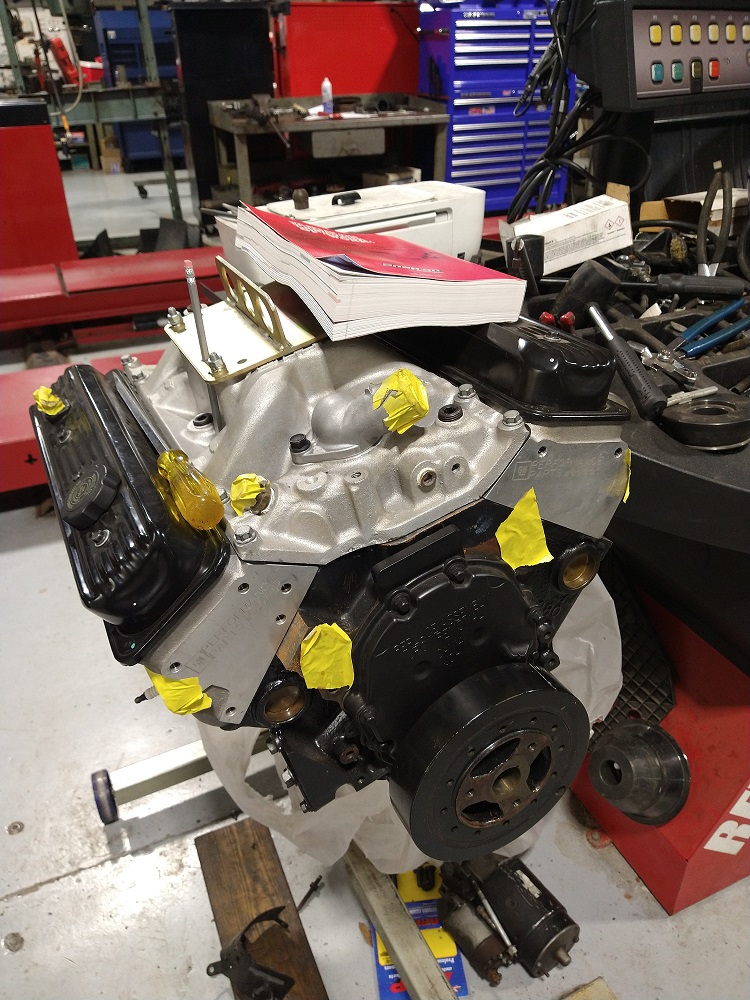
Brakes Saga
Ok…..this is to document my work on the brakes of this truck. At first I was going to redo the original drum brake setup. But, then decided to go to a modern disc brakes setup.
Part One: I have also started the process of overhauling the brakes. This truck has drums all the way around. They work and are safe…..but even on a good day they are not Disc brakes as modern cars and trucks have are better. I will be switching to discs all the way around at a later date.
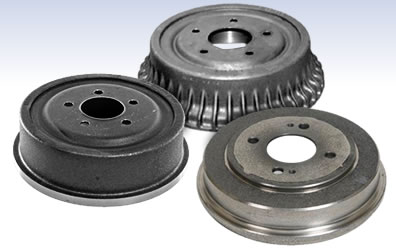
I found some damage on the rear brakes while I was inspecting them to see what size my truck had. Chevy trucks in 1969 had two size brake drums. 11″ x 2″ in and 11 5/32″ X 2 3/4″, the later on heavy duty trucks…..mine is not.
Not a big different but the parts do not interchange. So I found out mine has the smaller size 11″ x 2″. That 11 inches around and 2 inches wide brake shoes.
This is what my truck has:
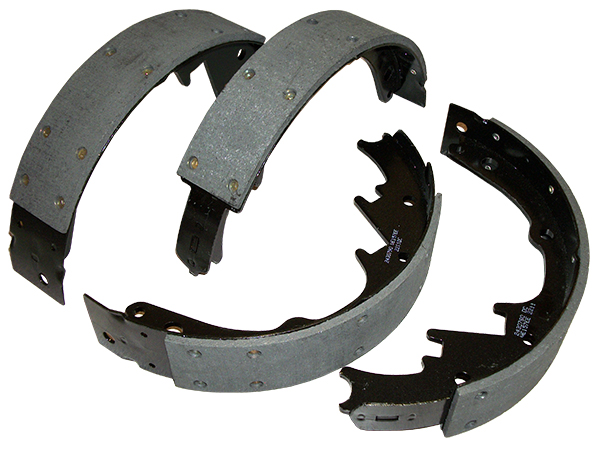

This last picture is all the parts together on the truck.Not mine but this is what it is supposed to look like with the drum off.
Not hard to understand….the little cylinder in the middle pushes the shoes out and they contact the drum. The pressure you apply at the brake pedal makes the shoes push out harder and more and more friction is applied and slows the wheel down. Springs release the pressure as you let off of the brake pedal. Worked for a lot of years.
Right now all of this mechanical stuff is bolted to a backing plate. One of mine is damaged by the previous owner…will post picture tomorrow….and dirt and junk got into all the springs, shoes and well everything. So, I have spent the last month trying to find a new one….oh wait they don’t make them anymore. Well, they do its just difficult to find one. There is no part number on the original and I am not sure what newer car or truck will interchange with mine. But, I found a guy in East Tennessee that had some for a truck and I got them. They are NOT new as you can see below.
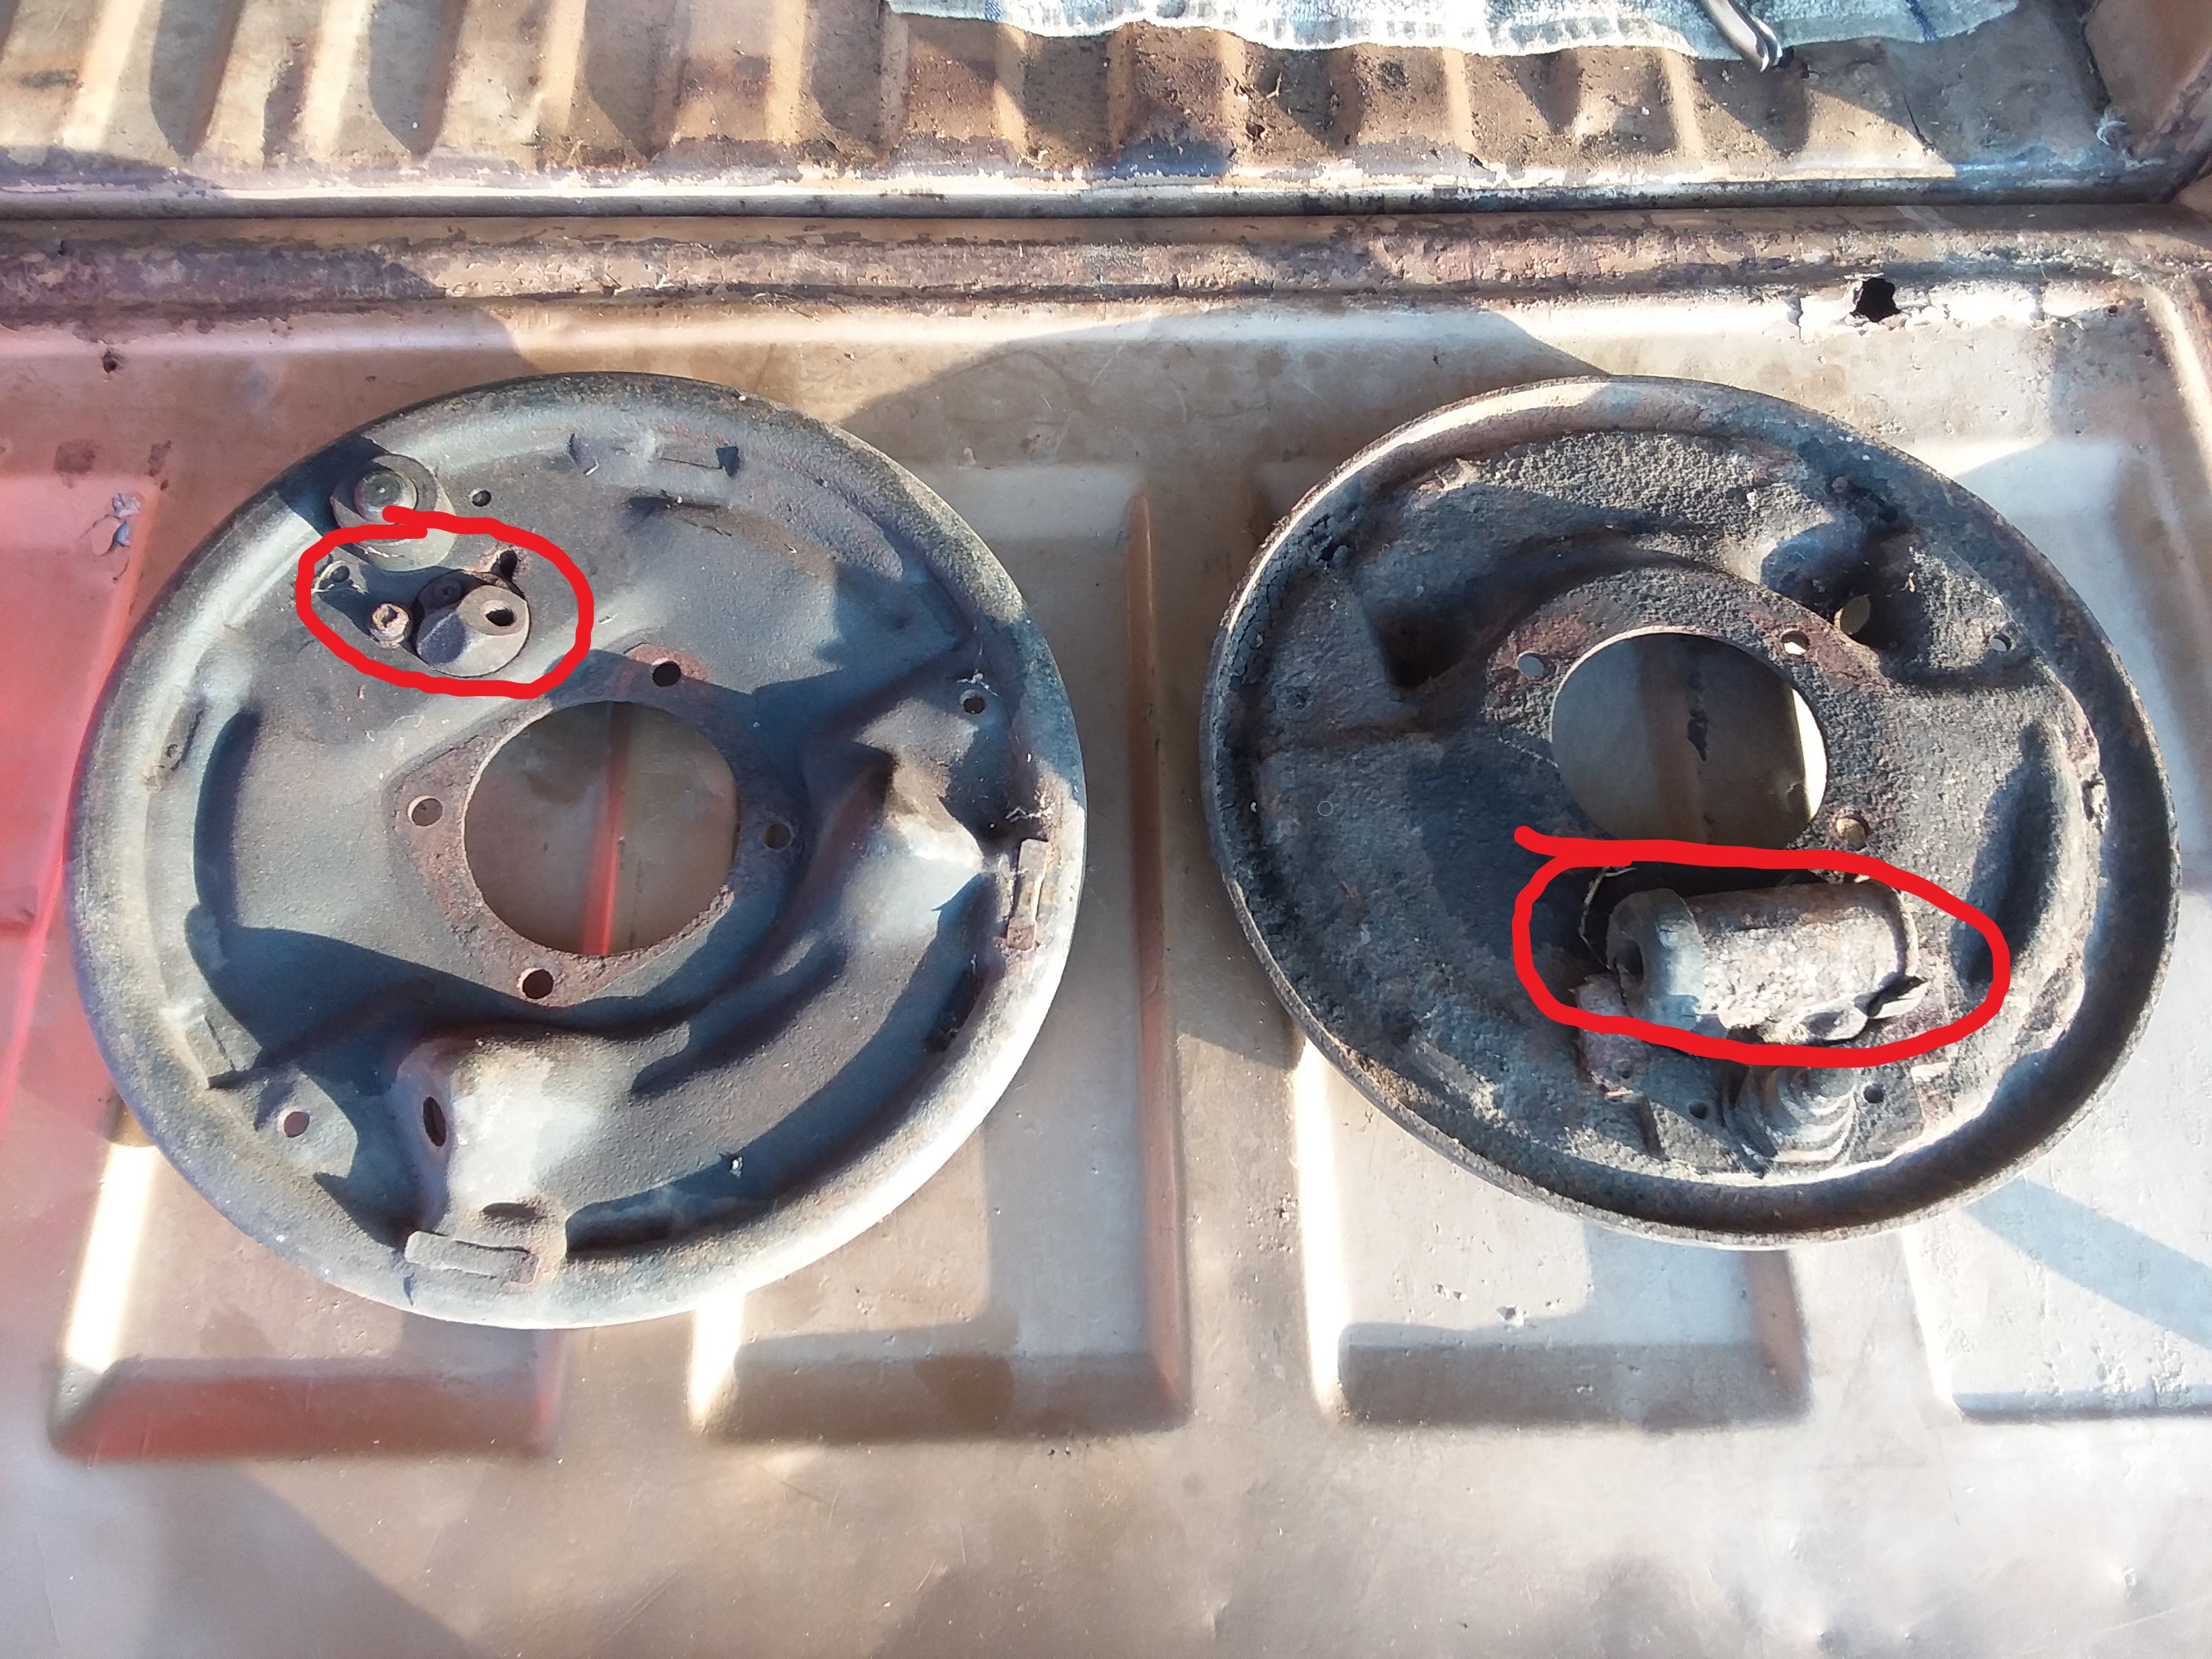
Had to drill out the bolts for the old brake cylinders (circled), to get them removed. But just wait until they get media-blasted and repainted. They will look 100 times better.
Here is my damaged one :
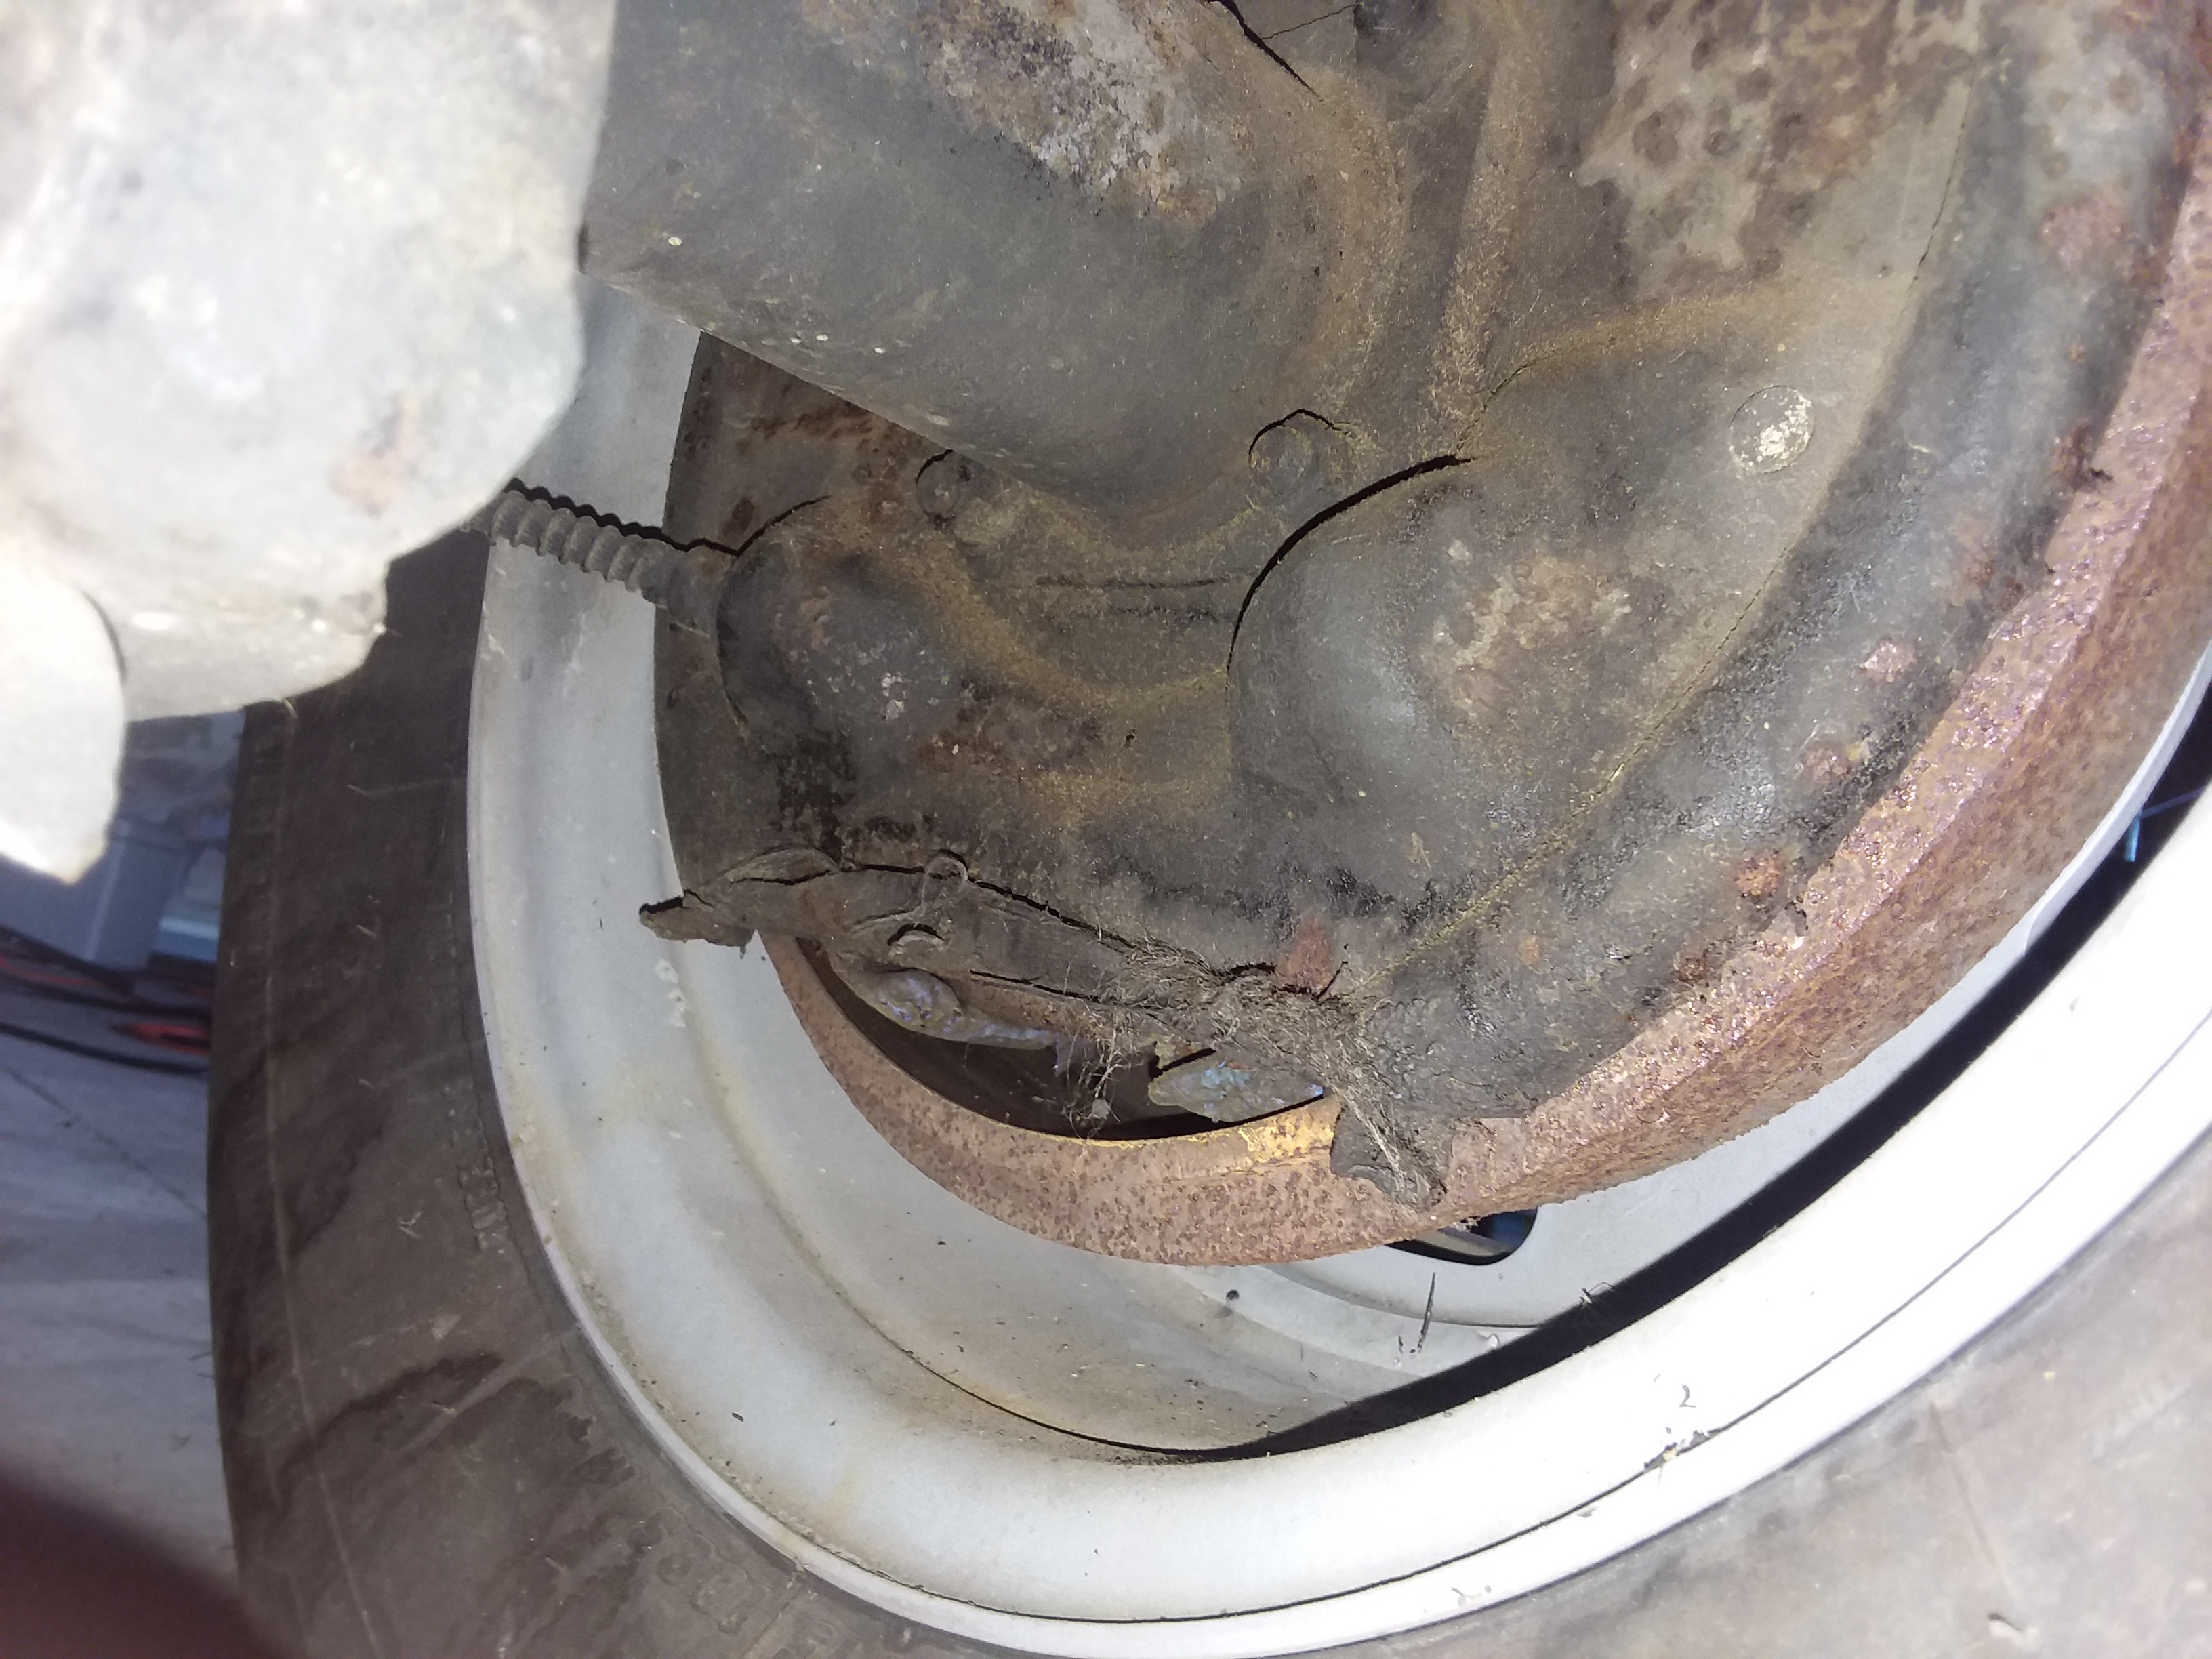
So that is why I needed to replace it. Dirt water and junk is getting in. The brakes on this wheel are shot. I will be able to limp it to the school and they are going to redo the brakes for me. The instructor wants to have to students experience “Old School Stuff”. I will be putting on the new disc brake setup later on when the complete restore starts. It will be a major difference.
I think the previous owner had the truck up on a jack and it fell off, that is how this got bent. But, it could have been anything and it MUST be fixed so the replacements will do that. I will be replacing all the brakes hardware, springs and brake lines. Its all pretty inexpensive to replace for these old trucks. Going down to Napa auto parts and getting all of it. I am sure the brakes will feel a ton better.
I have the new brake backing plates(to replace this damaged one) sand blasted and painted. They look great and will post a pic soon.
Trying to source all new wheel bearing and its taking awhile. Looking for American made….difficult.
After inspecting all the drum brakes at all four corners I found, they were barely working. The rear was not even working at all and the front had dirt, grease and junk packed in. All that is gone and I have decided to scrap redoing the drums.
Part Two:
UPDATE!!!
Well….decided to go a different direction with the brakes. I will be posting some pictures tomorrow. I am changing over to have disc brakes all the way around. I have the rear brakes almost done and just ordered a lot of the parts for the front. Large project but I think will be worth it.
Well…I am still working on the brakes. The worlds environment with Covid has set me back. Work has been extremely busy and I have not had much time. I am working on the brakes and will have an complete update on that soon.
Here is one of the rear brake system that is done, actually it will be a before and after. This is the drivers side as it looks now.
Here is the before (Original Drum Brakes) not working as I could not get brake fluid thru when I tried to bleed the line. I will have to get new brake lines and there is junk probably in it.
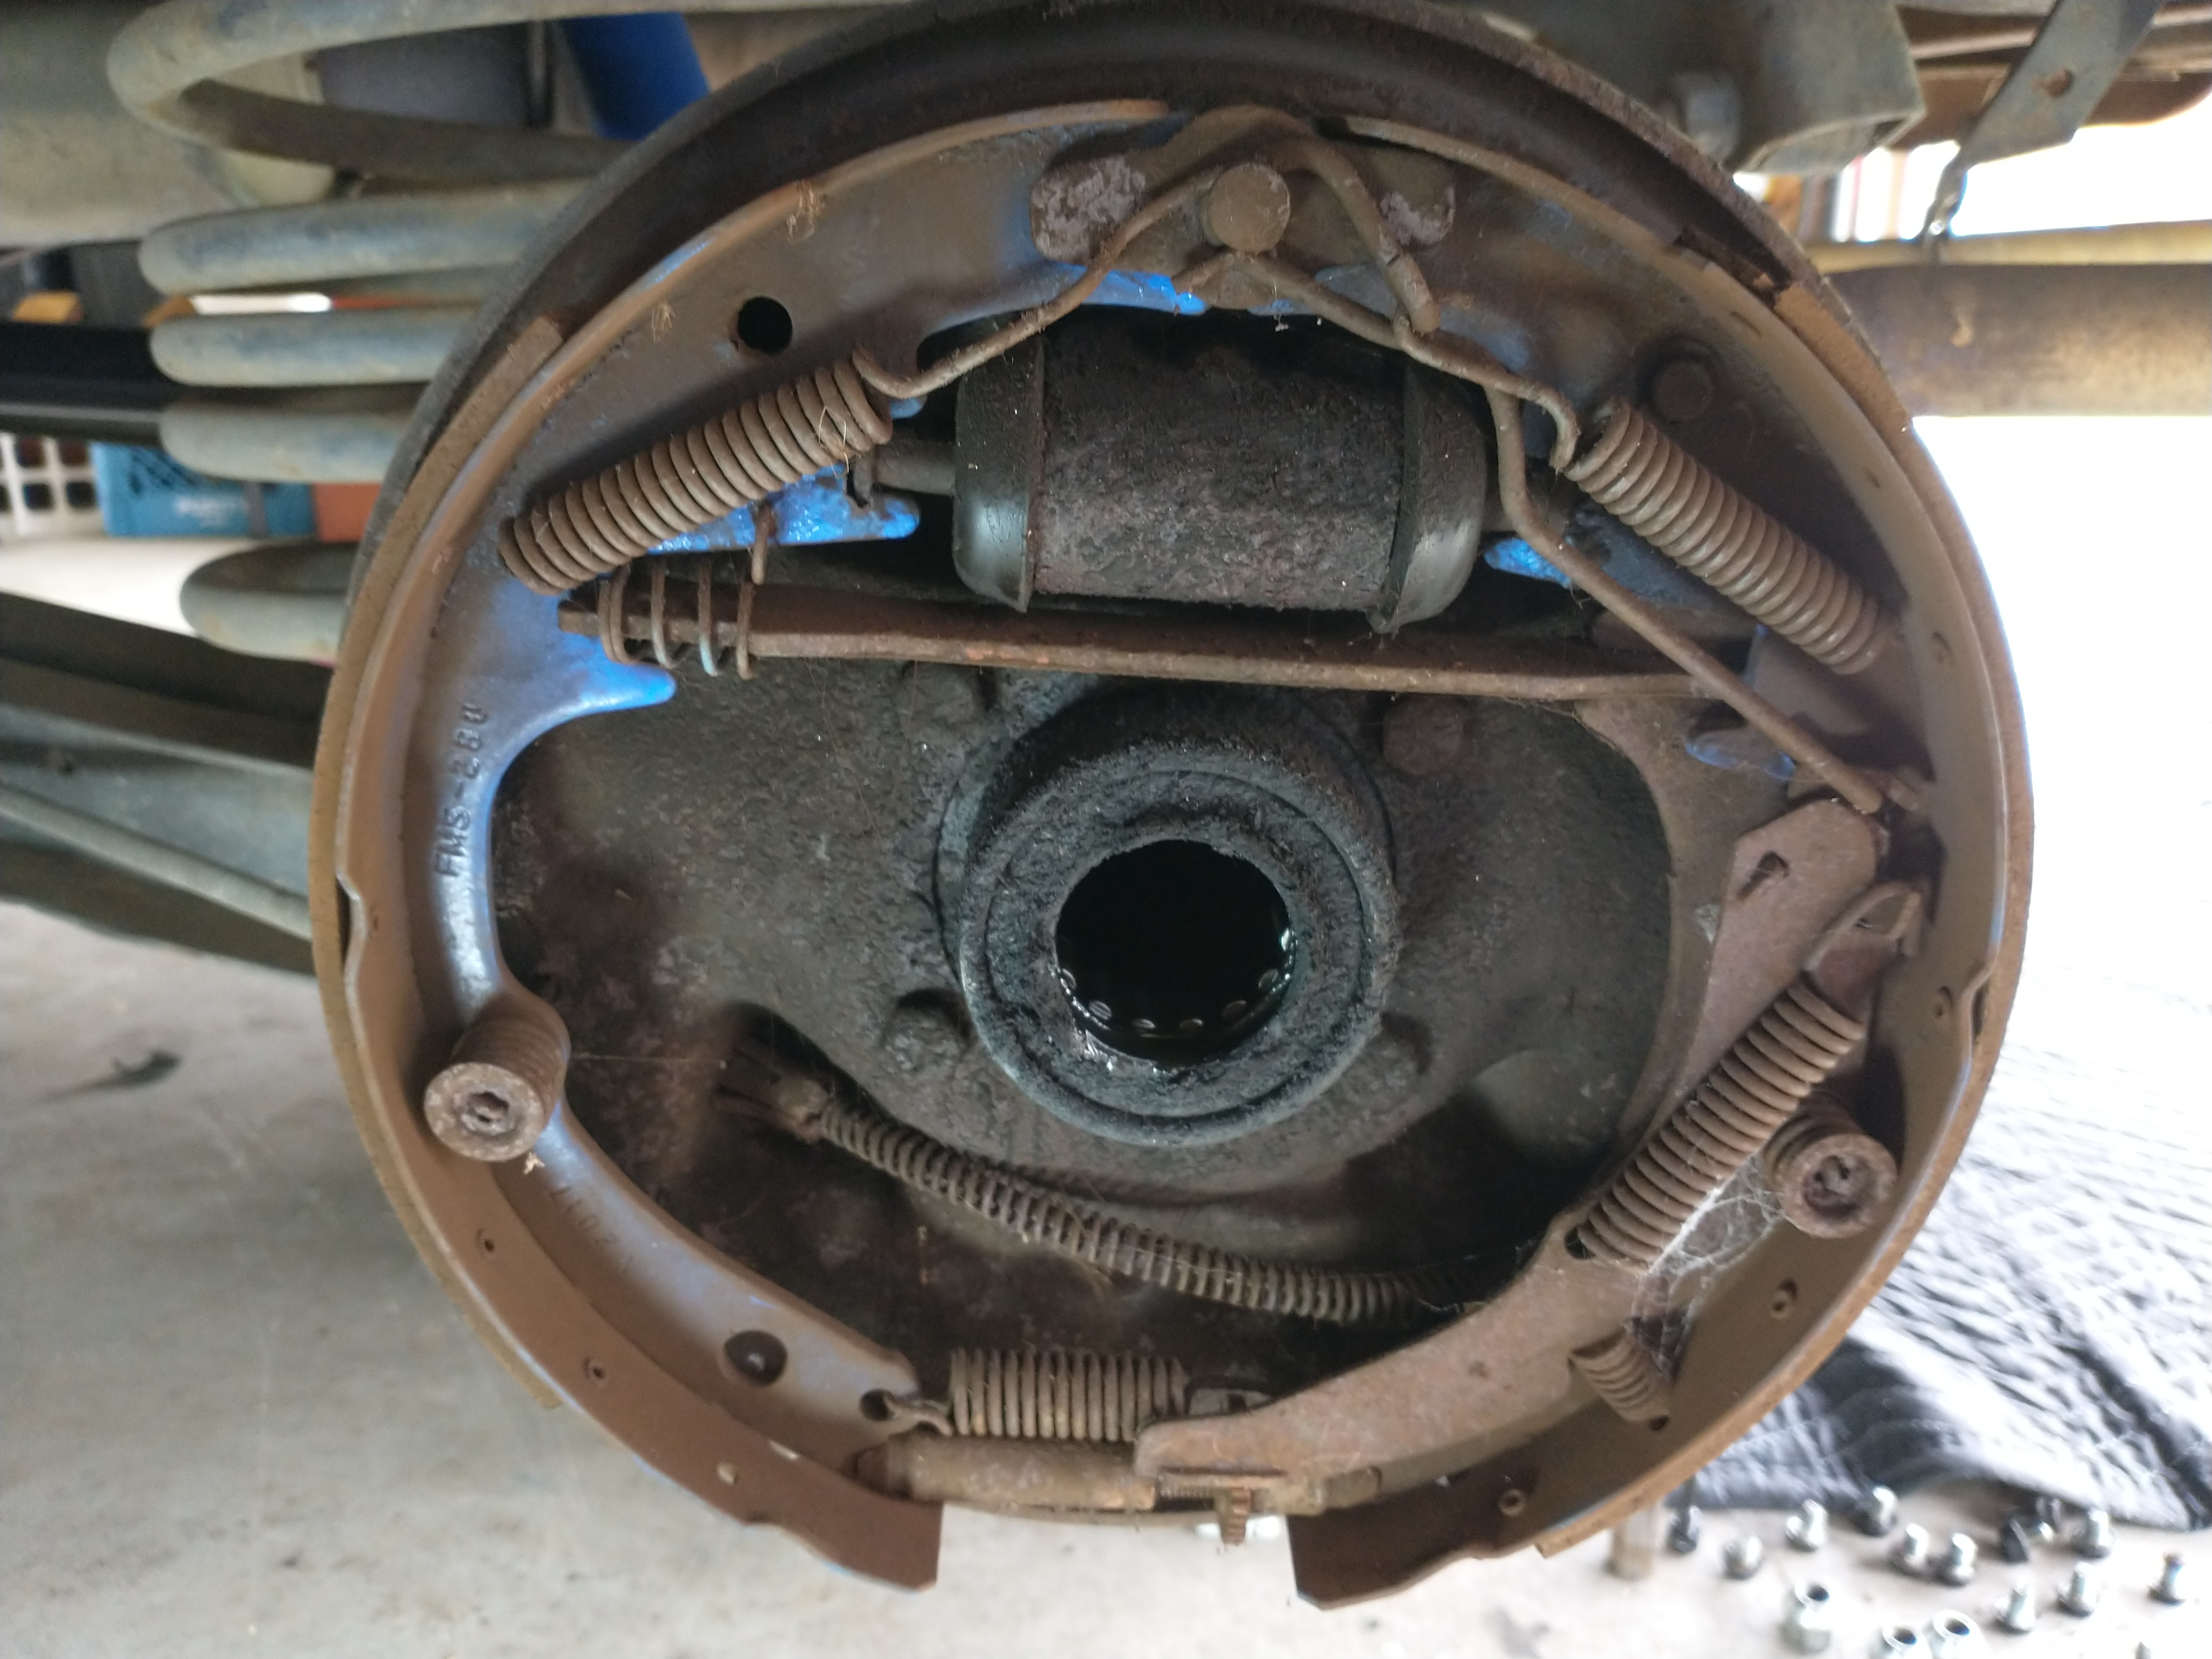
I have re-done the passenger side, when I was going to use the drum brakes. All this has been taken off for the disc brake kit. But. here it is.
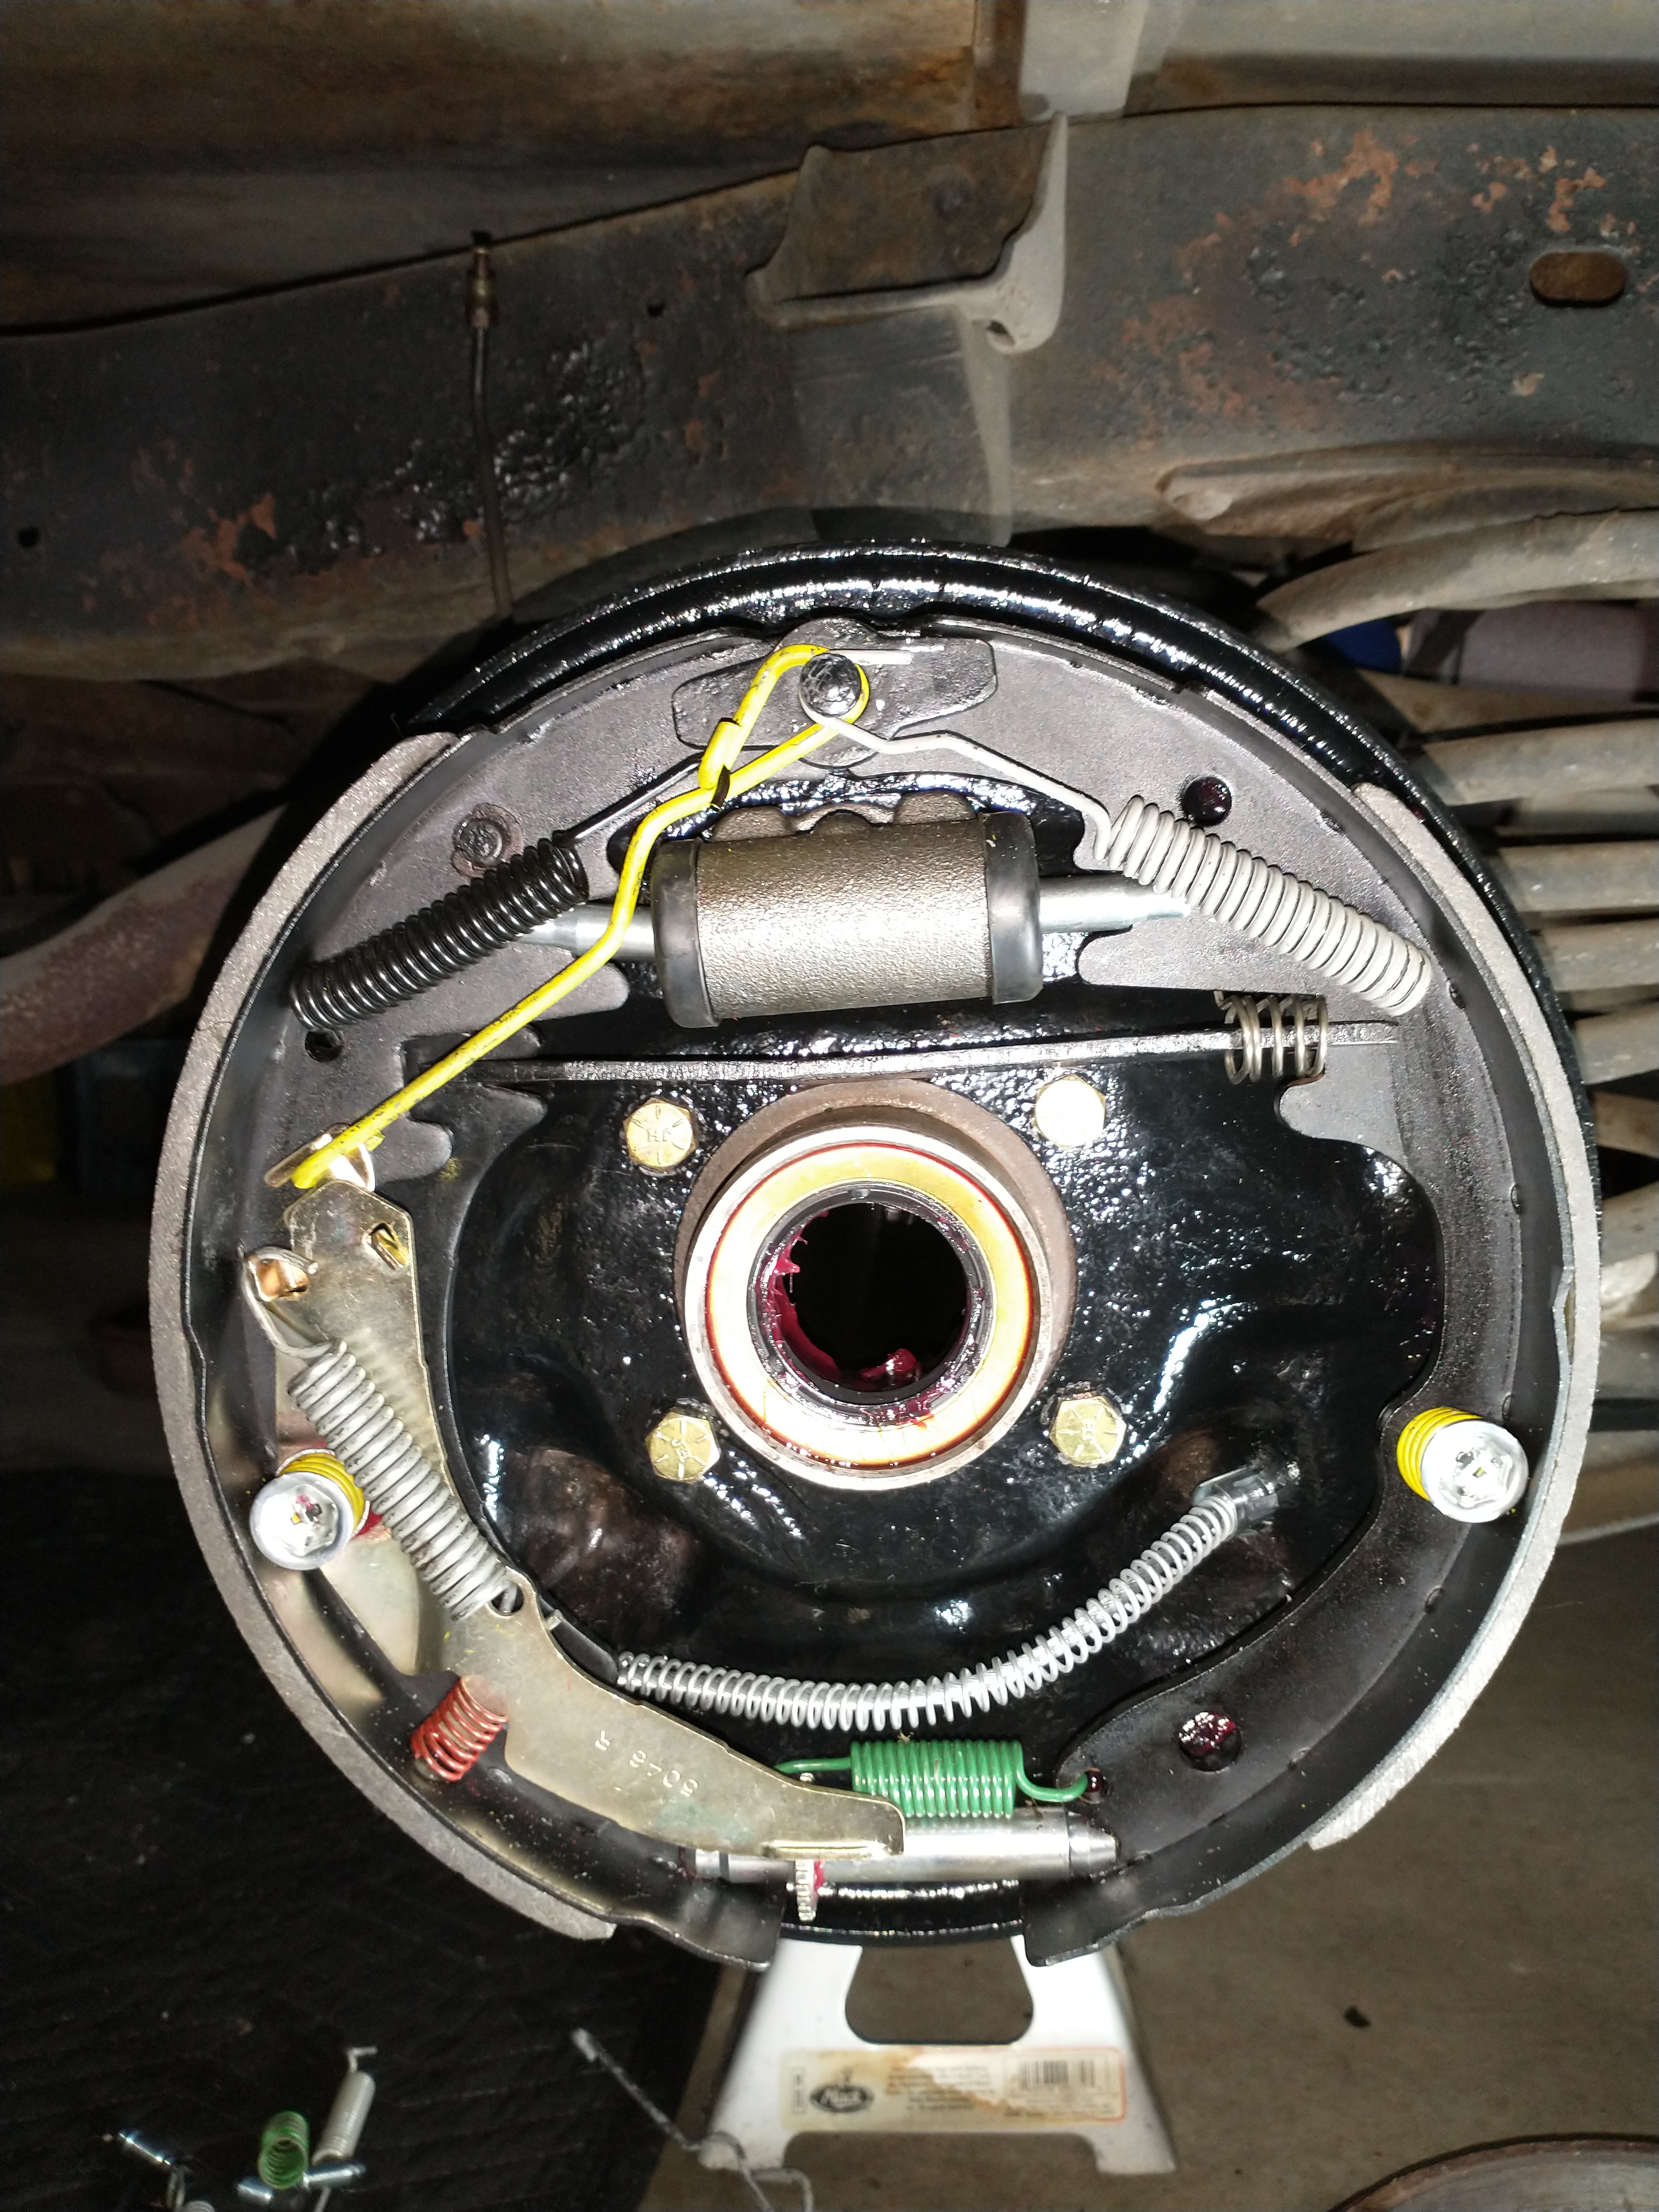
New Shoes-Spring Kit – wheel cylinder – everything is new plus new bearing seal and grease (red stuff). Its not fun but the brake were shot all the way around with these rears being the worst.
As I said…….Change of plans (forget what I did above…lol Disc brakes!
Okay…..as I said I have changed plans, and you will see the difference in the pictures. So I decide to go ahead and change the brakes over to modern disc’s. Same as most modern cars are. Luckily, the aftermarket support has provided disc brakes for the rear (which was not a factory option back in 1969). So there is no provision to install disc brakes. Here are the before and after and the kit I used.
Ok so the pictures above are Drum Brakes original to the truck and what most all cars of the era had. I decided to use a CPP rear disc brake kit, which is using a newer GM caliper used on a Cadillac Seville on the rear.
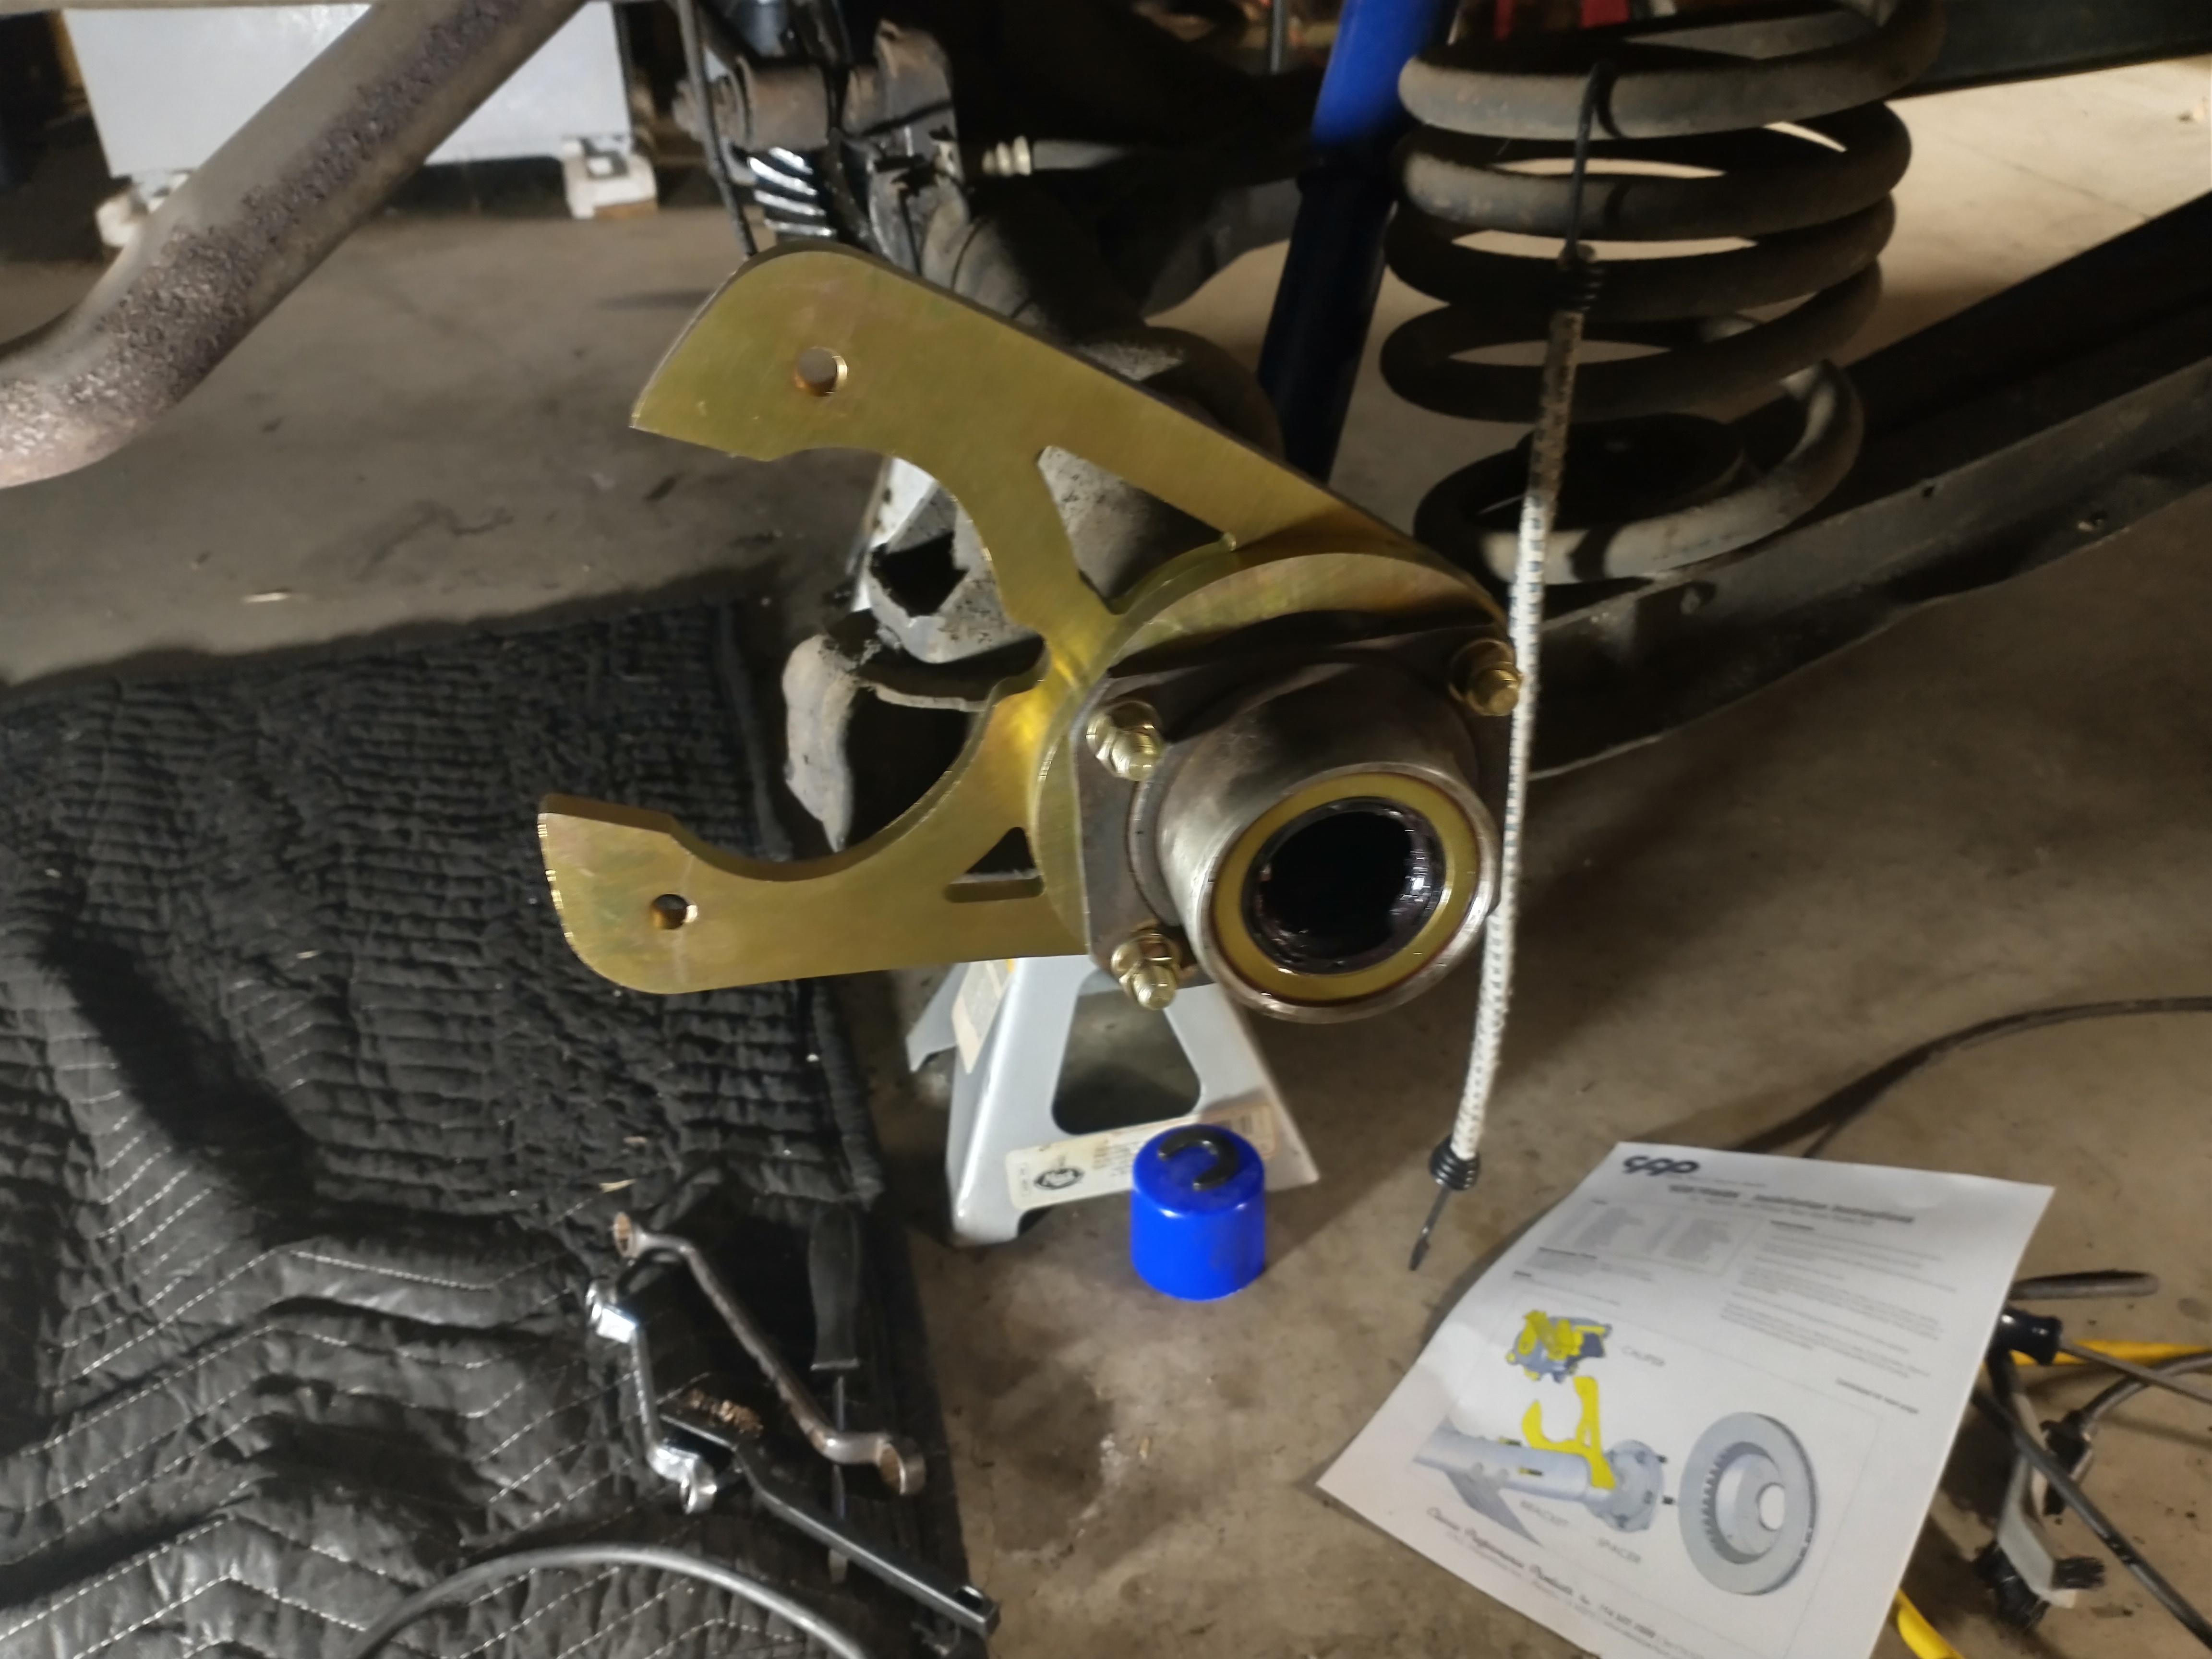
Here is the rear axle with the new disc brake caliper bracket installed
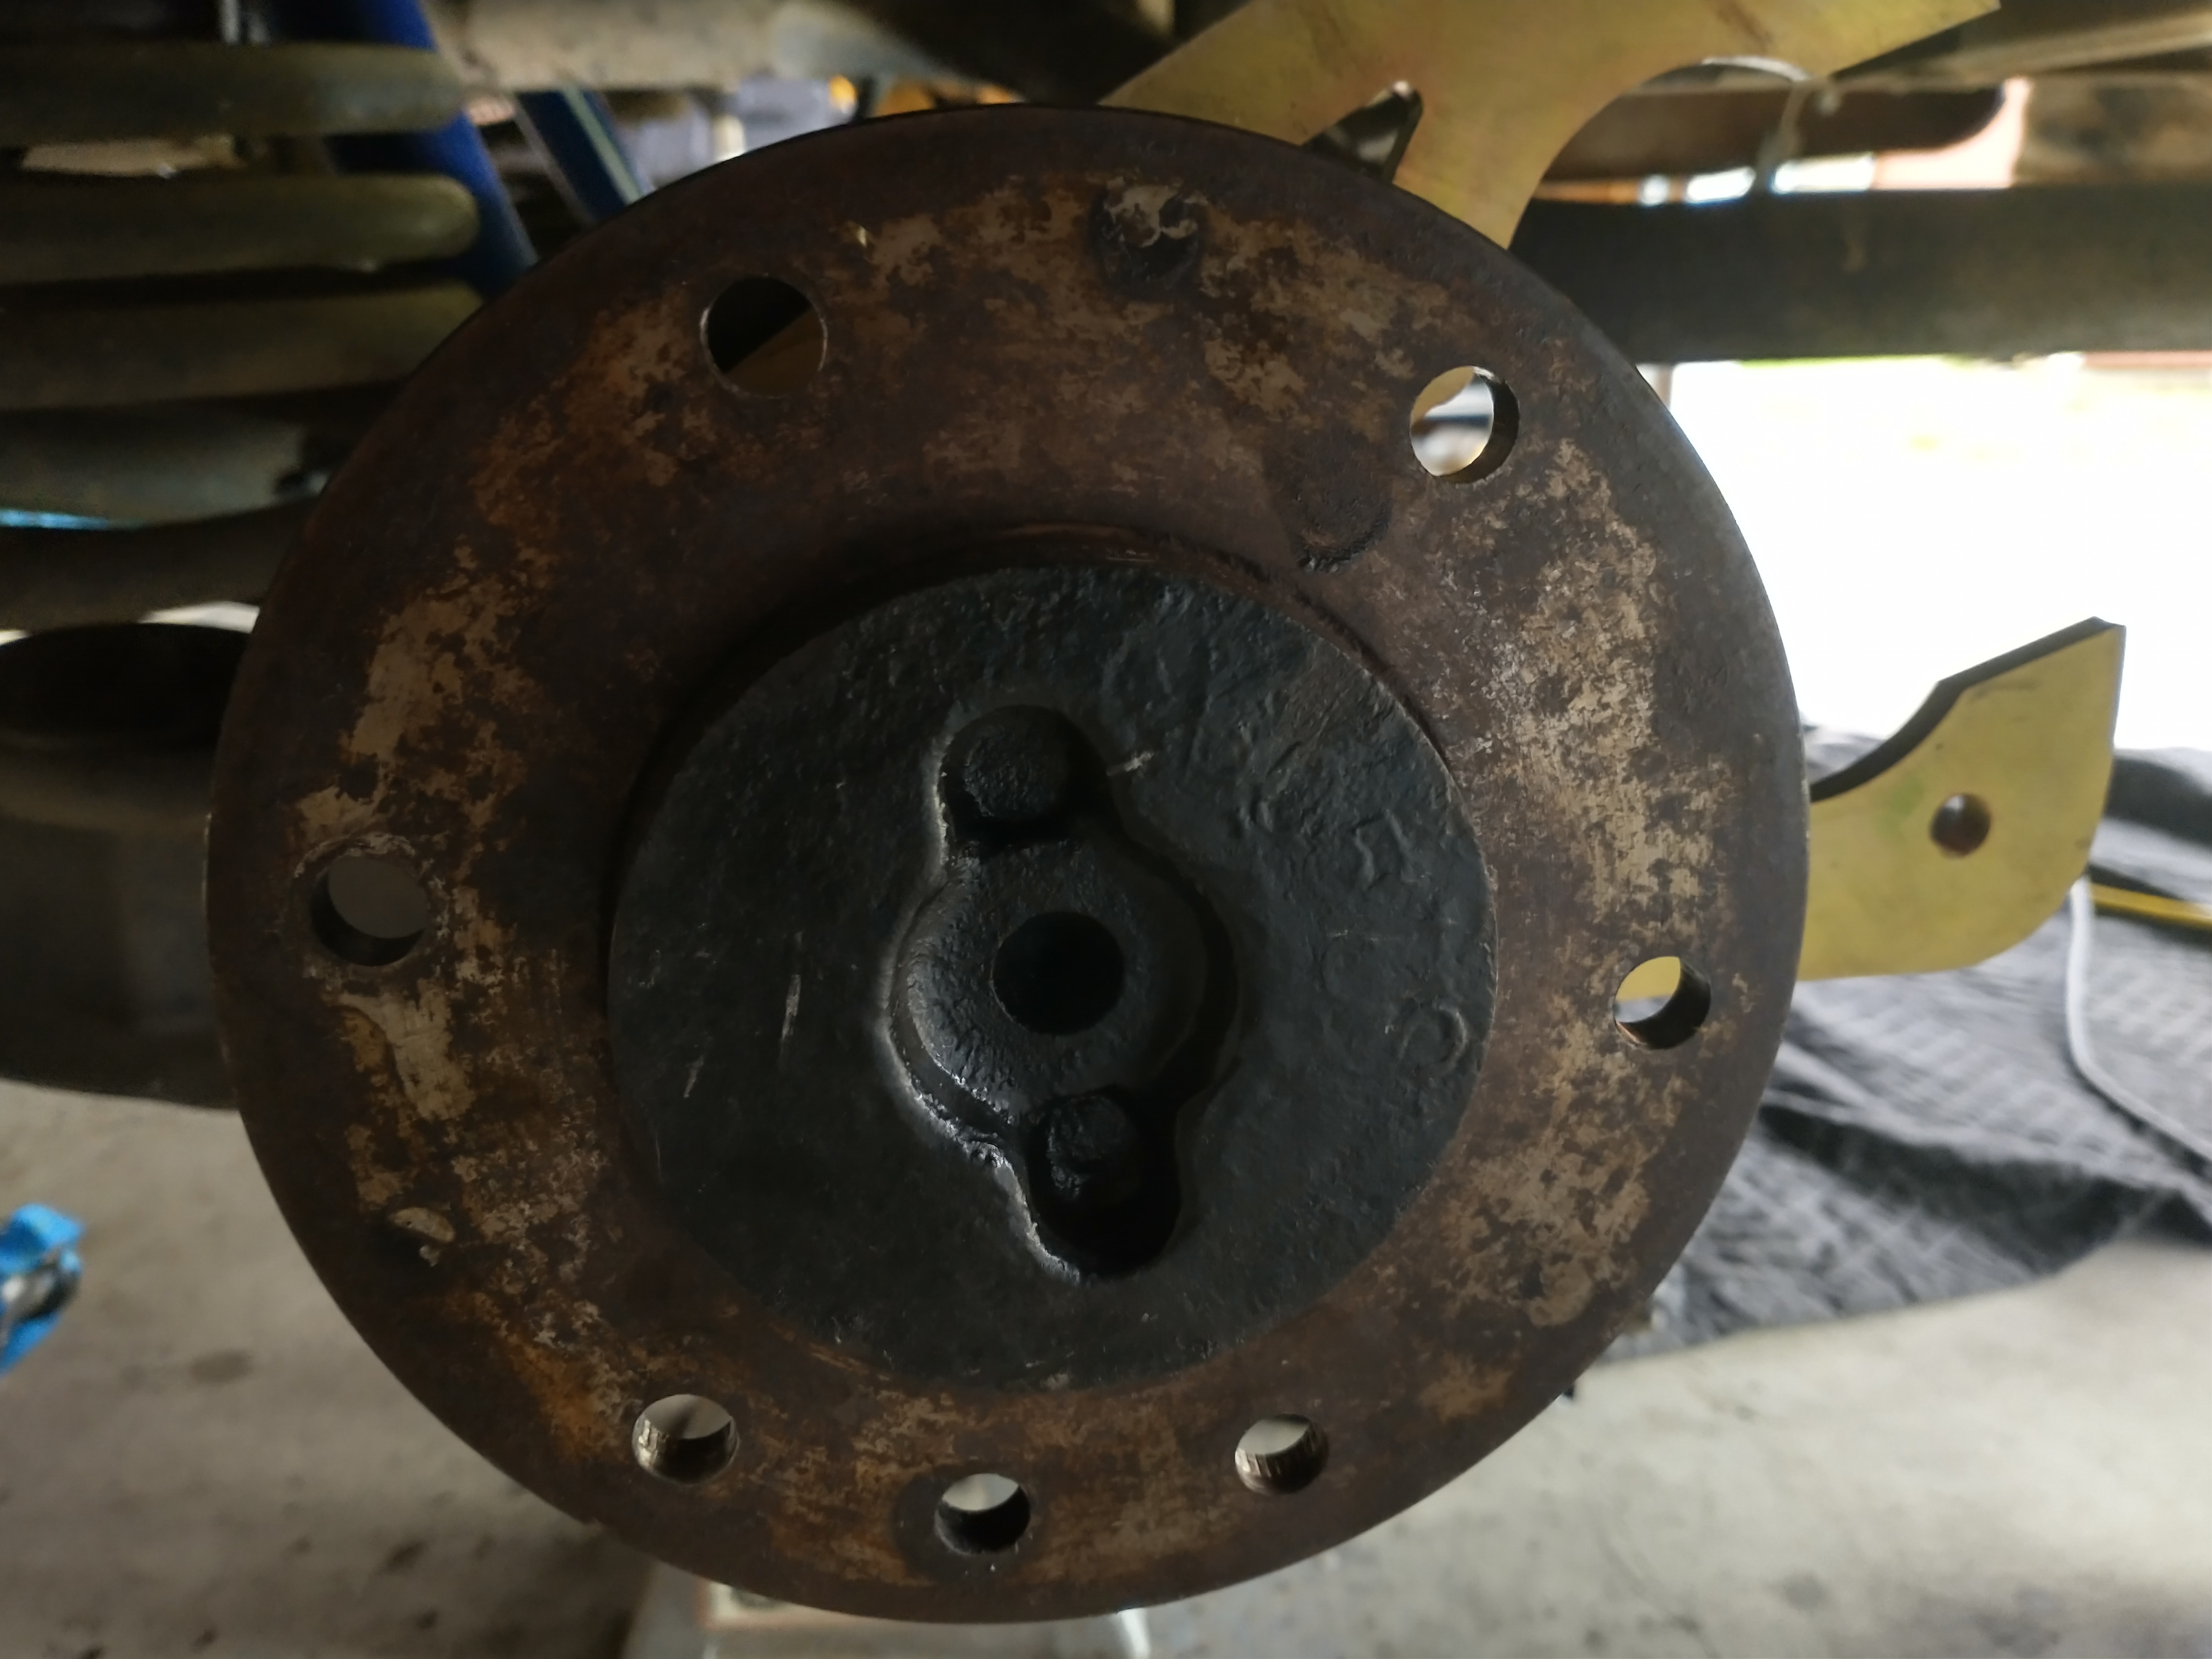
Here with all the drum brake stuff removed and I have cleaned off the end of the axle housing. Spacer and bracket are installed. This is what the caliper will be mounted too. You must have the bracket facing, lack of a better word…to the rear of the truck, this will let you place the caliper in the right orientation.
Note the thing that is further back in the picture…gears………more on that in a moment.
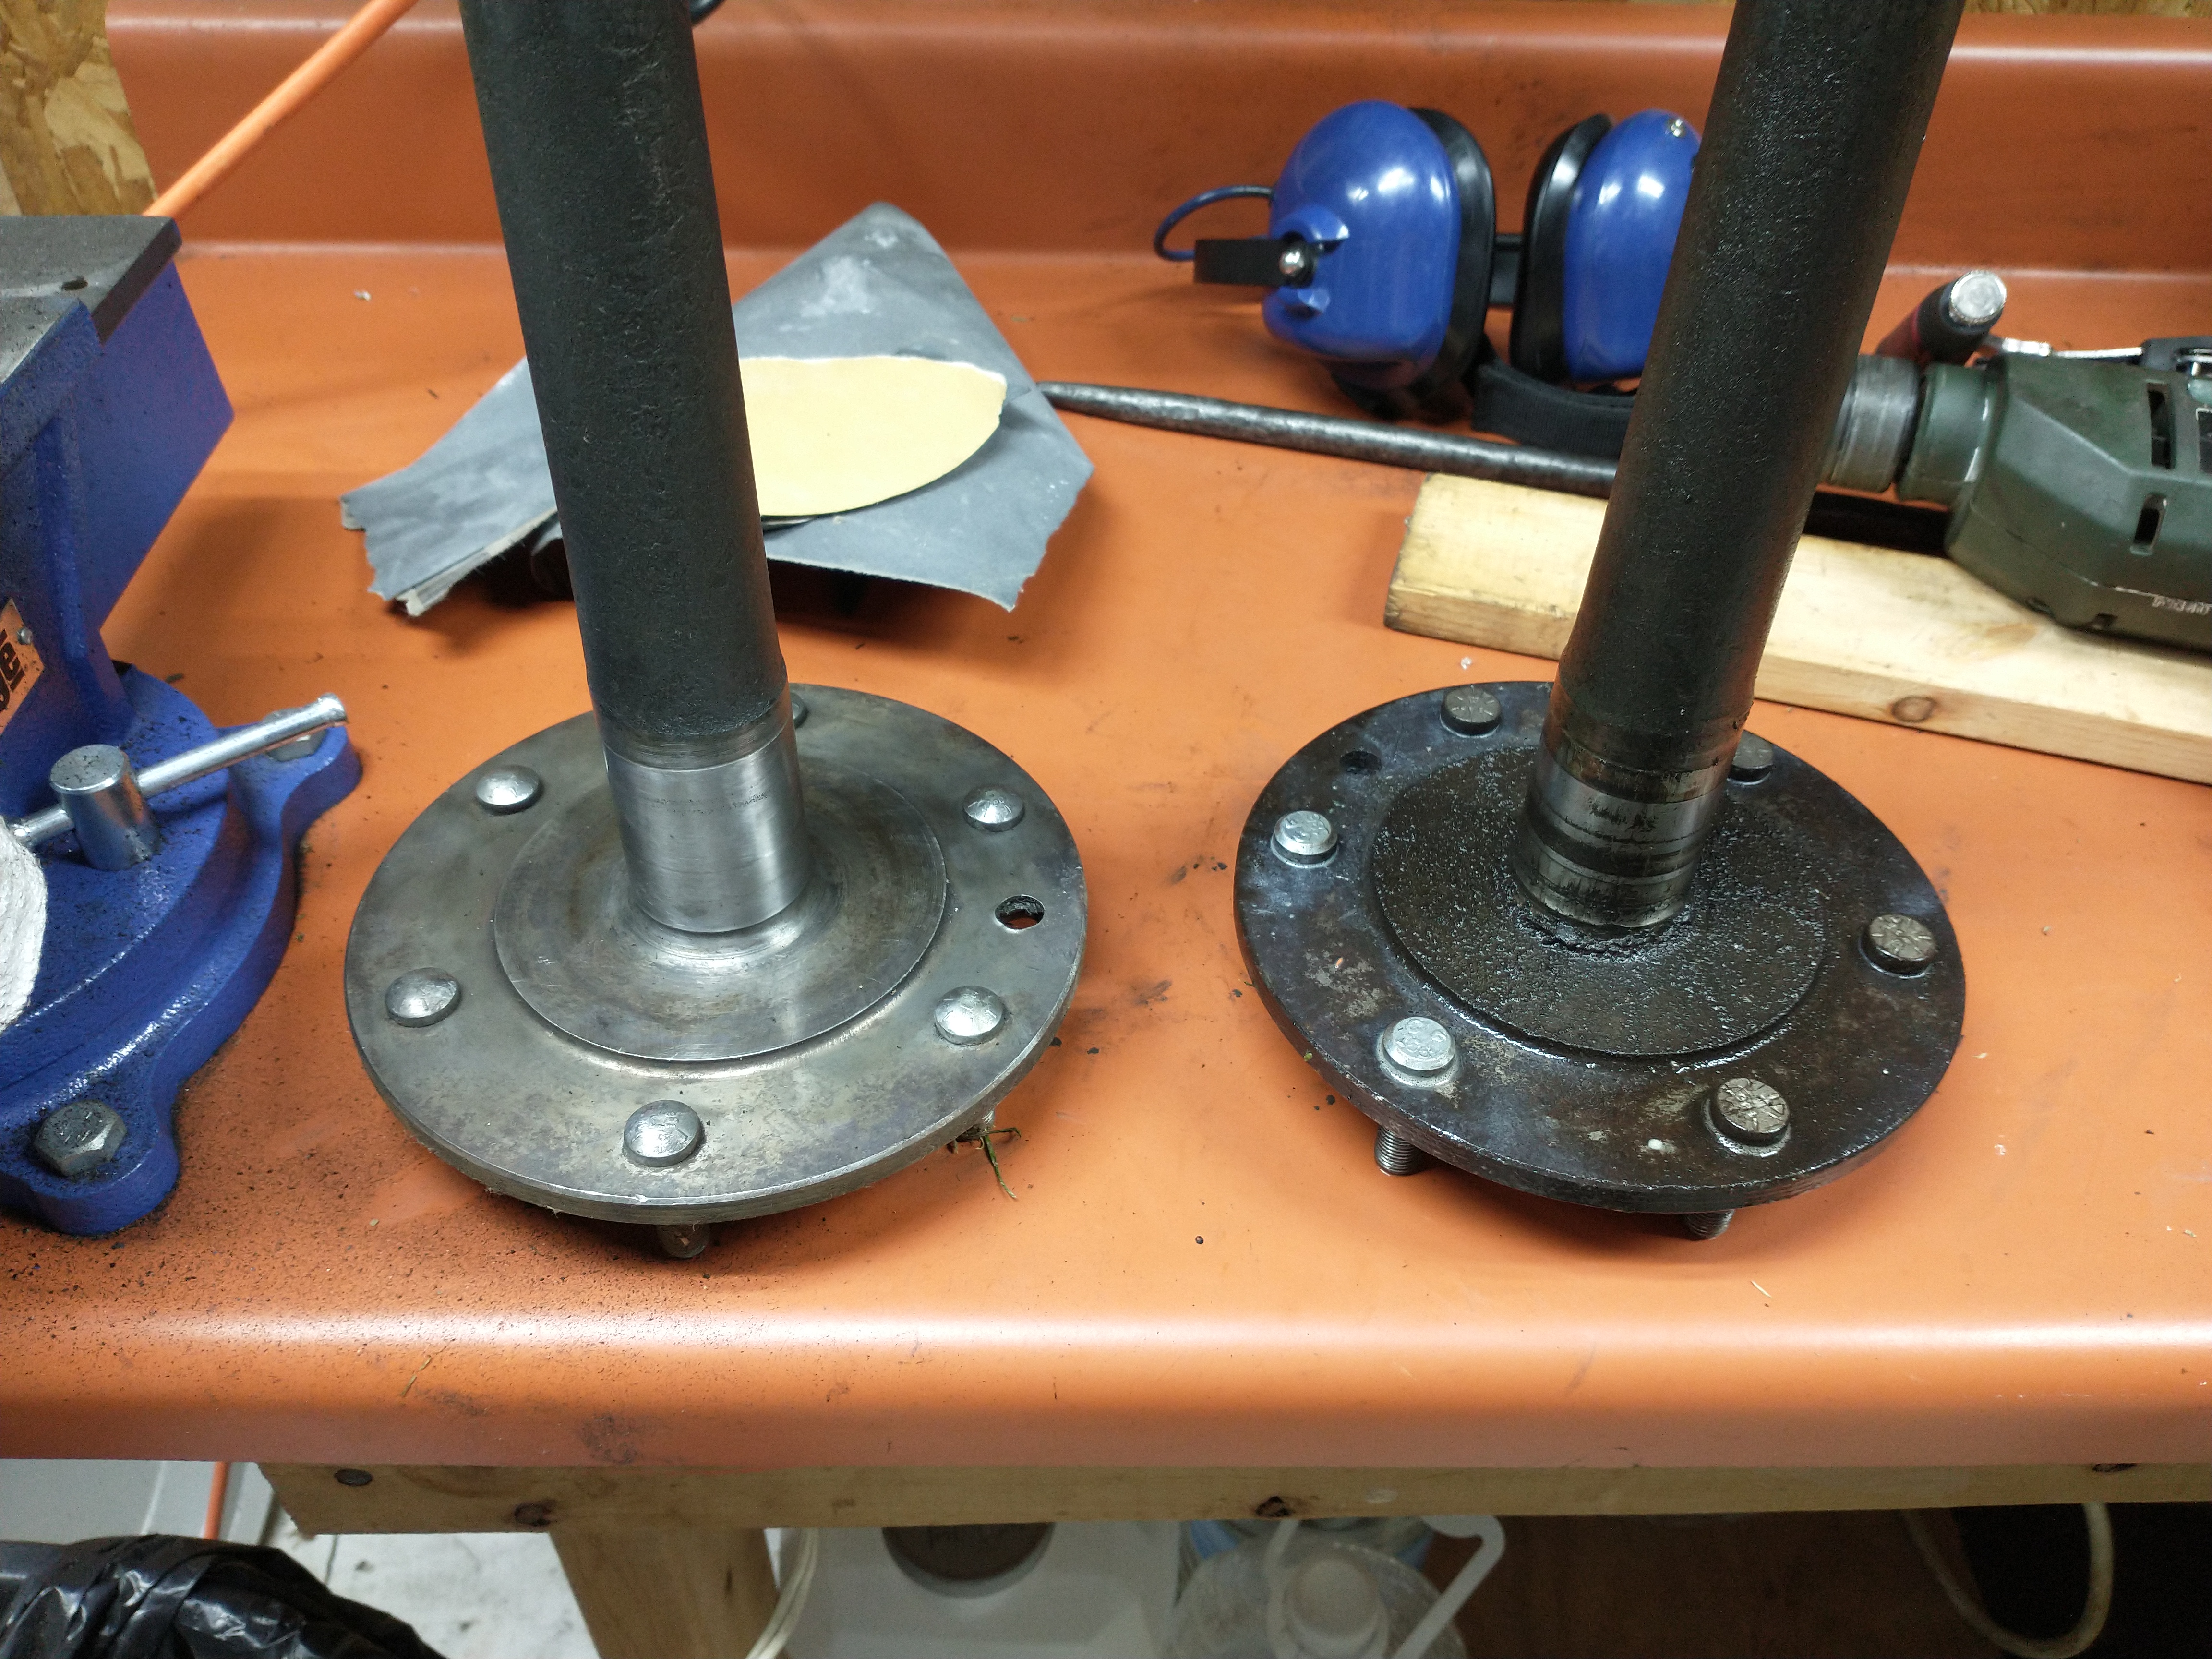
Here we have the end of the axle that has not been cleaned up. This is what the wheel bolts too, but wait…..the wheel studs are removed. Found out I must have new longer ones to work with the disc brakes and they are included in the kit. First I need to clean this up a bit.
This is the cleanup of the backside and where the bearing goes, the area on the axle up about a couple of inches. One not cleaned and one cleaned. See the difference. I just used a drill and a wire wheel to clean up where the wheel studs go. I used fine emery cloth to clean up where the bearing rides. There is no need to clean the axle further up as it will be in the axle housing with gear oil flying around in there.
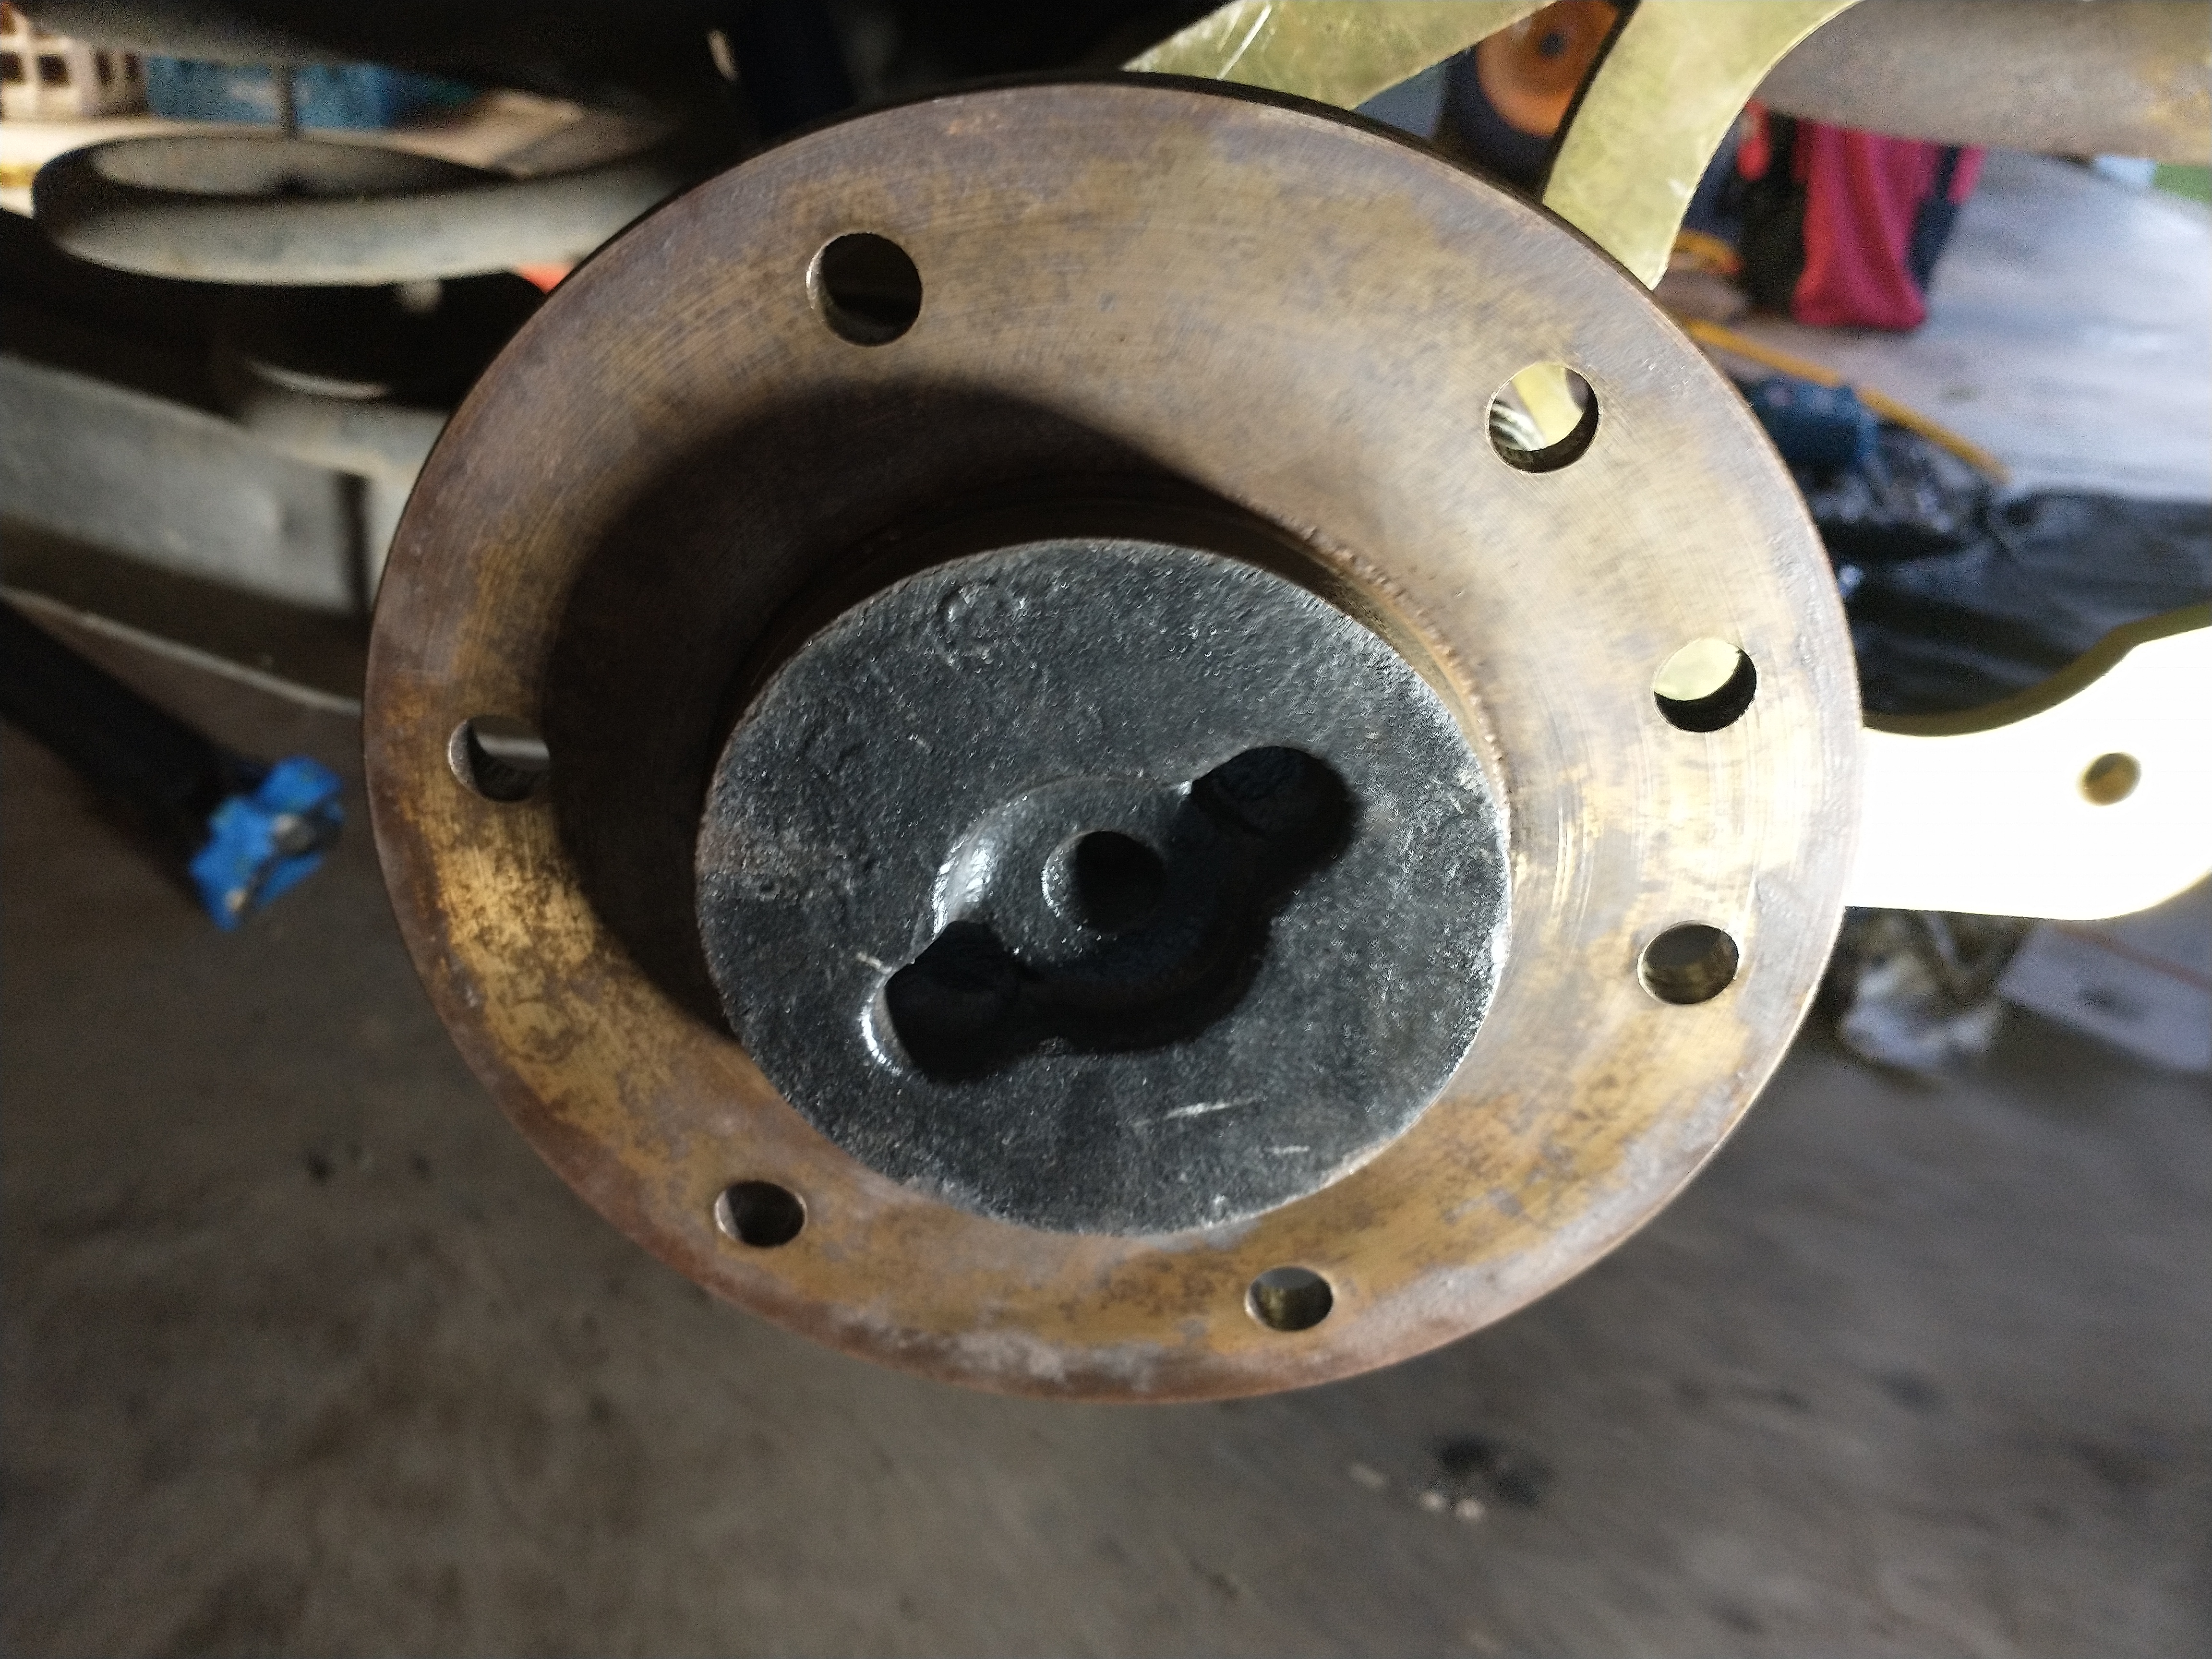
Here is the front side and harder to clean so I got off as much as I could. I have a solution that dissolves rust and I may try this later.
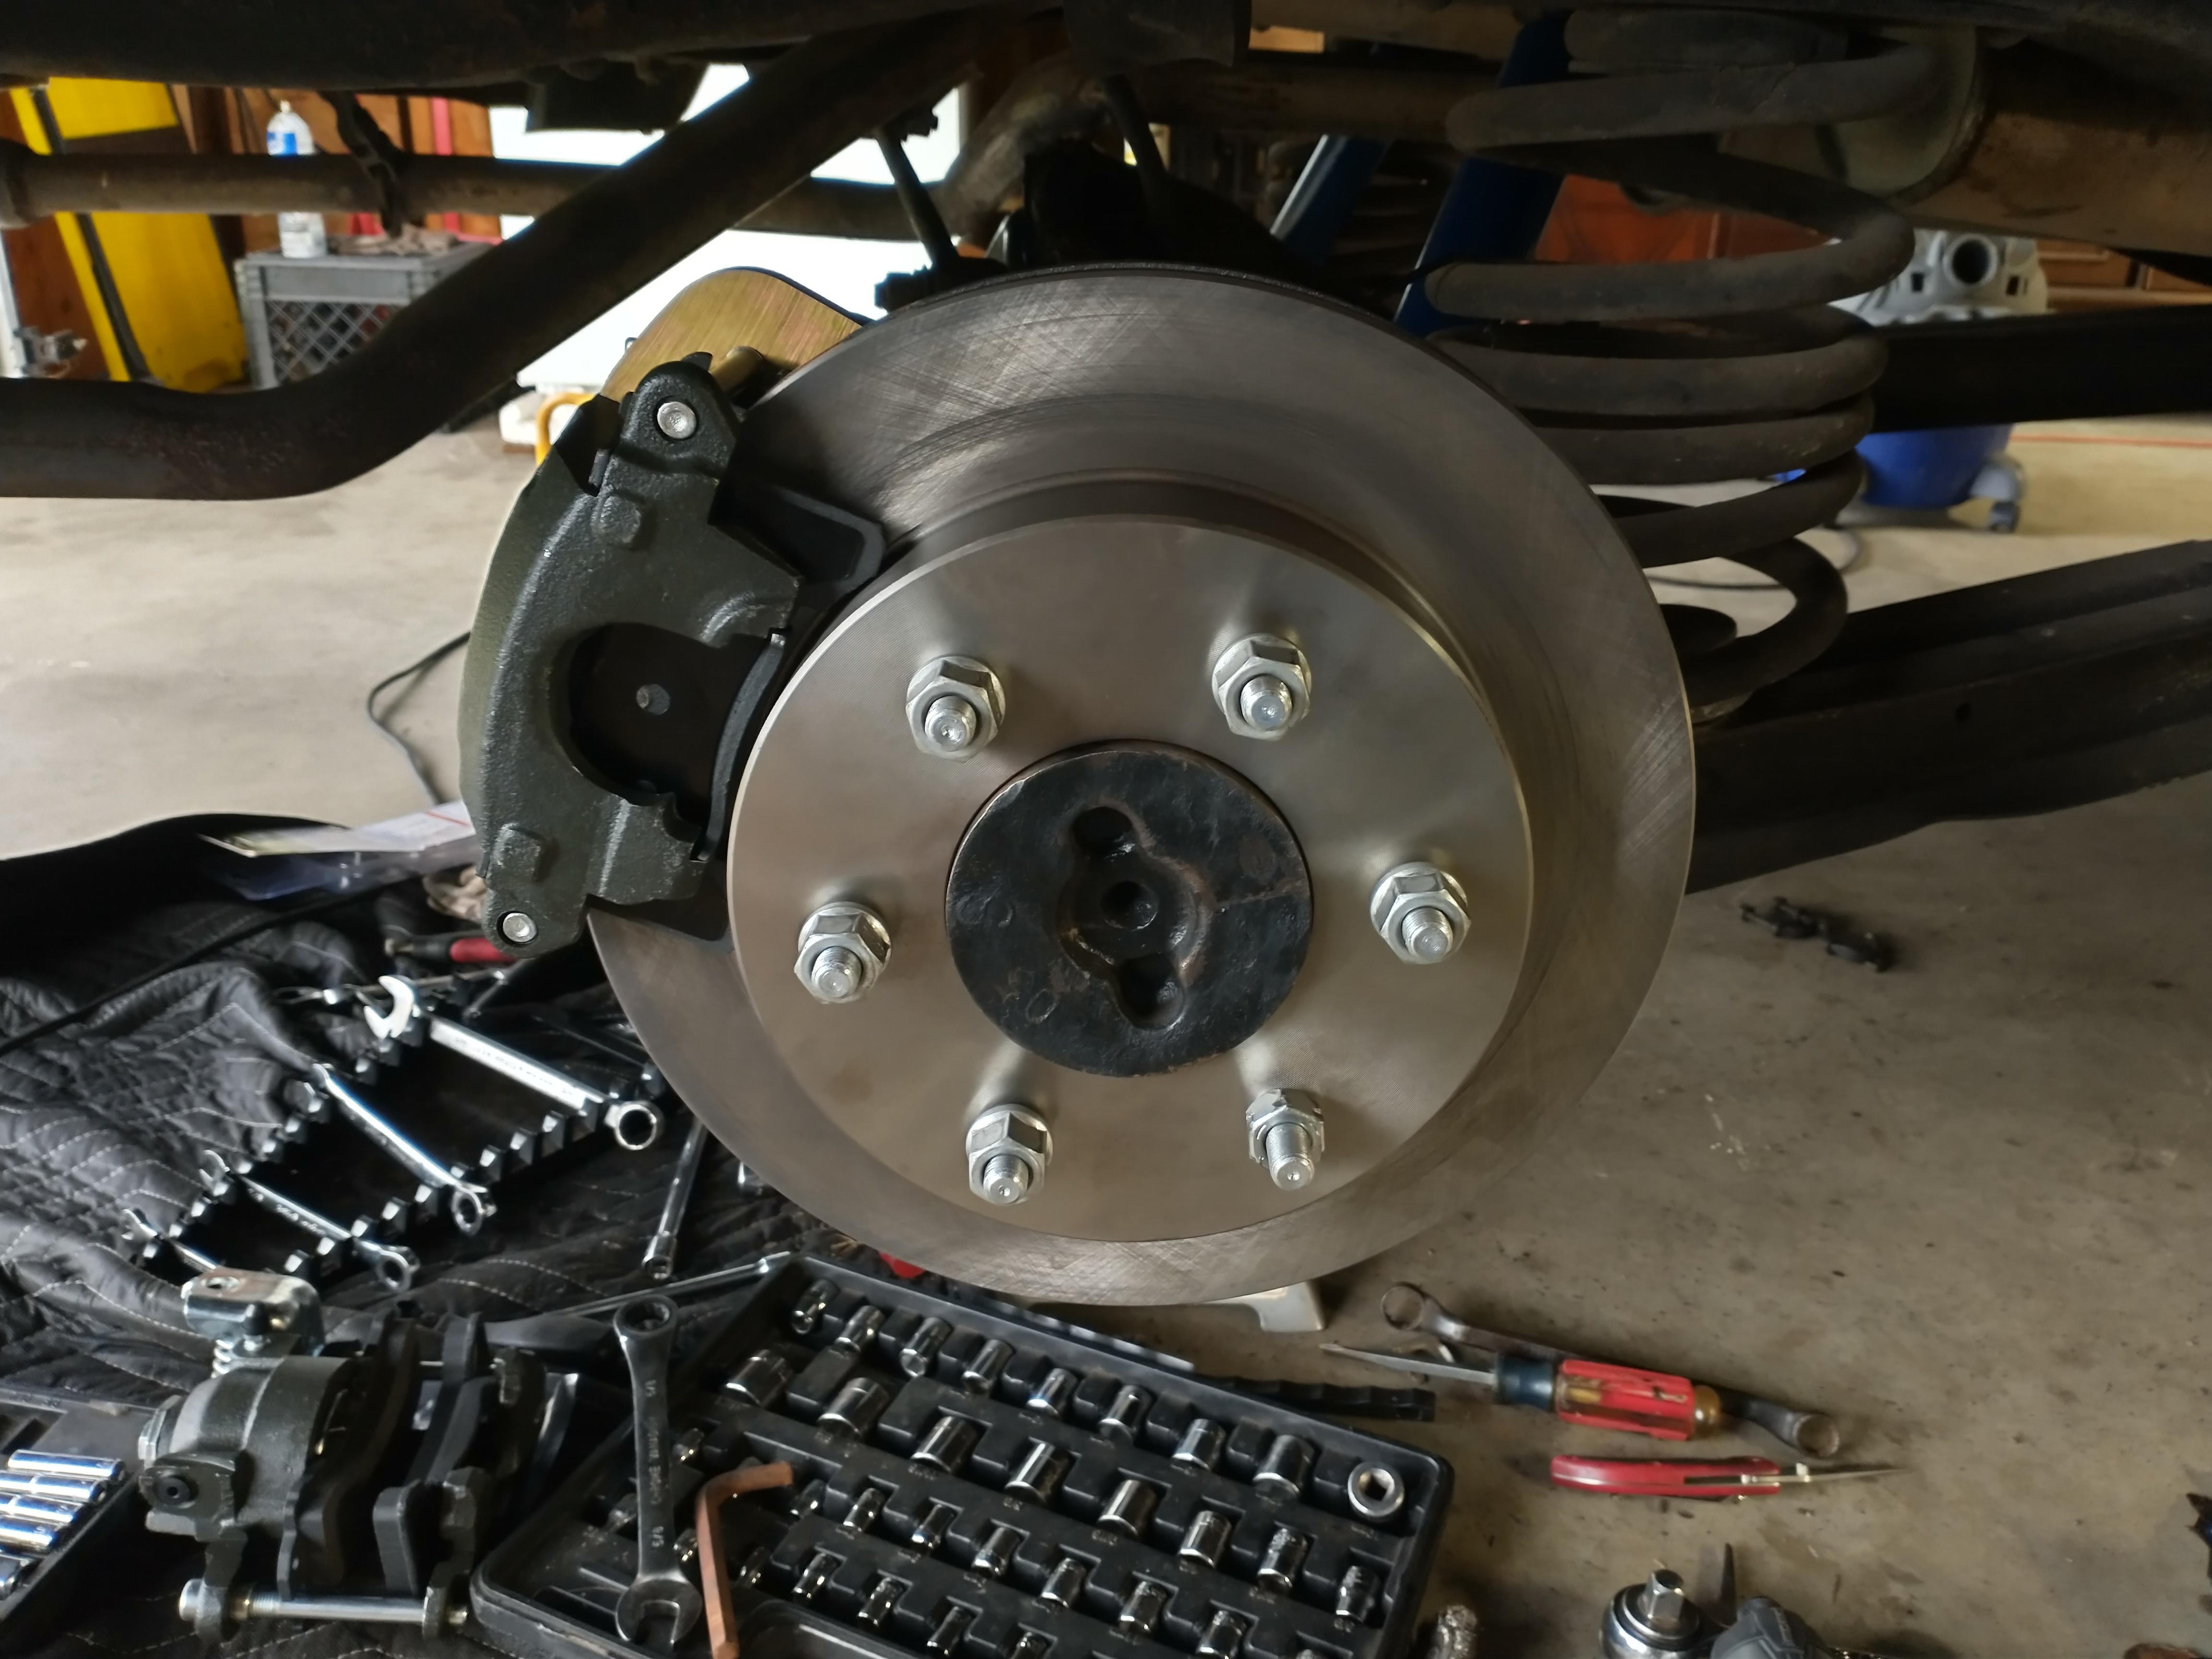
Here is the actual rotor (disc) installed with the wheel studs installed, which was a real workout. I did not take any pictures, but will add later the tool I used. It was rough. The caliper with the pads installed also.
Wheel stud install tool
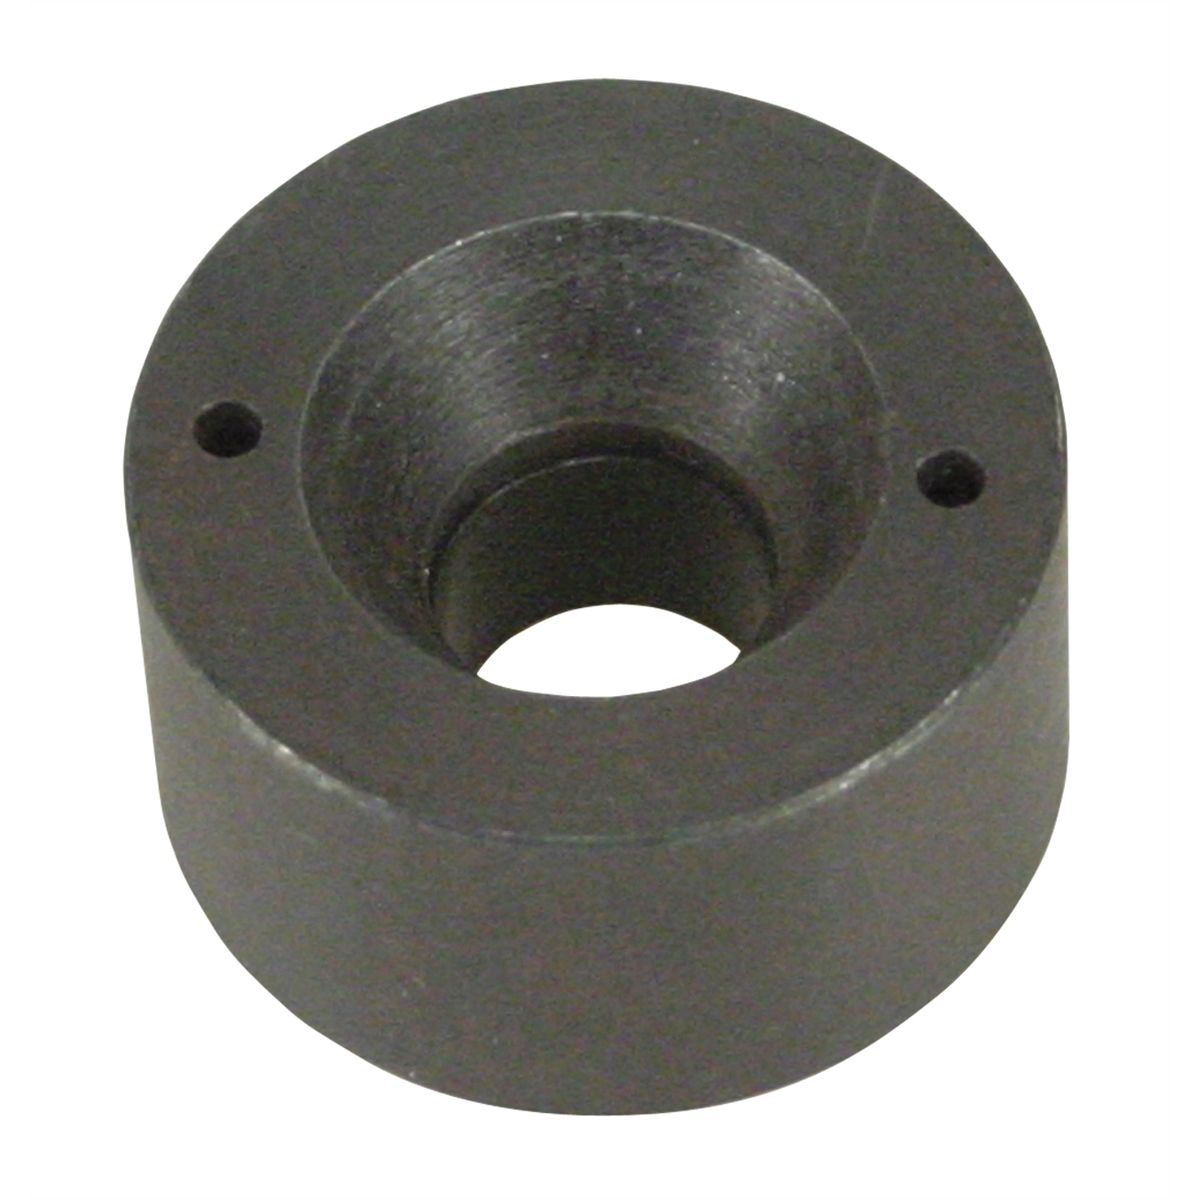
This was a work out to use….but a life saver and only about $13. Just a lot of wrenching to get each wheel stud in place.
This has been done on both sides and right now is just a test fit. I need to torque everything down. Will outline that when I do it and get some pics, its very very important.
Here is a pic of the backside showing the emergency brake ( Lever and Spring)

As soon as I finish the Axle rear housing cover…its out in the garage with the paint drying right now. Will finish it tomorrow.
Ok….I have done quite a bit of work in the past month. I will be posting pictures here once I get them off my phone and organized.
Winter 2021 Update
Well…..getting parts in has been a mess. Shipping is taking a long time. Got a couple of wrong parts and now its Winter. I am not too sure how much I will be able to get done, but I am going to try and get the thing on the ground and running. I am also doing a mini-upgrade to the fuel system. Once I get parts I will show that. 2021 has been a mess for progress….parts parts parts……crap.
Okay here is some of the work that is happening. Its prep and paint, so its slow. First here is some of the new parts that are going on. These parts will make sure the wheels are centered in the wheel well hopefully making the truck look better it will add alignment angle so it’s easier to align. Think of it as taking 1969 technology and adding what we have learned since. That is what I have researched and I hope its true. So I have started painting this stuff.
Update:……first paint job….debacle. IT did not stick and peeled off. I have since have them getting sandblasted and hopefully after that the paint will stick. I decided to change to chassis paint from Eastwood. Its supposed to work. I wanted to have the arms silver, but I guess black it is.
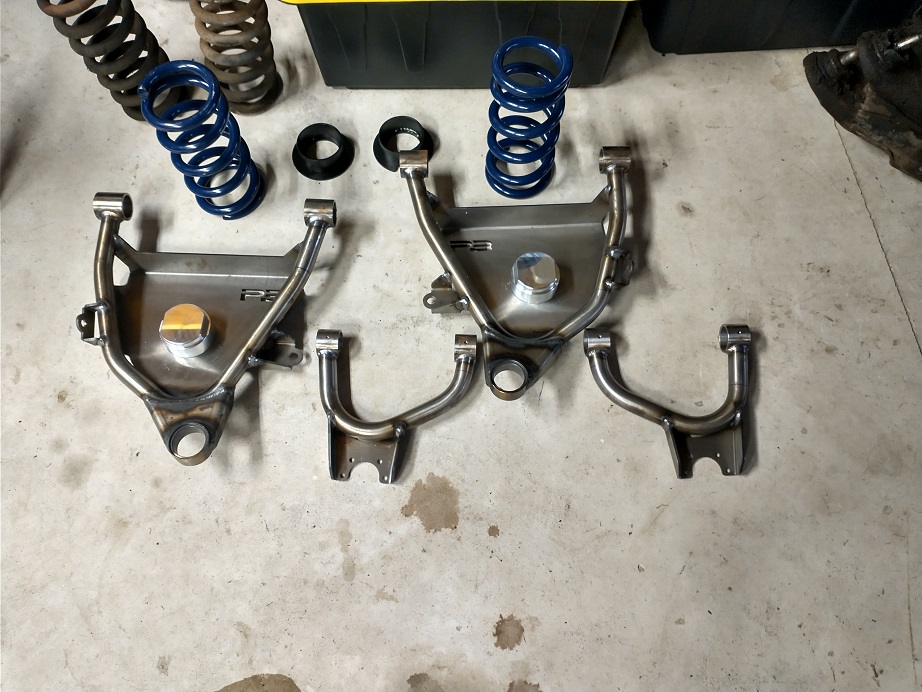
Closer shot of the new upper arms they are made for Porterbuilt.
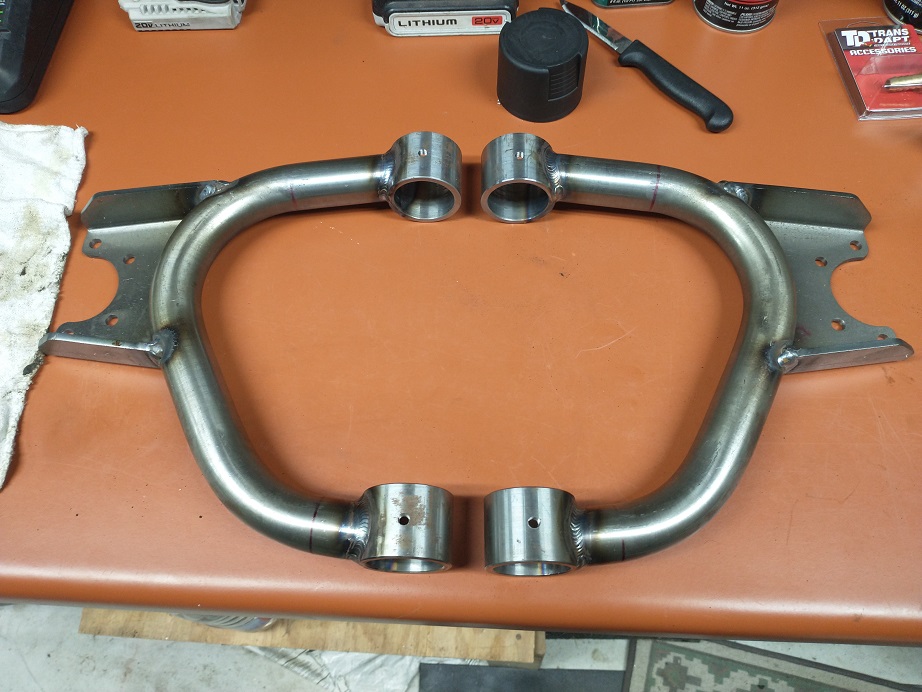
prepped
On to brakes. Here is the new master cylinder and power brake booster.

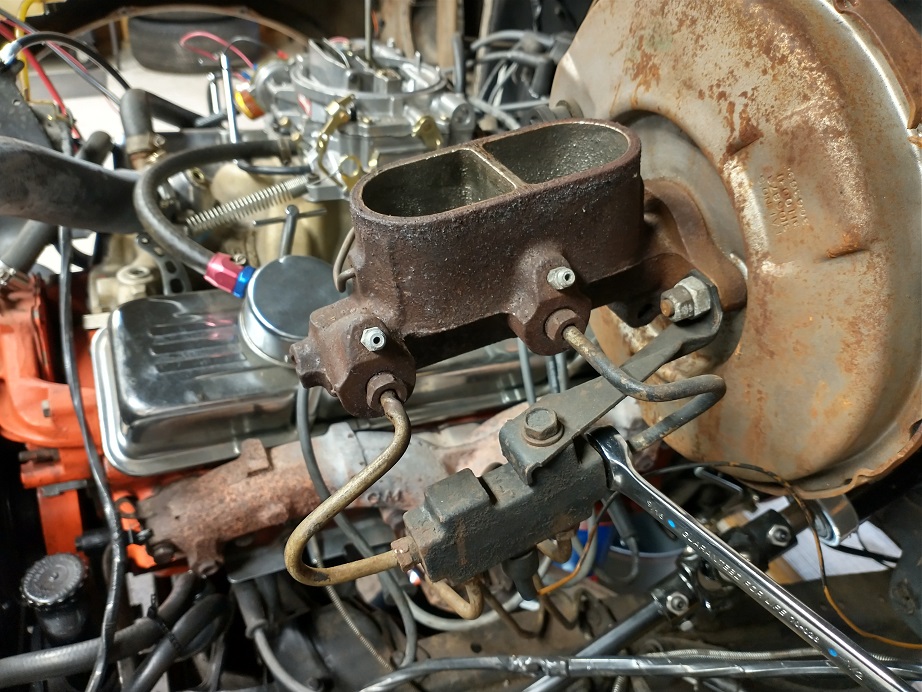
Here is the new dual 9in diaphragm booster (top picture) and corvette style master cylinder. The old booster (lower picture) was a single 11in diaphragm booster. Even though the old one looks bigger. The new one has dual 9 inch. So, with more surface to create pressure this should feel more like modern cars and trucks today. Now I have to get new lines that will go down to the front brakes. Here is why…….
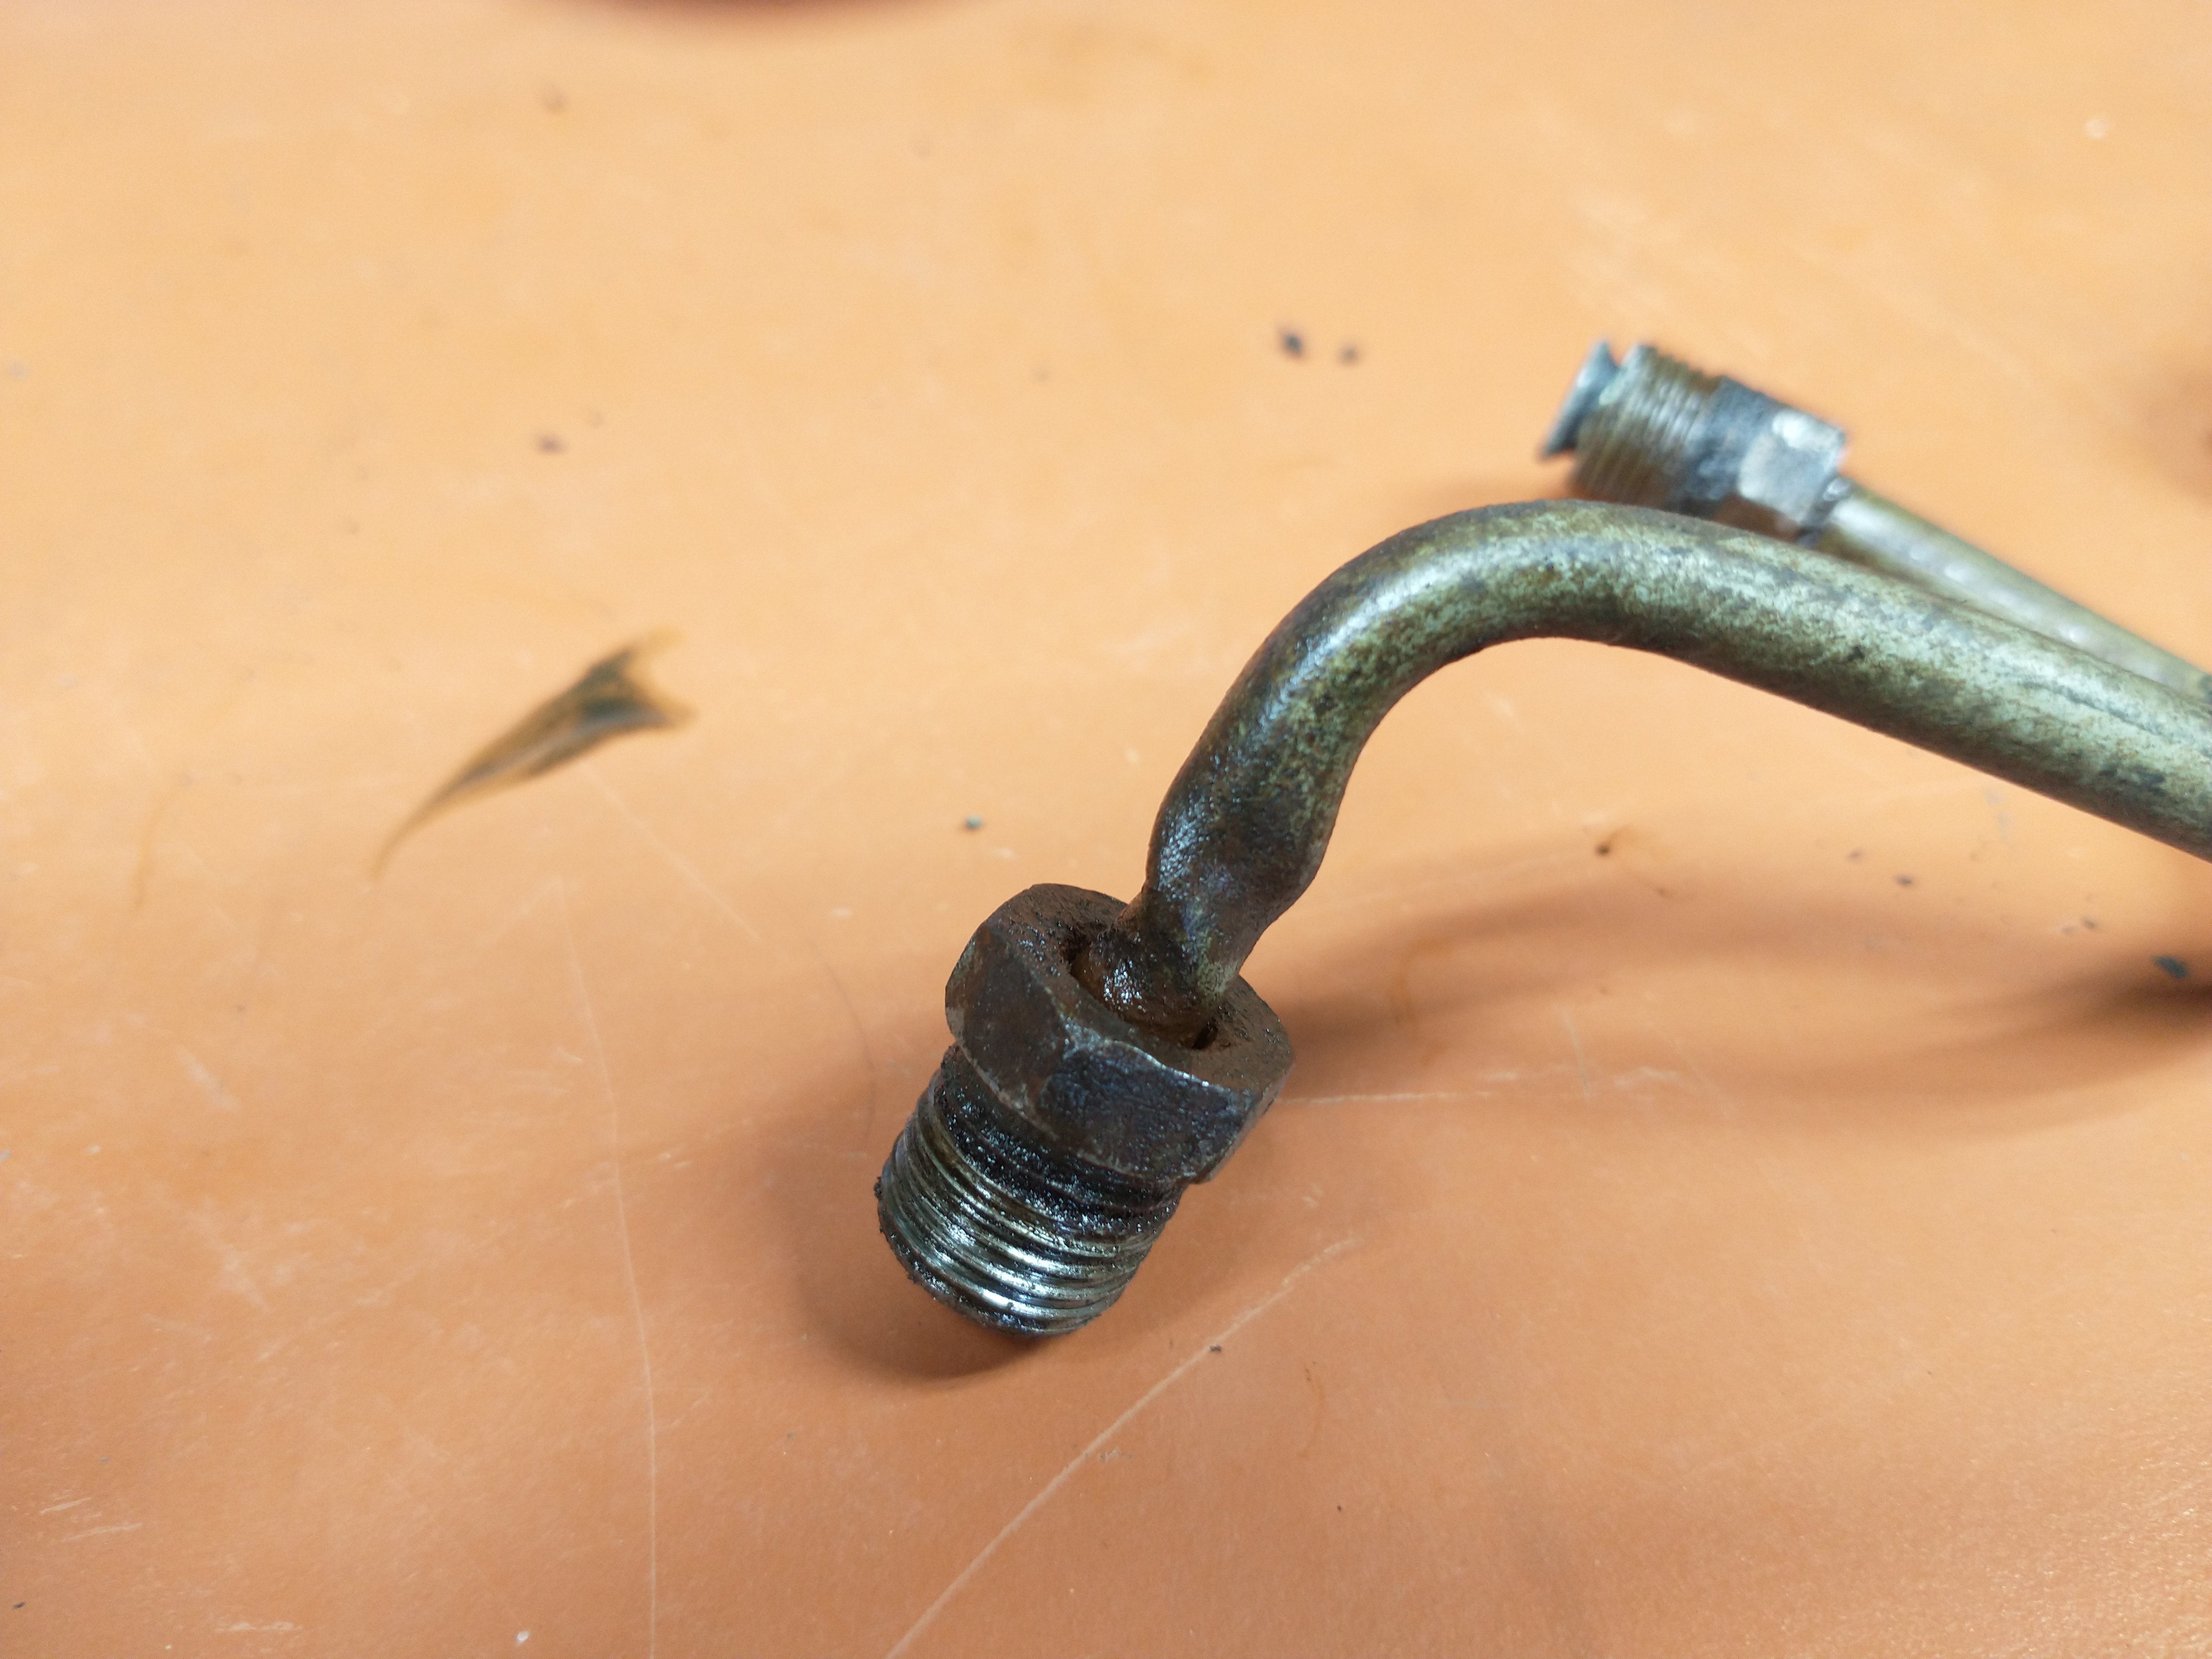
Above…….This is what I am finding everywhere on this truck. Of course this is what I like. Look at this line….it was going to one of the front brake lines. Previous owner tightened this too much and twisted it. So it will be replaced.
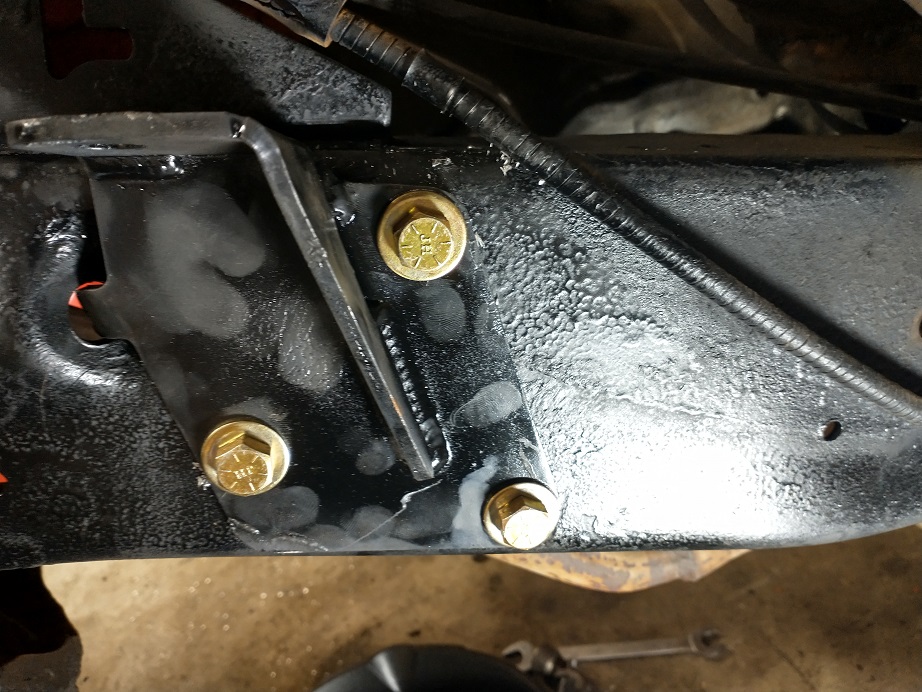
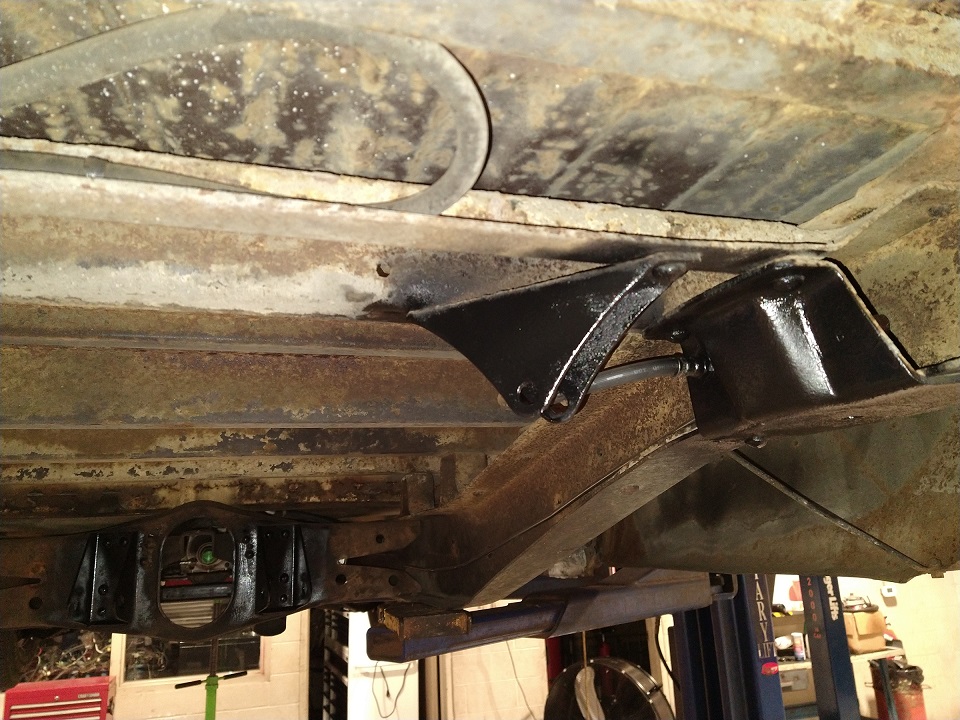
This is the new shock relocation mount. This looks like crap and I have repainted it, this is just a mock up. I have repainted and will get pics up soon. This mount will make the shock mount much stronger than the stock one. Will try to figure out how to show you that later. The upper mount is also stronger.
Currently I have a lot on new parts to install. I am waiting for these parts to get made and shipped. Already had one pack of stuff come in and 80 percent of it was wrong. Not surprsing…….that stuff has been sent back and hopefully the right stuff will be sent. I have been prepping the front of the truck for these new parts.
What is going to be changed:
- New disc brakes – Like the rear now
- New brake lines – (new ones not ordered yet)
- New Master Cylinder – (Makes brakes work)
- New Power Brake Booster – (Makes brakes easier to work)
- A-Arms tubular – (Stronger than original and these center the front wheels 1-inch)
- New Disc Rotors, calipers and pads – (this stuff stops your car or truck)
- New Tie Rods (Steers your car)
- New Tie Rod Sleeves
- Disc rotor dust shields ( who likesdust)
- New front wheel bearings
- New Springs
- New Shocks (second new springs)
Right now I am taking old parts out…..with a lot of trouble on one side. I will be detailing this in a future post. Working on a plan now like cleaning the area up and putting some paint. This will be just some paint to get things protected.
Problems I have had. A broken bolt that needs another part off to get it out, which has turned into a major problem. Now I have a bolt that I can’t get out and the threads are crazy rusted. I have ordered a tool to help me clean up the threads to make the bolt come out easier.
Pretty boring post with no pictures. See yall soon……
New Parts are starting to come in.
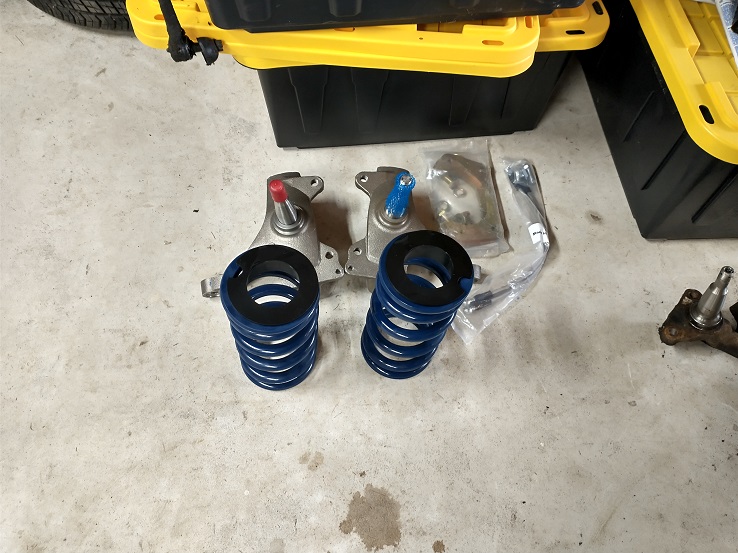
Front Springs, Drop Spindles and stainless brake lines. More is supposed to be here today and tomorrow.
Explain these later as all of them arrive.
Michael
How to Winterize your vehicle
HOW TO WINTERIZE YOUR CAR
A small amount of basic maintenance and some quick inspections can get your car ready to drive through winter weather. Car trouble is the last thing you want to be dealing with while it’s cold outside, and something like a dead battery can leave you stuck for hours. That is why it is important to be prepared and know what to do to ensure that your vehicle runs reliably.
If you want to ensure your car battery is in winter-ready condition, get a free battery test or charge at your local auto parts store.
Here’s a quick winter prep checklist:
- Make sure your fluids are fresh
- Keep a portable battery phone charger in your car
- Be prepared with an emergency kit (Next post)
- Look over your lenses, lights, and wiper blades
- Check your rubber: belts, hoses, and tires
- Have your battery tested
- Have a scraper on hand
Keep reading for more detail on how to get your ride winter ready.
8 THINGS TO CHECK AND CHANGE TO MAKE YOUR CAR WINTER-READY
1
KEEP A CLEAR VIEW WITH NEW WINDSHIELD WIPERS AND WIPER FLUID
Snow and ice make it harder for your wipers to work properly. That is why it is important to inspect your wipers before cold weather comes.
If they are worn then it is time to replace, and it may be worth switching to winter blades depending on where you live. Winter blades are specifically designed for snow and ice with a rubber-shrouded frame that prevents ice build-up and maintains even pressure distribution.
If you live somewhere particularly cold, swap out your wiper fluid with one that is made to withstand extreme winter temperatures.
2
LIGHT UP THE ROAD AHEAD WITH BRIGHT HEADLIGHTS
Winter means shorter days, meaning you will use your headlights more than at any other time of the year. Check yours and replace dimming headlights before they burn out.
If one headlight is burned out, the other one may burn out soon. That is why we recommend replacing headlights in pairs.
3
ENSURE TIRE GRIP WITH TREAD DEPTH AND PRESSURE GAUGES
Inspect your tires for adequate tread depth. Proper tread depth will offer more bite on the road. In some places, it might be a good idea to switch to winter tires.
Use a penny to test tread. Put a penny in (Lincoln head….heads first) If you can see all of Lincoln’s head you need new tires.
Use a pressure gauge to check the tires for proper inflation. Having the right air pressure helps your car keep traction when accelerating and braking. The recommended pressure can be found in your owner’s manual. Do Not Use the Max Pressure listed on the tires.
4
PROTECT YOUR FINISH WITH PAINT AND GLASS CARE
Wash and wax your vehicle to protect your paint from the corrosive effects of road salt. Maintain optimal visibility by thoroughly cleaning your windows inside and out.
You can prevent them from fogging up with anti-fog window treatment too. Using a water repellent on your windshield can help prevent water from sticking, freezing, and blocking your view.
5
POP THE HOOD AND CHECK YOUR MOTOR OIL
In colder temperatures, the motor oil thickens, placing a greater strain on your engine. If you have a windshield sticker or remember the weight of the oil you are using (i.e. 10W-30); verify that the oil is compatible for cold weather by consulting your owner’s manual.
Check your dipstick to make sure your engine contains the required amount of oil. If it is low, make sure to fill it up. Look at how clean the oil is and think about when the last time that you changed the oil was while you are checking the level. If it is dirty or hasn’t been changed as soon as the owner’s manual recommends, it’s time for an oil change.
6
KEEP YOUR CAR POWERED-UP AND INSPECT YOUR VEHICLE’S BATTERY
Your vehicle’s battery works harder in colder weather. That is why you should visually inspect the battery for swelling, leaking, or cracks, and check for corrosion (white/green powdery substance) around the terminals.
If you need a second opinion, or your battery is more than four years old, take your it to local auto parts store that offers free battery test and/or charge.
In case of starting trouble, it’s wise to keep some jumper cables or a jump starter pack in your trunk to avoid getting stranded in the snow.
7
PROTECT YOUR ENGINE WITH ANTIFREEZE AND COOLANT
Even when it’s below freezing outside, your car gets hot under the hood while running. When not running, your vehicle’s cooling system runs the risk of freezing.
If you don’t have enough antifreeze in your coolant mix, the mix could freeze and even crack your engine. Too much antifreeze can hinder your car’s ability to cool the engine when in use.
Use an antifreeze tester to ensure that you have the correct antifreeze-to-water ratio to protect your cooling system from freezing when not in use.
If it’s been more than 24,000 to 34,000 miles since your last flush and fill it is likely time for another. Your owner’s manual will have the exact interval.
8
MAKE SURE YOUR CAR HAS RELIABLE BELTS AND HOSES
Cold weather can increase stress on belts and hoses. Inspect your hoses for visible leaks, abrasions, cracks, cuts, bulges, or broken clamps. Look for glazing, fraying, cracks, or missing ribs on belts.
Those are the big things to winter-prep your ride, but there’s always more you can do to get ready for the cold months. Be sure to keep winter emergency supplies on hand, stay informed about weather conditions, and inspect your brakes.
Here hoping everyone has Happy Holidays and a safe Winter. How 2020 has been no one needs car trouble during Winter.
Carry a blanket in the trunk in case you are stuck in the side of the road in Winter and need to keep warm. I will be going over Emergency Kits you should have in your car next post.
Michael
Winter Update and change of plans
Okay…its been cold here. I can’t do much work on the old Chevy when its cold. I still have to prep it for Winter which means getting anti-freeze in it…..will do that next week. But I do have some news which I will share, The work to this date has been to get the old Chevy running so when I had to paint the Dodge I had I could drive it. Well, sold the Dodge and now I have an all Chevy family with the addition of the 2015 Colorado. So I am changing plans for the old Chevy. Here it is.
Next spring I will be doing some major upgrades and getting the old truck drivable so I can get it out and drive it more. I probably will not tear it down for a full restoration for a couple years. I need to work on getting the Colorado paid of in those two years, but I want to continue to move forward on the old Chevy. The plan will be to put parts on that I will be keeping even after to full restoration, but get the thing running so I can enjoy it for awhile. So look for that as I am will be planning that over the Winter. It will have upgraded parts underneath but probably look like it does now, I will not be doing much body work. Will update you.
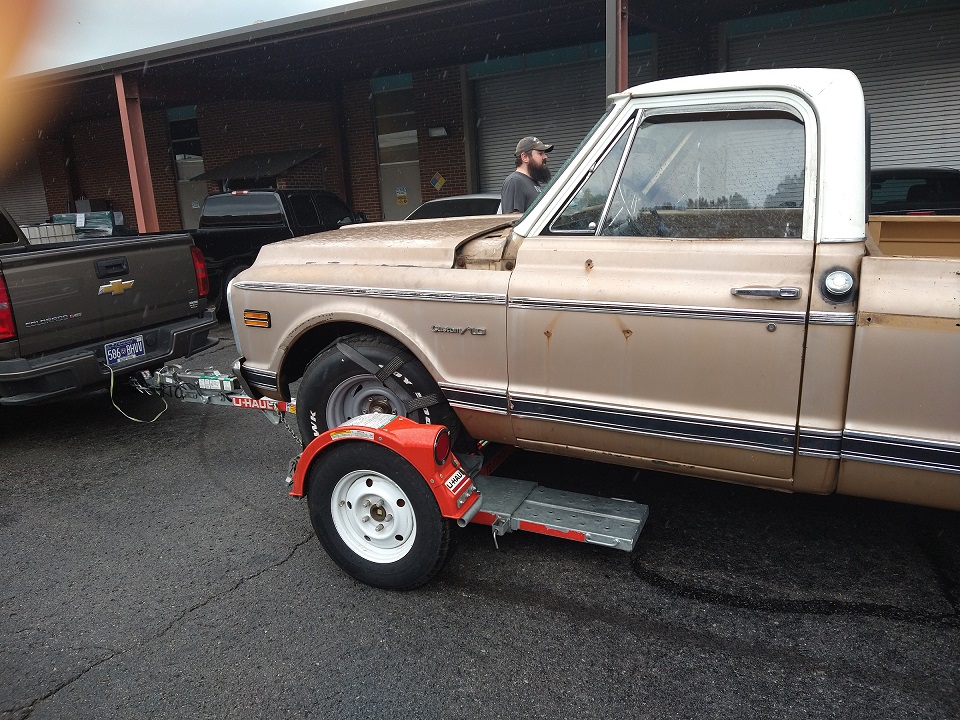
I have done a couple things to the Colorado. I added a receiver hitch. I have learned the hard way that towing by the bumper is no good unless to are towing a feather. So this is what I added.
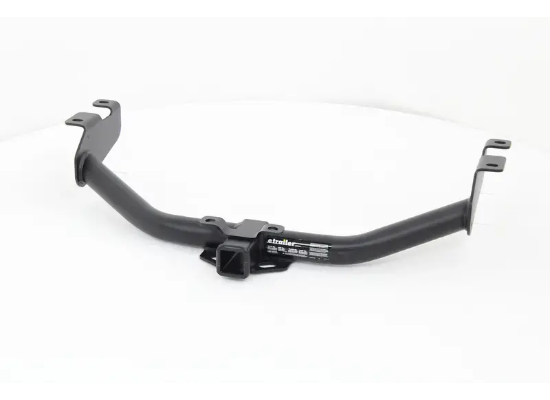
This is way overkill for what I normally tow which is a small trailer and a lawnmower, but if I even need to tow bigger this hitch can handle more than the truck can tow, so I will be safe. Me and Melina’s father installed the hitch a few weeks ago. Took about 2 hours or so. Was not too bad. Will post some pictures of it installed later. If you do not use one of these and only use the bumper and your trailer is lower than the bumper, you risk bending the trailer hitch…had it happen. If you tow to heavy a load for the bumper you will bend your bumper. There is a science to making sure you are not towing more than your truck can handle and a lot of people do not calculate it right. I will find a video online and post a link that explains it.
I also put a fun item on in the form of a new grille emblem. Its a retro styled, the design came from the ones on the trucks Chevy made in the 40’s and was made to celebrate Chevrolet 100 year of making trucks. Here is a before and after.
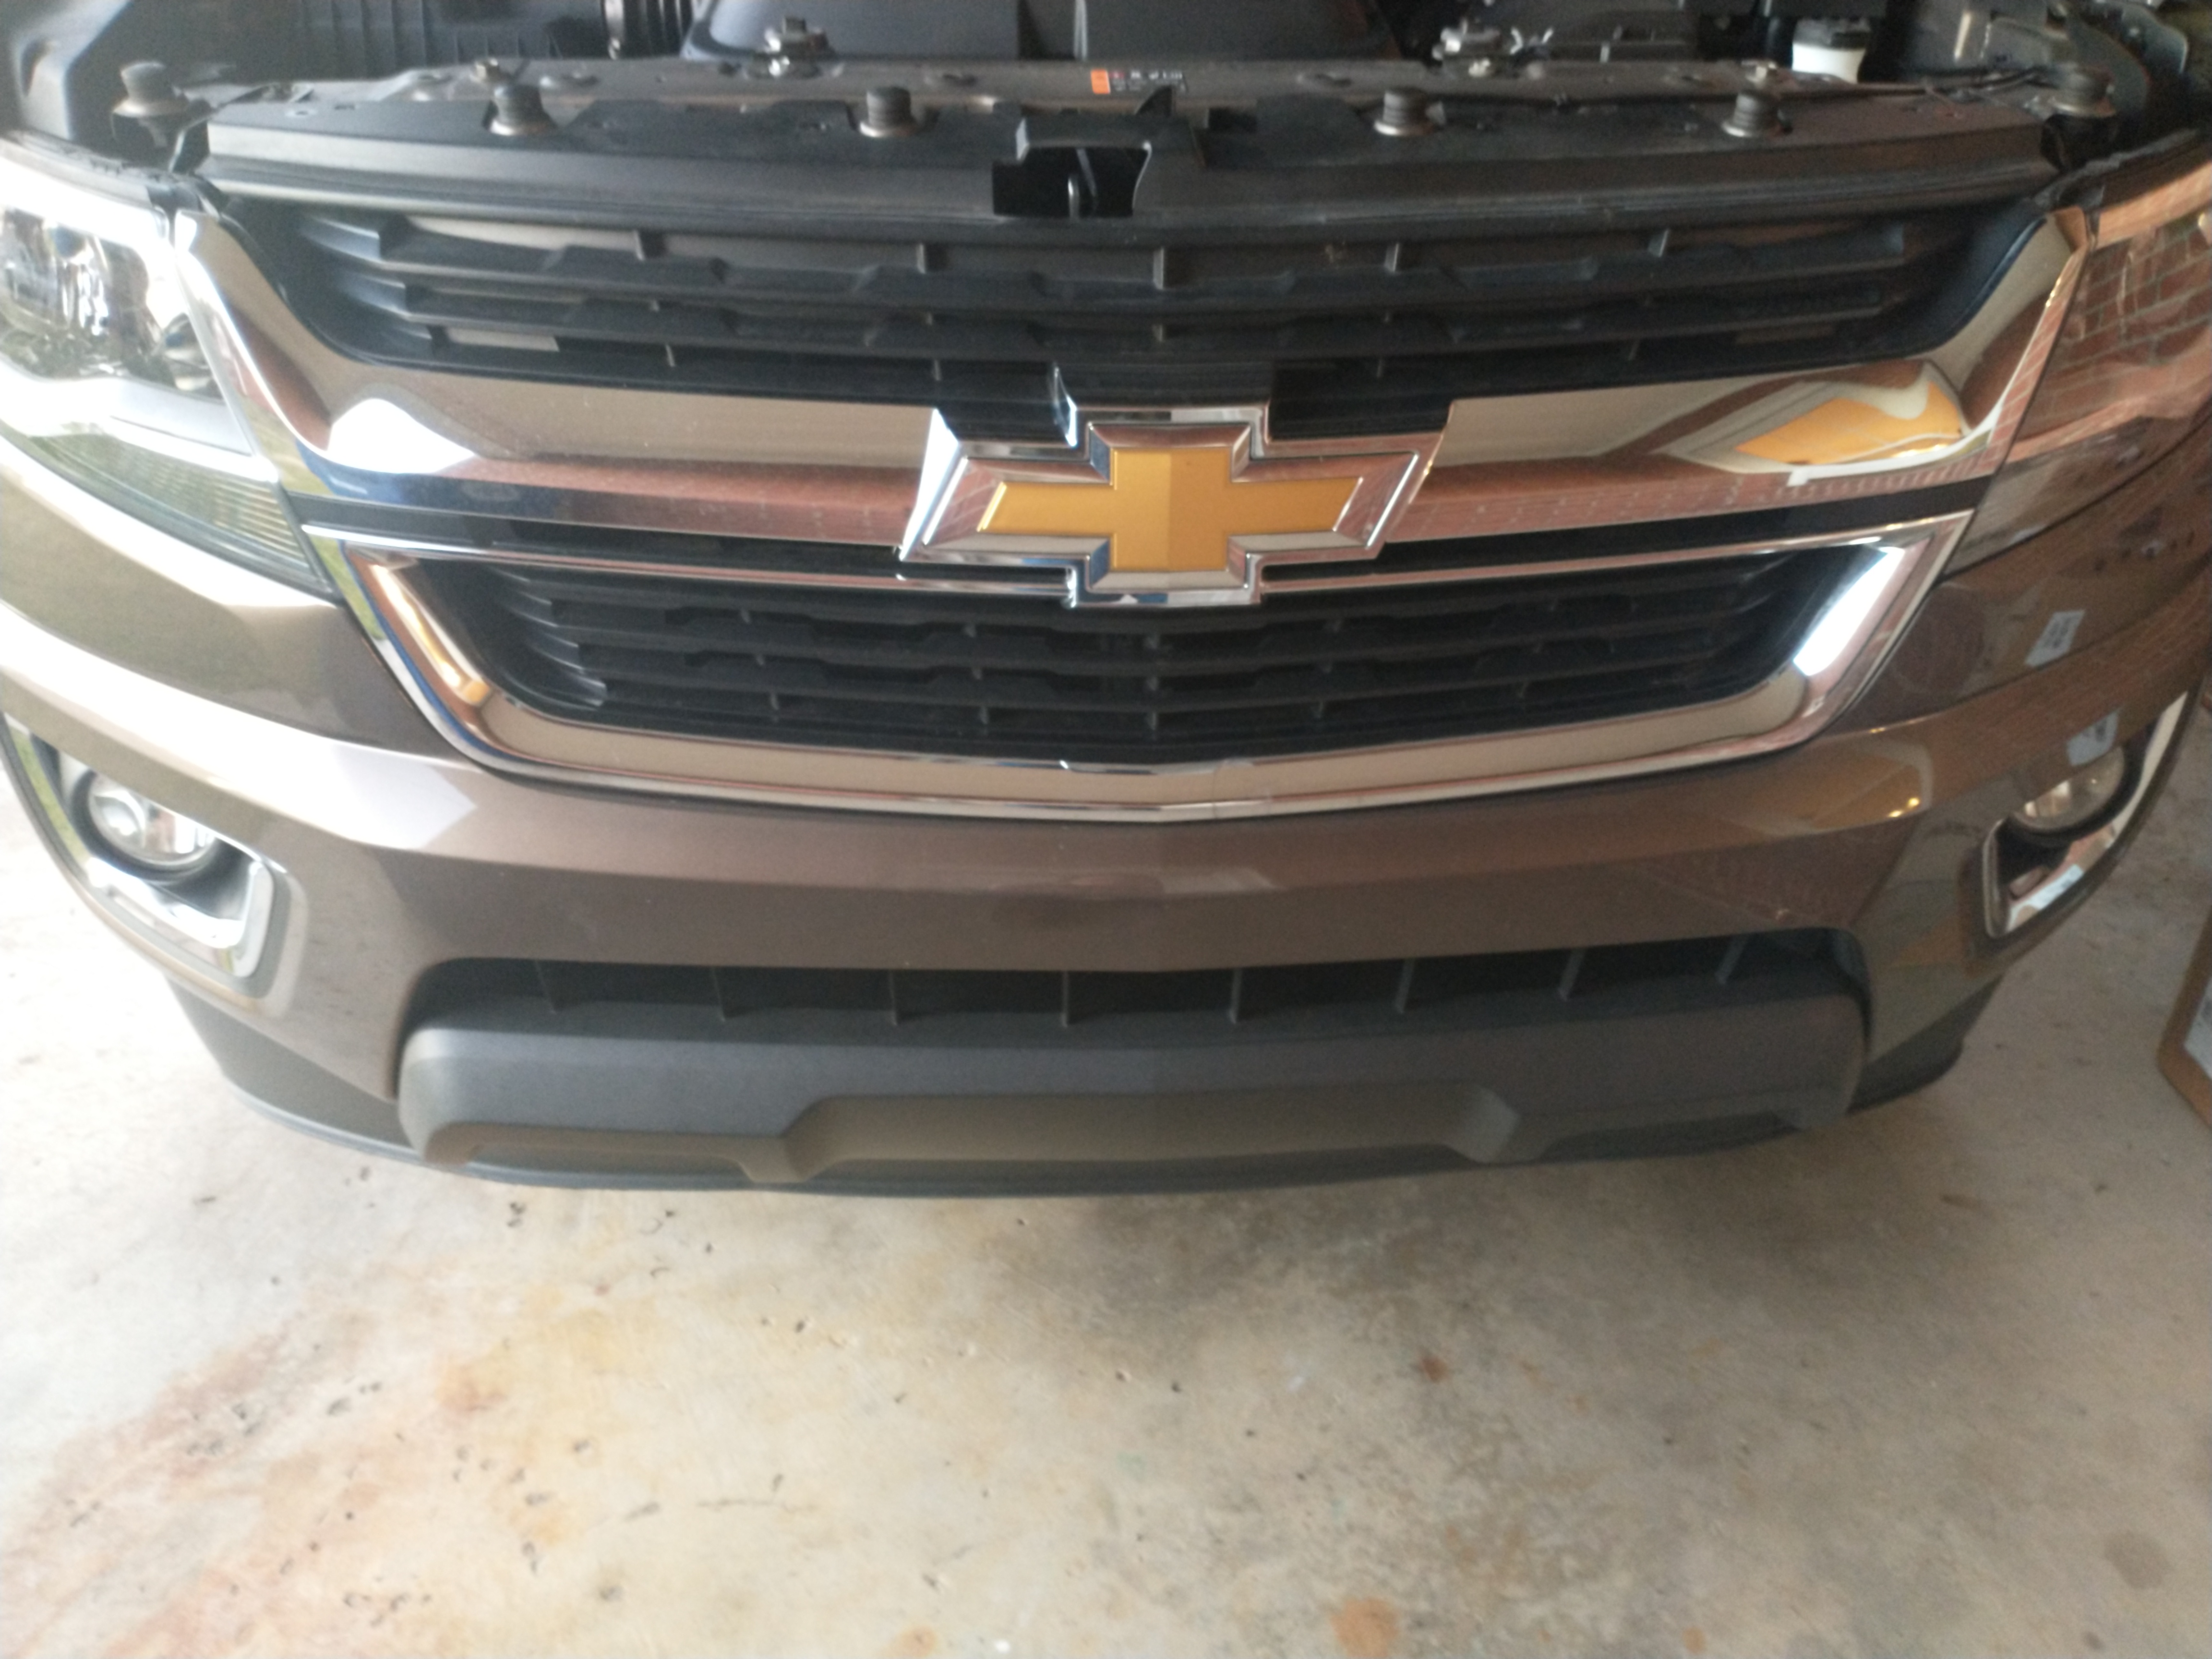
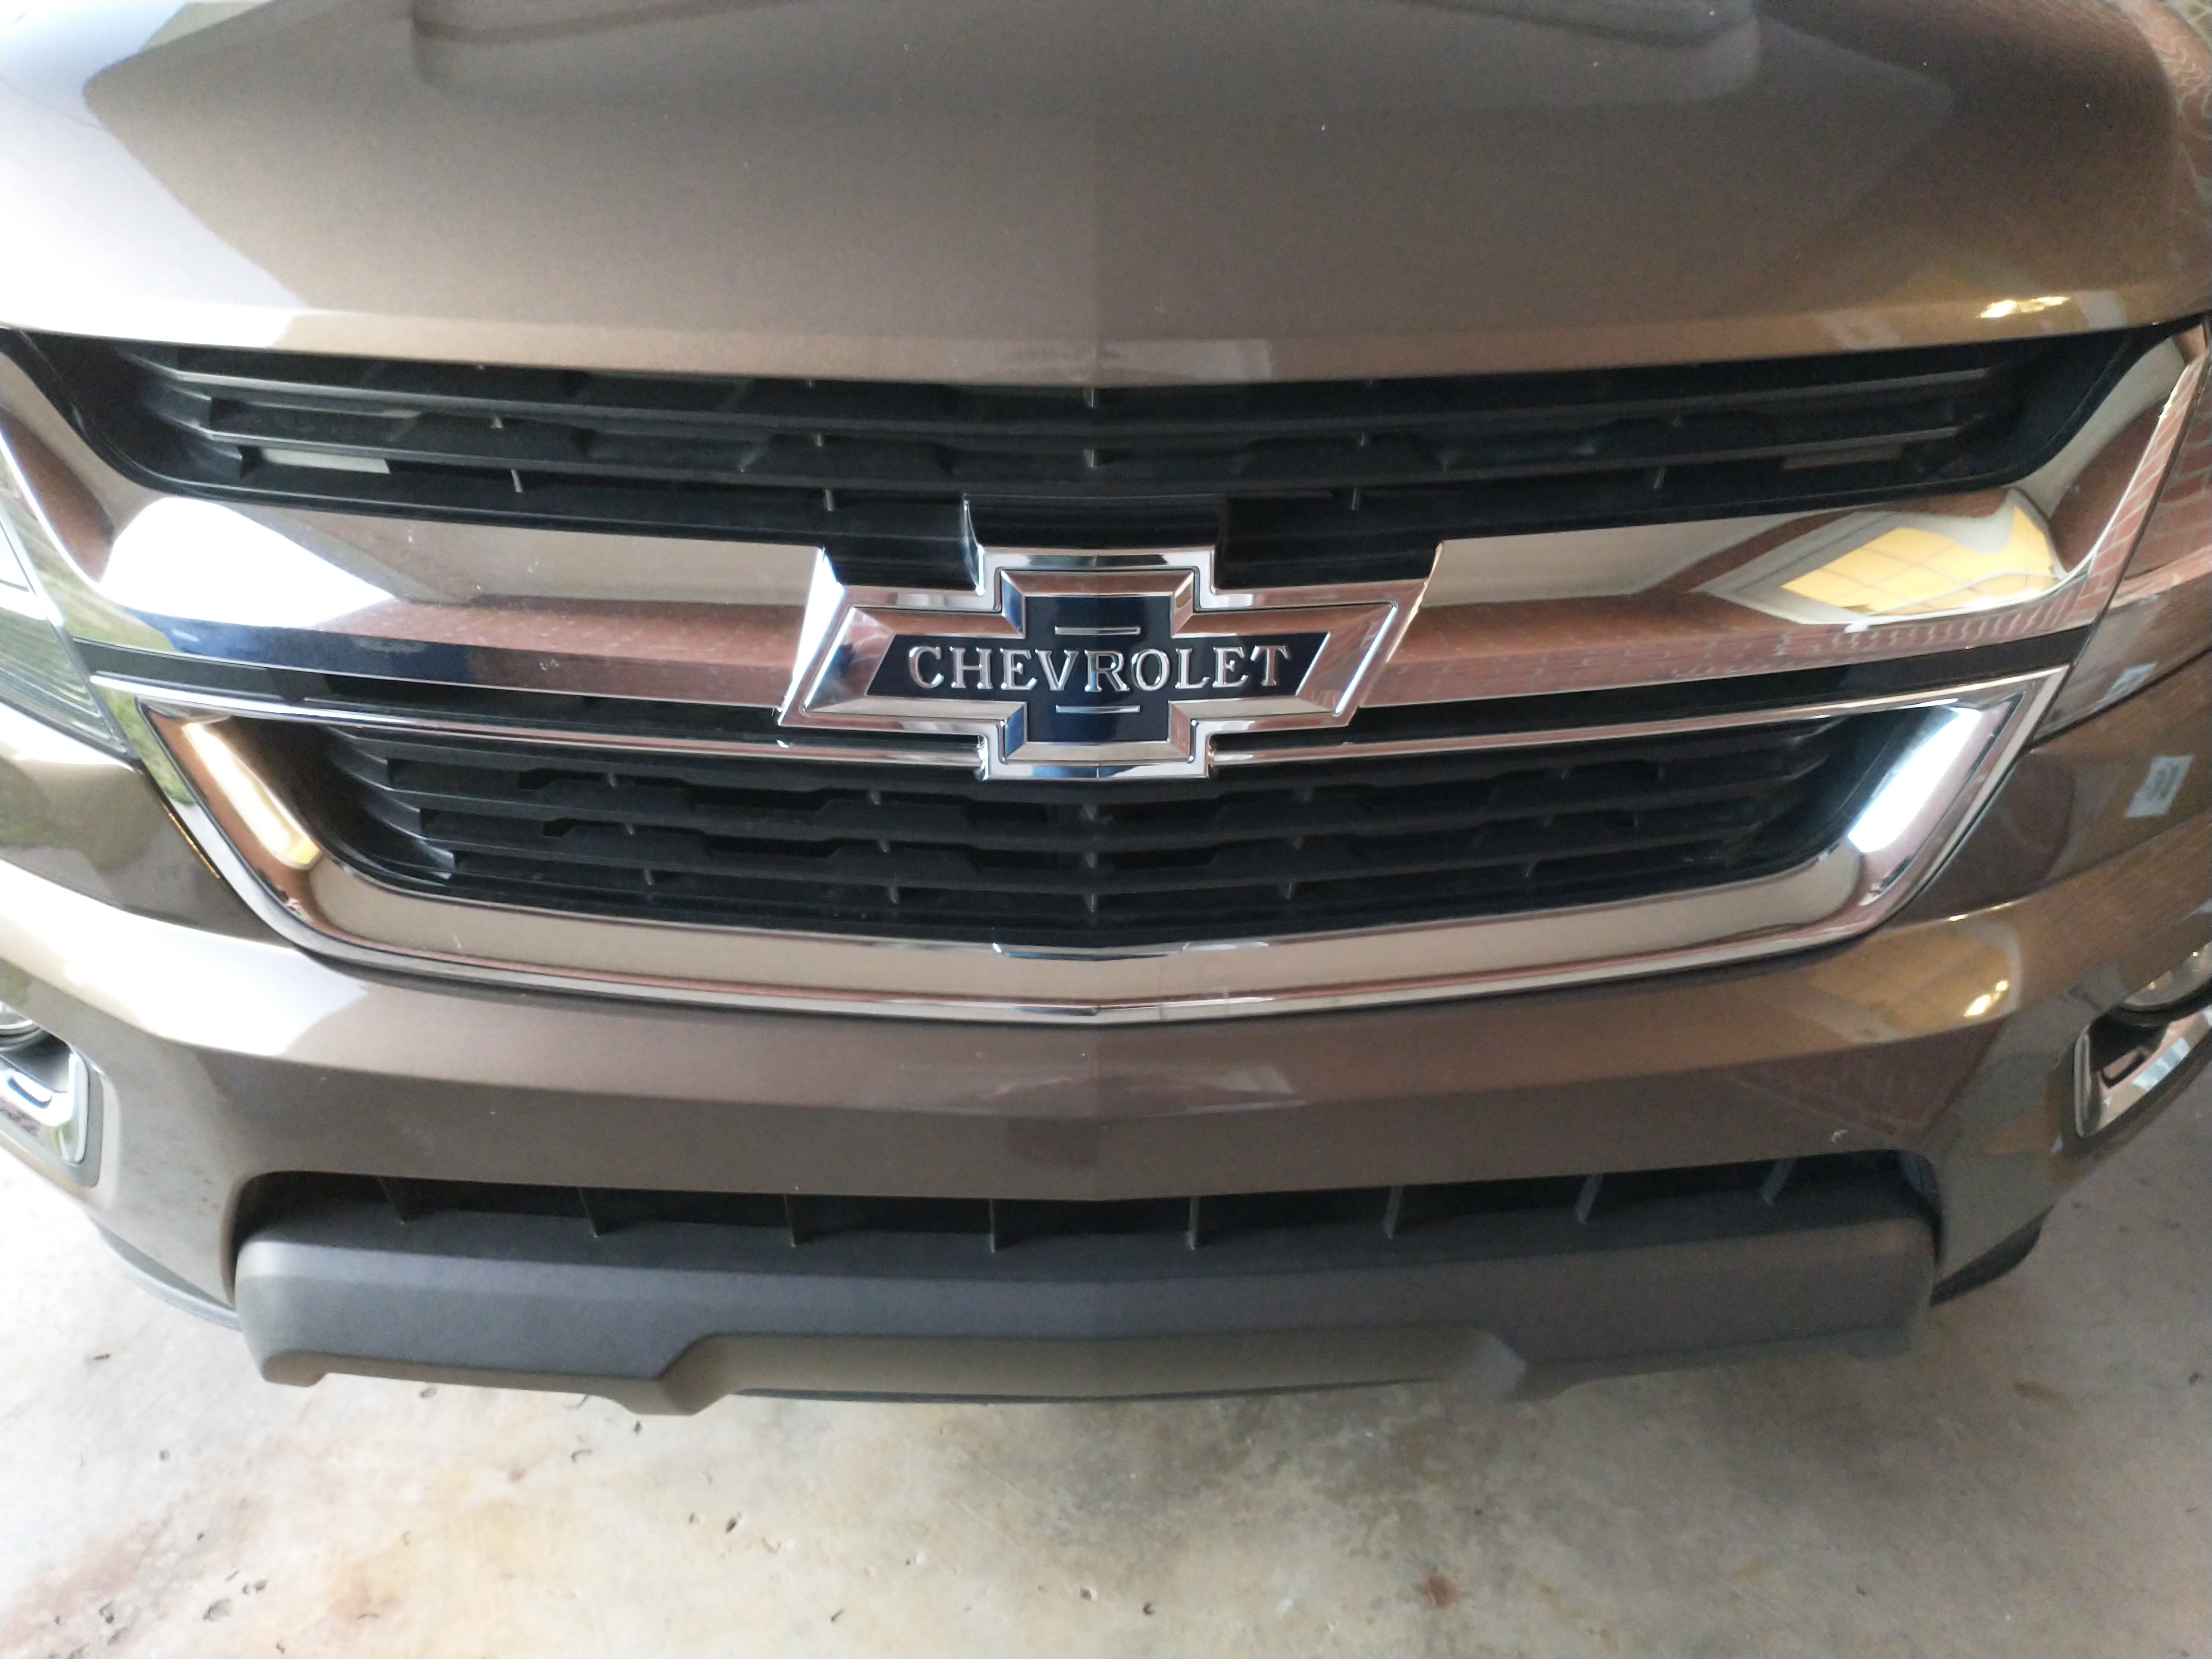
Does it look better?
